-
Registration
Please register an account to access the Forum topics and features.
An Active Membership subscription gives you access to extra features and exclusive content!
Choosing Active Membership is a great way of supporting the community and showing your appreciation for our resources.
Please note that you need to register BEFORE you can use Facebook, Twitter or Google as a sign in method.
Files For 3D Printing
Files that can be used to for 3D printing physical versions, using your own printer or a service such as Shapeways etc.
Note that files for CNC and laser cutting can be found in their own sub-section, inside.
246 files
-
Free
Cdngoose 2008 Davros
By cdngoose
Included in this package of STL files are all the parts I have printed off for my 2008 Davro's panel. Also included are the measured blueprints for each piece. This way you can ensure the parts are exact or re-size them to fit your panels. Please look to Cdngoose 2008 Davro's build for information on how they were created and used. All of these files were created for me by Phillip McNulty, I owe him a Huge Thank You for not only making me these STL files from his CAD drawings but for allowing me to share them with all PDF members.
All files were printed in PLA filament as well as the rubber boots were also printed in flexible PLA
Hope these help others in their building process. Though they do not make exact reproductions of the TV show parts I believe they are more than close enough that when fans take pictures while standing beside Davro's they will be very pleased!
Cdngoose
1,285 downloads
(2 reviews)0 comments
Updated
-
Free
Full True Dalek Paradigm Kit
By erichdalek
To begin: that is a lot of files.
This is in 1/10 scale, so scale up as you want.
This was built on tinkercad.com, the file can be found here.
There is the main file, 'Full Dalek' if you want it in one color, and have support material.
The rest is all the individual parts, broken up so that they can be printed in their different colors, without support material or as groups of the same color.
There are two zipped folders, one "all parts"-- everything individually, and "Everything Sorted By Color" which is the groups of the same color in about a 20x10 cm box.
The last file is one that I am using as a hot glue mold to make the domelights.
If there are any questions or requests or whatever, feel free to contact me.
Disclaimer:
I am not amazing at modeling, nor is Tinkercad the best program ever for this kind of thing (as user KiwiMrDee stated, it is "designed for kids so detail and rendering options are limited") and so this is not exactly perfect (especially my angles in the full dalek, so print the pieces and assemble it yourself!) and I won't take offense at greater creators then me offering criticisms (hot glue mold, really?).
993 downloads
(0 reviews)0 comments
Submitted
-
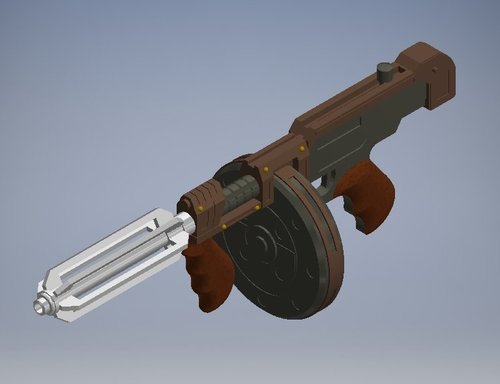
Free
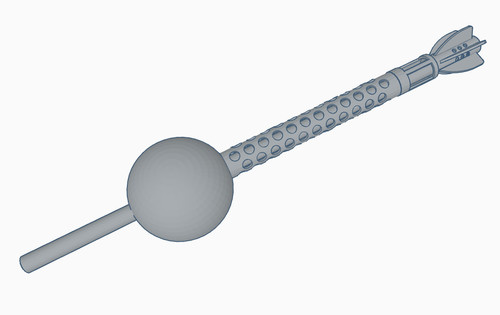
Dalek Thompson Submachine Gun
By Peekaymac
I drew these up so that my spotter could easily be in costume as a recognizable character that wasn't restrictive or limited movement. Basically they just need to wear 1930's style clothing and carry the Thompson and it's done. Oddly I didn't 3D print my own version - it was made by hand but I subsequently made these files for others to use.
You'll need:
6x Barrel Tines
2x Magazine Side 1
I have each of the magazine faces mirrored on my model but I can't remember why now.
1x each of everything else
I allowed 1.75mm pin holes for joining all the parts together.
Any questions please ask.
983 downloads
-
Free
NSD: Light Cage
By Ultrastar
NSD: Light Cage
By: Ultrastar
Intended for Dalek builders out there with the ability to 3D print models. This is a 3D model of the NSD Light Cage. This model was created with the purpose of 3D-Printing. However, with this being a 1:1 scale and 100% accurate model it can also be used as a reference for your own builds. Feel free to ask questions about this model as you see fit.
774 downloads
-
Free
Full Size Movie Dalek Fender (1st or 2nd Films)
By Chris Moliere
FINALLY! This thing took an eternity to split into smaller parts, but it's complete! This can be used for both movies: If you are making a 1st movie Dalek, print all 60 parts, but if you're making a 2nd movie Dalek, print ONLY parts 1-35, and use rubber sheeting for the rest of the fender. This thing will probably take several months or more to print, but it will be worth it! Have fun!
768 downloads
(0 reviews)0 comments
Updated
-
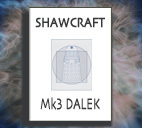
Free
Shawcraft mk1 Kit
By Sparky_Butane
This is a complete 3D printable kit of a mk1. All of the pieces are separated and allowances are included. All of the pieces should assemble with little or no sanding. Some pieces were simplified so that it was actually printable. I haven't printed it yet so contact me with comments, questions, or concerns.
Enjoy!
mk1.zip
712 downloads
-
Free
Mk 1-2-3 EyeBall
By Luke S
Come With multiple Different iris/lids! You Can Mix and Match!
You Can Modify them If You Like.
Includes:
Mk1 Eyelid
Coming Soon!
POWTD eye front and Iris MK3 Shorten Toffee lid MK2 Barnardo Eyeballs Mk3 Evil of Daleks Pupil Iris. Mk2 EyeLids(Different Hole Diameters) Mk1-2-3 Eye Back Mk1-2 Eye Front Mk2 Toffee Apple Front & EyeLid
585 downloads
-
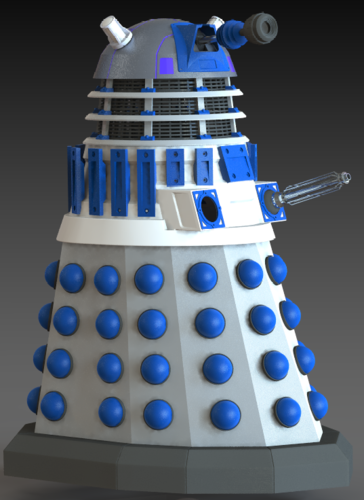
Free
Full Size 3D Printable NSD-like Dalek
By elembivos
Hello all, I hope some of you find this useful, and no one finds it frustrating...
These are the STL files I designed and used to print Duma. You can read all the details here:
I used this project to gain experience both with CAD and 3D printing. Both of which I had no experience with before starting. I started at the top and worked my way down, and you can see how my skills developed a bit as progress was made. There are places where things don't quite match the plans, most notably the NSD dome grooves are missing. I didn't have the skills at the time I did the dome to make that happen. One other thing to note, that you might not notice is the eye stalk is slightly shorter than the plans. This was done intentionally to fit a lamp rod down the center to reinforce it. Straight up 3D printed stalk was not strong enough by itself. Likewise the gun and plunger have lamp rods through them too, but I used long enough rods that they could be trimmed to fit. I took artistic license here and there, for the most part it follows the plans.
If you are thinking of attempting this project you need to know a few things. First, again, I had little to no CAD or 3D printing experience before starting this project. There are probably better models in the downloads section for various parts, but I drew them up myself anyway in an effort to gain experience. So this is the WHOLE thing, designed to fit together. If you substitute someone else's dome, or eye, or whatever, don't expect it to fit without some additional work on your part. Even if you stick strictly to these STL files, not everything is perfect. Read through Duma's diary 5 or 6 times to see where I struggled, and needed to make modifications post print, to make it all work. I think the only file in the bundle that isn't what I used is the Cowl, and there all I did was remove the name from the ID indent, because you probably don't want your Dalek to be named Duma. That said, this project took over 2 years, spanning 2 computers. I did my best to assemble the STL files into one place before uploading them, but be prepared for me to have made a mistake and included one or two files that don't work, or there may be something missing. If someone comes across this, I should be reachable through the forum to figure it out. Second, for the neck and dome you'll need a variety of M3 nuts and bolts. There are many, and I don't recall all the sizes, so have a variety on hand. The skirt and base are held together with a variety of M5 nuts and bolts. Currently the neck is glued and screwed, everything else is just screwed. Eventually it will be glued, but for the moment it seems to hold together pretty well with just nuts and bolts. In the beginning I was printing the parts with threads in the part. Which works ok, but isn't super robust. Eventually I learned how to embed nuts in the parts, so the lower parts don't have that. Third, the dome was designed with animatronics in mind. So there are motor mounts for the eye, and rotation. The motors are described in the build diary, but if you can't get hold of the same part, you will likely need to make some significant modifications. I haven't included anything for motorization in the shoulder or base, so it is currently a static prop. Eventually I'll work out those details. If you get to it before me I'd be happy to bundle your efforts in here. Lastly, I had no CAD or 3D printing experience when I started, so don't judge me 😉.
P.S. Someday I plan to update the files to include "what I would do if I had it to do over again." But don't hold your breath.
564 downloads
-
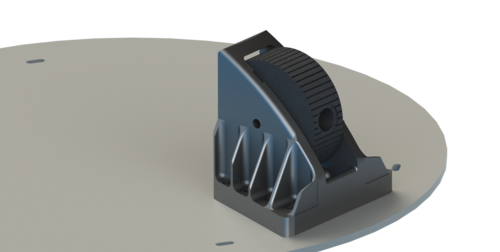
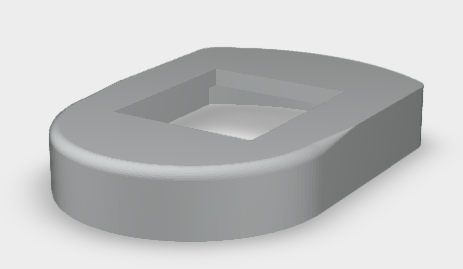
Free
NSD eye pivot holder
By cjorgensenmd
Designed to hold my 3d printed NSD eye pivot and support the interior dome. The base is as thick as it is because I needed the extra height to get the eyestalk where it needed to be from my rotating base. The little horizontal rod on the lower side of this piece is itended to be used to attach a spring to counterbalance the weight of the whole eye.
542 downloads
-
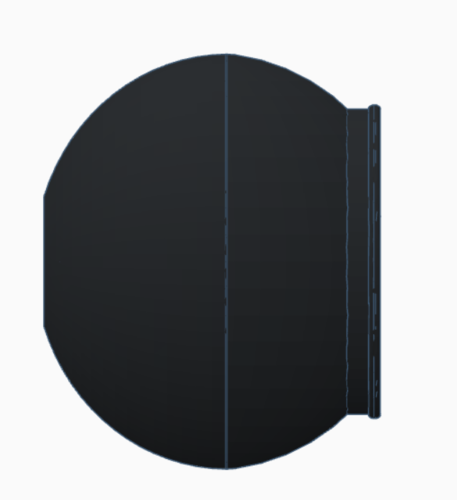
Free
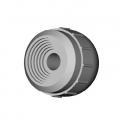
NSD: Eye
By Ultrastar
NSD: Eye
By: Ultrastar
Intended for Dalek builders out there with the ability to 3D print models. This is a 3D model of the NSD eye. This model was created with the purpose of 3D-Printing. However, with this being a 1:1 scale and 100% accurate model it can also be used as a reference for your own builds. Feel free to ask questions about this model as you see fit.
533 downloads
(0 reviews)0 comments
Submitted
-
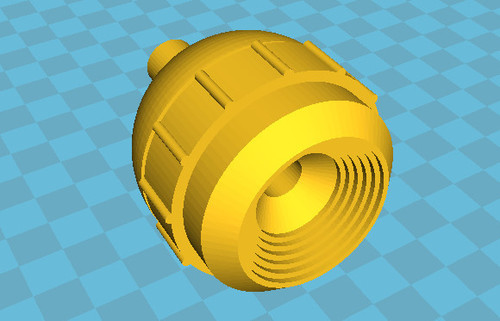
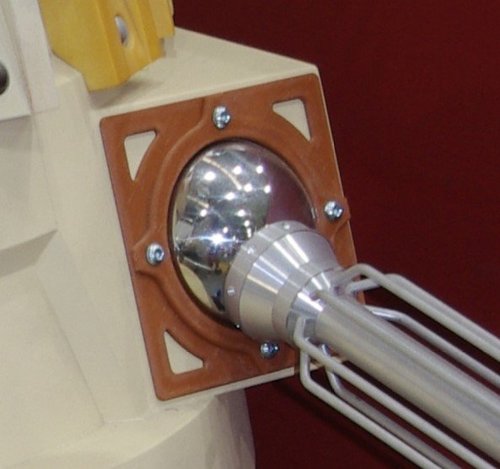
Free
NSD Moflash Cage For 3D Printing
By Ferrain
Second published attempt at anything like this, for 3D printing so please be gentle.
NOTE The screenshots show some pieces that have been printed unsanded & untrimmed & they also show cages V1.99 & V2 (The only part that is constant in both is the top ring), from the test fitting a roll back to V1.99 for the supports & base may be required for a deeper recess of 3mm.
The Top ring takes about 30 - 40 minutes on a Replicator 2 at Highest Quality settings.
A support piece takes about 32 minutes on a Replicator 2 at Highest Quality settings, these could be multiplied up to the required 8 for the output file.
The base will take about 3 hours on a Replicator 2 at Highest Quality settings.
It is suggested that a hot pin be pressed through the build material using pliers & suitable heat source for each support at the top & bottom rings after gluing for additional strength.
Despite various efforts a one piece print has not gone smoothly so still a kit of 6 parts not including Moflash lens, if a one piece is successfully produced, the file will be added as a compliment.
Constructive feedback welcome.
518 downloads
-
Free
Death to Daleks Projectile Gun
By erichdalek
Designed off of user Ramjet's plans-- Complete version without allowance, each other part with allowance for main gun part fit.
492 downloads
-
Free
3d Printable Shawcraft Skirt
By Chris Moliere
I scaled this model for my Prusa Mini, in order to print all the parts for it. I designed this to use for making a fiberglass mold, but with some modification, it might be able to be actually be used on a prop. However, if you decide to do so, you would most likely need to print the parts with 100% infill for push-through hemis. Enjoy!
492 downloads
(0 reviews)0 comments
Submitted
-

Free
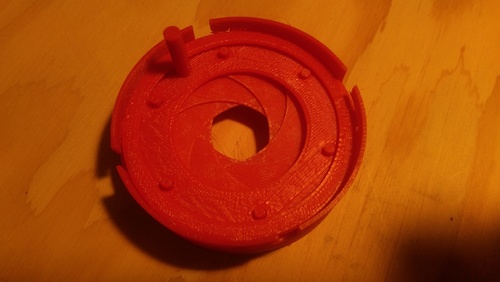
Servo Iris Assembly
By trickster
UPDATE: I noticed lots of people are downloading the model files one at a time. It's much easier to download the complete package and avoid the download limits. Here's the zip: ServoIris.zip
UPDATE: There are pictures illustrating the assembly process in my build diary. Note that there are two iris versions in the diary. This is the second one.
This is a complete set of 3d objects to create a micro servo driven iris insert. It is designed to fit into this eye with a little bit of sanding and work with this servo and this LED disk. All parts have the proper clearances based on my printer using .2mm layers. Some of these are pretty close to the wire and you might have to fiddle a bit. I printed everything but the LensPlate using white ABS and painted various surfaces black. The LensPlate is translucent blue ABS with an acetone vapor bath. The leafs and SlotRing were lightly sanded smooth.
Objects included (bottom up):
Casing SlotRing peg (6 required) leaf (6 required, note the stl file is flagged as broken and can't be repaired, but it prints ok. Don't use a raft.) LensPlate (print using translucent filament) [LED disk] LockRing (orients with tabs at the top) DualSlotLEDPlate (LED disk attaches to this) ServoArm (servo horn fits inside) [servo horn] ServoArmCover ServoMountRing ServoStandoff (2 required) ServoMount [servo] ServoMountCap
Check out my build diary for pictures illustrating assembly described below. Note that there are two iris versions in the diary. This is the second one.
Assemble the Bottom Iris Section
Assemble the slot ring into the casing. Spray the front and inner lip flat black.
You will need to print 6 each of the leafs and pegs. Then assemble each peg and leaf so that the peg sticks out the opposite side from the post on the leaf. Give them a light sanding to get them smooth. Now paint them flat black and sand smooth again. Leaf assemblies orient with the offset post (the one printed as part of the leaf) down. You have to get all 6 properly nested.
The LensPlate is printed with blue translucent filament and acetone vapor bath smoothed out. Orienting this piece is the tricky part. You will probably have to spin it a few times to figure out which way works. LockRing goes on top of the LensPlate and fits the slots of the casing. You have to clear out the tiny support thingies on the casing btw. Orient the LockRing with the tabs on top.
The LED disk has 4 holes punched in it. Find the pair that fits the DualSlotLEDPlate and press it on with the wires through the hole. Then add the plate to the stack with the LED facing down. The posts on the LensPlate should be at one end of the slots and should move within the slots to open and close the iris. If this is not the case, try disassembling and rotating the LensPlate one step around the leafs until you find the way that works.
At this point you should be able to operate the iris by hand. This is a good time to sand the outside of the casing and inside of the eye front until they fit together properly.
Assemble the Top Servo Section
I used the micro servo with feedback from Adafruit. Eventually I plan to use the feedback wire to know the servo's current position. I believe the non-feedback micro server is slightly different and probably won't fit this mount. You could use a different servo but would have to adapt the ServoMount and ServoMountCap. Trap the servo between the ServoMount and ServoMountCap so that the servo shaft is in the center of the mount. The pieces should fit together snugly.
The servo comes with several horns. Find the one that matches the hollow in the ServoArm. Trap the horn between the ServoArm and ServoArmCap and snap the pieces together. It only fits one way.
Rotate the servo shaft by hand to determine the limits and set it to the center of its range. Attach the arm assembly to the shaft so it is at a right angle to the servo mount and secure it with the screw.
Assemble the servo assembly, two ServoStandoffs, and the ServoMount Ring. If the standoff pegs are too tight, lightly ream out the holes.
Final Assembly
Operate the iris by hand so it is at the halfway point. Attach the servo assembly to the iris. Everything should be properly oriented and the servo assembly should fit snugly on the casing. Make sure all the tabs are lined up. Try operating the servo arm by hand and verify the iris opens and closes. It will not close 100% and will probably not reach the limit on the slots.
Now you have to connect it all up. I used an RJ45 socket and ethernet cable connected to a Raspberry Pi with Adafruit servo/PWM and PifaceRelayPlus HATs. Here's the software. You will have to experiment with the servo to determine what relay and PWM values to use.
Here's the zipped objects: ServoIris.zip
484 downloads
-
Free
NSD Hollow Eyestalk Disks
By trickster
These models are best used for making hollow eyestalk disks with translucent filament. You can also use opaque filament but you'll lose the effect. Here is how a solid eyestalk disk looks when printed at 10% fill with translucent filament:
Looks pretty cool as an actual iris but it doesn't let much light thru. So I decided to try making each disk as two separate pieces that fit together with a hollow center. Here's how that looks:
I also did a acetone vapor bath which made them look like this:
If you're doing an acetone vapor bath you must treat the pieces before assembling or acetone will condense in the hollow center and they will end up looking like this:
Here is a build diary entry describing how to do an acetone vapor bath. Here are two finished pairs viewed from each side:
Each piece is oriented with what will become the outer surface facing up. This keeps all the support structure noise on the interior. You need to use full support, btw. And make sure your build plate is evenly heated.
I've included two sets of files. One set has standard 22mm holes in the center. The other set is the one I used for my Dalek. I used a 5/8" center tube so they have 19.5mm holes. Each set has pairs of inner and outer disks for each of the three sizes. There's a ridge on the interior side of the inner disk which fits the lip on the outer disk. Dab of glue (test first!) and you're good to go!
Oh yeah, and I can't swear that they are exactly the same as the original parts. I looked at the part descriptions and thought they were most likely spherical caps. So I did some math and made them spherical caps based on the dimensions of the original parts. If anyone has a genuine article they can compare against I'd appreciate any feedback how close they are and any adjustments that would make them better.
Here's the complete package: NSDHollowEyestalkDisks.zip
465 downloads
(0 reviews)0 comments
Updated
-

Free
NSD Eyeball
By Slythenperior
This is my version of the 3d printable 2005 Dalek eyeball. The thing that makes this different is the screw function allowing the front of the eye and the back to screw together. This is in case something goes wrong with the wiring and the light stops working. Just thought it would make things easier for everyone. Enjoy
458 downloads
-
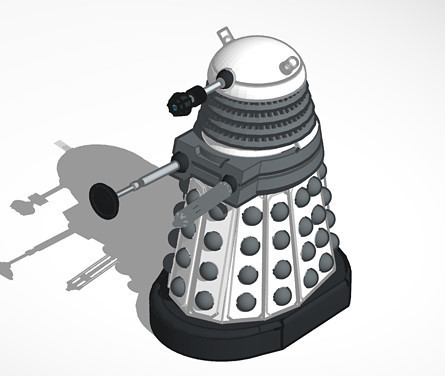
Free
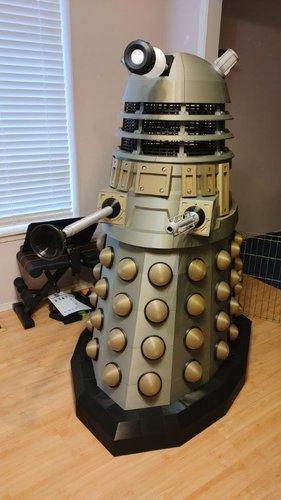
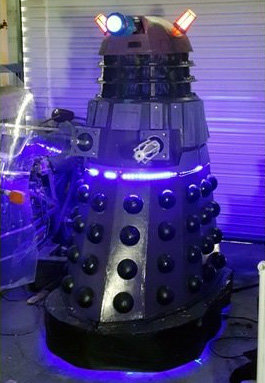
NSD 3D Print Components
By tlmxcpmpp
File contains various New Series Dalek components for 3D printing, including...
Claw Cowl Dome Dome Turntable Eye Gun components. Hemisphere Neck Rings Slats
Photo shows Dalek built using these components (along with traditional build methods).
439 downloads
-
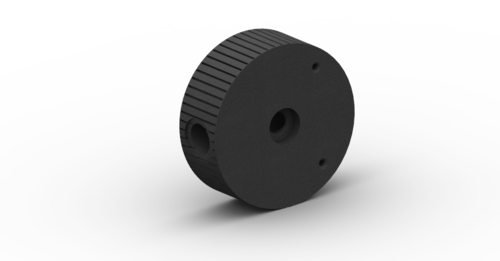
Free
NSD Iris
By trickster
This is a working iris insert. It fits this eyeball by Slythenperior very snugly after both parts are lightly sanded smooth. This is in initial version. I'm going to add parts for attaching an led and stepper motor but I don't have either of those yet and thought the iris alone might be useful.
There are six object files:
Casing - everything fits inside the casing and it fits into the front of the eyeball SlotRing - fits inside the Casing on two keys Leaf - you will need six of these Peg - you will need six of these, one for each leaf HoleRing - this has a handle for attaching a stepper motor LockRing - keeps it all together
Note that the casing has some slots with overhangs. Automatically generated supports did not work so I added some tiny blocks instead. Once it's printed just clean them out. Don't use supports or raft.
One end of each leaf has a pin which is offset from the center. The other end has a hole through it and an indent on the same side as the pin. Press a peg through the hole so that there's a pin on each side of the leaf and the base of the peg fits into the indent. The peg should lock into place. I had to print a few extra leafs because some of them were too loose a fit. You can use glue if the pegs don't fit tight enough. Make six leaf/peg assemblies and lightly sand them smooth.
Insert the slot ring into the casing lining up the notches with the keys:
Lay the leafs in one at a time. The offset pin (the one printed as part of the leaf) goes in one of the slots. Place each leaf on top of the previous ones. The first 4 are easy. The last two, you have to slide them under the first leafs.
Once you have all six leafs seated in the slot ring, place the hole ring on top. Wiggle it around until all six pins are set. Then add the lock ring, pressing it down and turning it.
Here's how it looks when done:
Here is a zip file of all the parts (version 1.1): NSDIris1.1.zip
430 downloads
-
Free
NSD eye pivot
By cjorgensenmd
For use with 3/4" OD rod for the eyestalk and standard skateboard bearings to be inserted on the sides. The two holes on the rear are for attaching control wires to go to a windshield wiper motor for RC control of up/down movement. Optionally combine with my 3D printed eye pivot holder.
370 downloads
(1 review)0 comments
Submitted
-

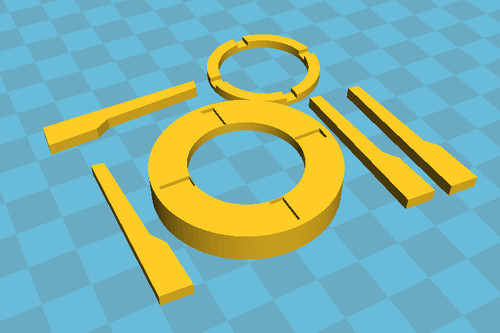
Free
Exploded NSD dome for 3D printing
By cjorgensenmd
This in my NSD dome sliced into manageable files for 3D printing. Each section is still fairly large. you will need at least 200mm x 200mm print area, but once everything is printed, they can be attached to a lasercut base and then glued together for a very accurate NSD dome which will require very little finishing before a fiberglass mold is made. I have included both the raw solidworks files as well as the STLs in case anyone would like to make edits. I will edit this post once I have all 16 sections printed. I have two so far and they each took about 14 hours to finish, so this is a patient process.
368 downloads
-
Free
Full Scale Shawcraft Dalek Dome
By Chris Moliere
My class just gave us Fusion 360 accounts, so I whipped this up in my spare time. This is based on the most recent Shawcraft Dalek plans, as of upload. Since my printer doesn't have the proper build volume to accommodate the entire dome, it has been split into sixths. Enjoy!
359 downloads
-

Free
Classic eyeball and pivot
By Huxster2000
The 3D models I used to print the eyestalk for my Power of the Daleks build. The parts here are designed to accept an inner tube 25mm in diameter and outer tube sections 32mm in diameter. The hole through the side of the eye pivot is sized for an m8 threaded bar.
351 downloads
-
Free
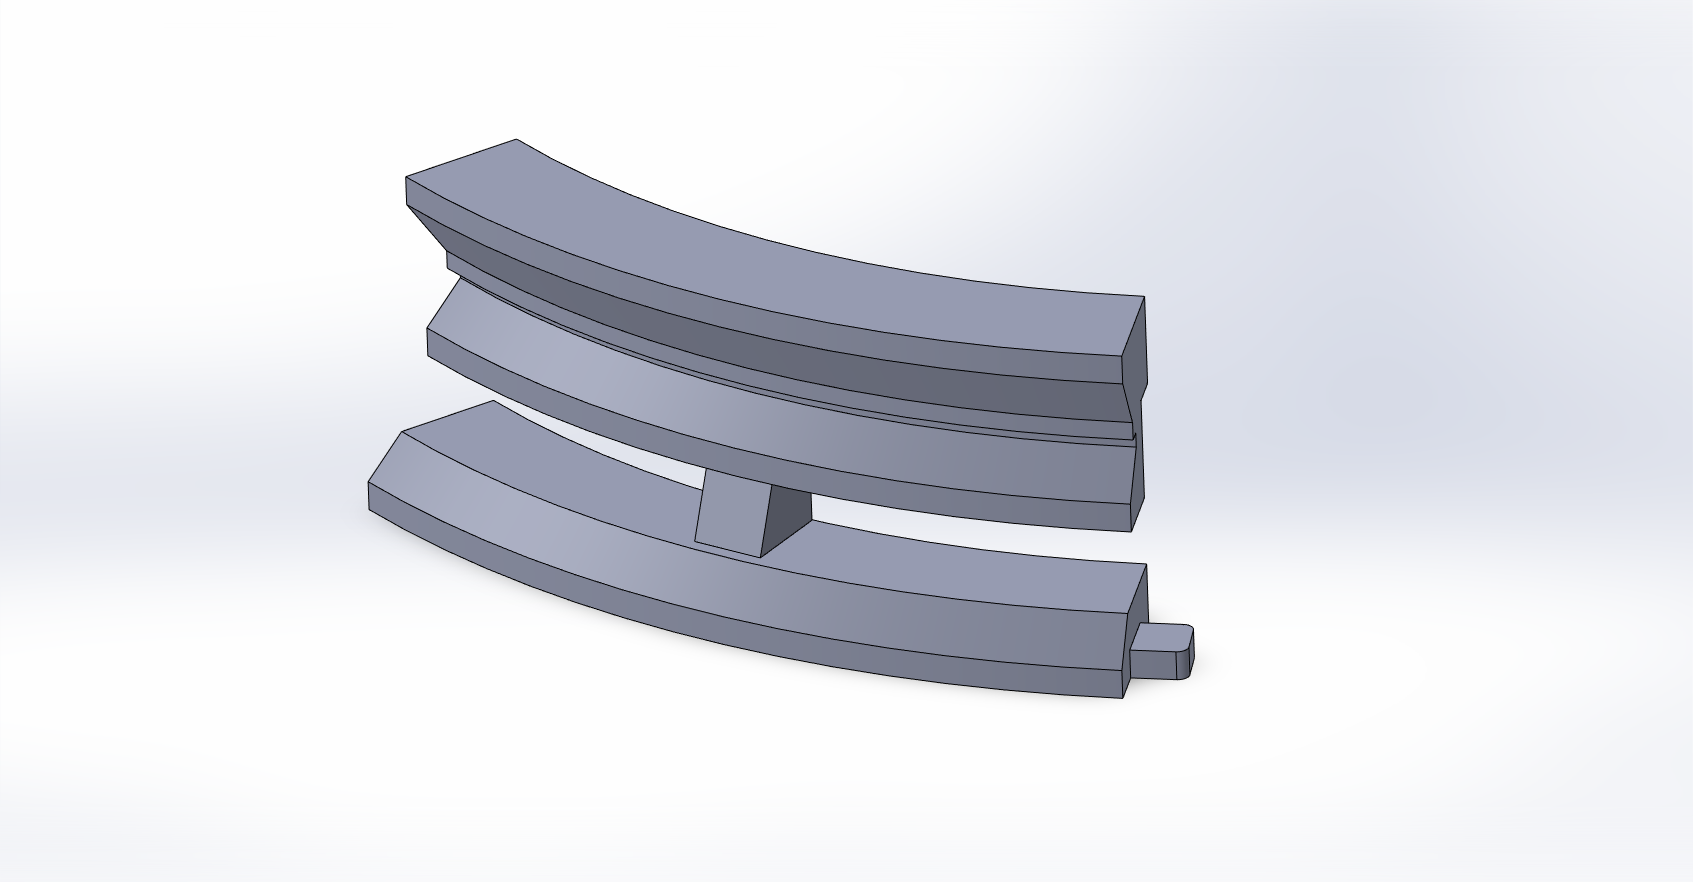
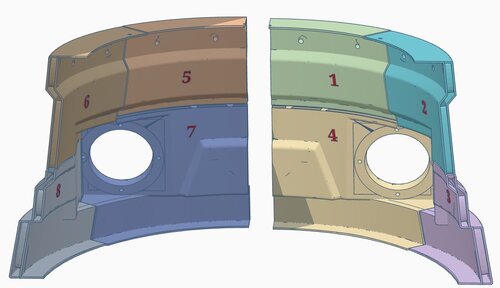
NSD double walled shoulders in 16 easy parts for 300 x 300 x 400 printers
By Prefect1938
Hello,
Please find the STL files for my 2005 Dalek’s shoulders. I took the original model shell from daviddz and put it into Tinkercad. There I added a further double skin with connecting internal blocks so that it would be rigid without any need to skin inside with GRP or further reinforcement etc. Once assembled the structure is very strong with no flex at all and is still quite light. This is great way to avoid building the complex curves in wood and will last a very long time. As the original sections were very large, I also split them up so that they would easily fit on my CR10’s 300 x 300 x 400mm bed. Some further simple cuts on some of the taller sections would get them to fit on smaller machines such as an Ender.
All the 16 sections have been pre-orientated for printing and only two sections need any form of support, which saves a huge amount of material and build time. The two parts that do need support, only need a small amount of tree support on one side which just snaps off with no difficulty. Even if this is your first print you will find this a very easy project, although you will need to be patient as it’s a lot of printing. If you are confident in your printer, then some parts can be grouped on the same build plate, but it doesn't really save a huge amount of time to do so and risks losing two parts if something goes wrong. You will need about 8kgs of filament, and it is best buying this in 5kg spools which I hang of the wall. I just google for the cheapest stuff I can find.
I have printed all the parts which have come out perfectly. To join the sections together I welded them with a 30 watt soldering iron rather than glue as it is much stronger. I have carefully split the sections so that joints would be easy to sand, I never bothered sanding the inside as it just looks like metal welding. For bed adhesion I have only been using thinned down white glue, about 5- 10% with water, this works great and have never had a failure. When working through so many parts I would recommend, just going from 1 – 16 printing one at a time. I have numbered the inside surface of the sections to avoid mix ups and added some matching assembly screenshots. I added two wooden rings to the inside of the top and bottom lips which were added before the front and back sections were welded together. I used Tiger seal adhesive between the plastic and wood which is extremely strong. Although the printing of these is really easy, it is a large undertaking so I would suggest you thoroughly study the files and confirm they will all fit on your machine, parts 14 & 12 being the tallest.
Enjoy!
I used the standard setting on Cura with the following overrides –
All parts except 4 & 7
Wall count = 4
Infill = 20%
Support type = none
Adhesion type = Brim
Brim with = 20mm
Parts 4 & 7
Wall count = 4
Infill = 20%
Support type = none
Adhesion type = Brim
Brim with = 20mm
Support type = tree
Support = touching build plate
Support angle = 70degs
I've tried to be as careful as possible but if I have goofed up somewhere let me know asap!
351 downloads
(1 review)0 comments
Updated
-
Free
NSD Eye STL Files
By henryjolly
Eye2 is hollow without a stem and Eye4 is hollow with a stem. Perfect for printing then adding an LED.
346 downloads
-
Free
Solidworks NSD
By cjorgensenmd
I have uploaded my NSD modeled entirely in Solidworks. This should help others quite a bit if they need any parts 3d printed. Also includes fully functional RC Dome assembly, so no more guesswork. Solidworks is CAD software, so all dimensions are included.
346 downloads
(1 review)0 comments
Updated
-
Top Downloads
Week
-
Free
-
Free
-

Free
-
Free
-
Free
Month
-
Free
-
Free
-
Free
-
Free
-

Free
Year
-
Free
-
Free
-
Free
-
Free
-

Free
All Time
-
Free
-
Free
-
Free
-

Free
-

Free
-
-
Recent File Reviews
-

Mark Sheriff 6
Excellent , looks great and very well designed , well thought out . thank you
-
Marc Harris 42
I'm in my 50s and have since I was a boy watching Dr Who in the 70s always dreamed of making a Dalek for fun, now I have the time and resources, along with your forum's help it's time to live that dream.
I have watched some of the members videos, and I am very impressed with what I have seen.
Long live the Who verse.
I will document my progress and share any innovations I make
-
Chris R 25
Great set of models that printed and fitted together really easily. Can't comment on accuracy as I'm no expert but very happy with the result
-
Dalek Hal 312
Great file, easy to print
-
doctorone 3
Great plan but the pivot does not print as it is not complete like the eye stalk
-

71Davros 2
These plans seem to be very concise and detailed. Hopefully, there shouldn't be any problems making the Dalek now.........
-


-
Download Statistics
-
Recent File Comments
-
By life size · Posted
I printed mine in PTEG, 235 nozzle, 60 Bed , no supports and it printed with no mess at all. I ran it at a 40 percent print speed, and the orientation was large cup facing down on my print. -

By John · Posted
See this FAQ topic for more on Downloads availability: -
By ChristmasDalek · Posted
Welcome to the forum! Sorry you have encountered a problem... While waiting for someone who knows more about the downloads section than I do to answer, you may find the explanation in @Johns answer to this thread: Be well, Kathy -
By tardis112 · Posted
Why am I not permitted to download this? -

By Mark Casto · Posted
This is such a useful file for the eye it is perfect for adding a fish tank led inside and looks great thank you. -
By DarthCranium · Posted
ok @Bodule. i apologize if i caused any issue. -
By Bodule · Posted
Hi @DarthCranium Can I suggest that you ask your question in the 3D Printer Discussions section of the forum please? https://www.projectdalek.com/index.php?/forum/209-3d-printer-discussions/ That section itself may be worth a read through, as is @ChristmasDalek's post above yours 👆 here as it may provide additional useful information on how to use the forum. -
By DarthCranium · Posted
What is a good size of 3D printer youd recommend if i wanted to make a dalek of my own? please let me know when able. Thanks -
By Dalek-Nik · Posted
Moflash lenses appear to be slightly difficult these days. the best bet in my opinion is 3D printing them. there are many accurate models here that can be printed on any FDM printer you can find. there is a chance that you can find the lenses online to buy, but those sites can be slightly sketchy. depending on the filament you buy and the printer you have/find, they can be produced fairly accurately. filament can come as cheap as 17 dollars, but do keep in mind that they can some -
By Chris R · Posted
Thanks for uploading these files. Printed really nicely with the odds and sods of filament I had around and very pleased with it, haven't done any tidying up or painting but it looks great as-is.
-
-
Highest Rated Submitters
No ratings this week.
No ratings this month.
-
1
-
2

-
3
-
4
-
5

-
1
-
2

-
3
-
4

-
5
-
-
Current Donation Goals
-
Finance the Forum Hosting 2024Raised £100
-
-
Top Templates
-
Free
-

Free
-

Free
-

Free
-
Free
-