Jump to content

Exploded NSD dome for 3D printing 1.0.0

   (0 reviews)

3 Screenshots

About This File

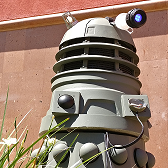
This in my NSD dome sliced into manageable files for 3D printing. Each section is still fairly large. you will need at least 200mm x 200mm print area, but once everything is printed, they can be attached to a lasercut base and then glued together for a very accurate NSD dome which will require very little finishing before a fiberglass mold is made. I have included both the raw solidworks files as well as the STLs in case anyone would like to make edits. I will edit this post once I have all 16 sections printed. I have two so far and they each took about 14 hours to finish, so this is a patient process.

  • Like 1

User Feedback

Recommended Comments

@cjorgensenmd   I printed these pieces but am having an extremely difficult time gluing them together. I have tried 5-minute epoxy, and cyanoacrylate glue, and even tried using gorilla duct tape to hold the pieces together to allow the glue to set, but the pieces fall apart each time (especially the "middle" ring). Any tips on how to do this? Clamps do not fit well over the curved areas.

Link to comment
Share on other sites

I haven't printed this yet but i have some experience in 3d printing, what glue are you using? i printed a Storm trooper helmet which was 14 pieces and i keyed joining edges before using cheapo superglue from Toolstation the gel one, i used small bull dog clips and used blue masking tape in some areas as extra support i did have to hold some pieces until the glue started curing you can get this spray to instantly activate superglue but i cant remember the name,sorry if this is no help at all, good luck.

Link to comment
Share on other sites

Anyone having the issues when trying to print these that the models are upside done when loaded into cura?

Link to comment
Share on other sites

yeah i had this i had to re arrange them on  the print bed but as they make a circle you need to make sure you have supports on as they do not sit flat on the bed,  i will be starting to print  these over the weekend and i will be using 15% infill on mine, 

  • Like 1
Link to comment
Share on other sites

cjorgensenmd

Posted

I ended up welding them all together with a soldering iron. In retrospect, I should have designed then with keys. In cura, you can flip the part orientation fairly easily until it prints in a normal manner

  • Like 2
Link to comment
Share on other sites

Chris Moliere

Posted

Very nice file. My life would be so much easier if there was a Shawcraft version of this!

Link to comment
Share on other sites

DalekDucky

Posted (edited)


Thank you so much for these files, I Printed these, 10% Fill, Using Stock Artillery X1

I reoriented the pieces for my printer. I have a 300 x 300 bed so it offered a bit more options to print. Did not need any support for any of them


All the base pieces,  8 of them printed nicely orientated how "flat" as per their final position. took an average of 11.5 hours for each piece

Middle Pieces, 7 of them were all printed flat, they were an average of 13.5 hours each. Printing them flat crates circles so I had to use filler to get rid of them

the Top piece took 15.5 hrs.


Total printing Time was just shy of 200 hours.


Assembly

Used a block sander to make all the parts flat and also give something to "bite" to. I used dolor store "super glue" and it worked really well

The base was really easy, used bull clips to keep them together,


The middle layer was a bit more interesting. I went in two pieces at a time based on the pattern (the lines ans extending "squares" and assembled them to the base matching the base lines.
That ended up creating a small gap in some cases to the adjacent piece and one "larger" one at the back but as this was a flat area, it can be filled out to be hidden 

83CA9F7D-F101-4B40-A34B-320253388DA2.thumb.jpeg.a850faece457bc2de3700085360e10da.jpeg

Top Piece went in very well


Used wood filler for all the lines and then sanded everything.

Here is the finished product :)


F5655D64-A191-44CD-91FB-BA46686DEBD6.thumb.jpeg.d8dd837fc1b812e9b2a8c1dd90867945.jpegCEAB4022-435C-4C26-9E78-BBD34E550958.jpeg


Thank you for a great file :)


Edited by DalekDucky
  • Like 3
Link to comment
Share on other sites

CannonFodder30

Posted

I working on printing this out now.  I have the bottom ring finished and a few of the middle sections printed as well.  I can't wait to fully assemble it.

  • Like 2
Link to comment
Share on other sites

Have people been printing this as a positive to make a fibreglass dome mold and then dome from, or using it as a printed dome, as is? I've printed a couple of R2 units, so thought a printed Dalek dome wouldn't be much different than the head of an R2. 

Link to comment
Share on other sites

Join the conversation

You can post now and register later. If you have an account, sign in now to post with your account.

Guest
Add a comment...

×   Pasted as rich text.   Restore formatting

  Only 75 emoji are allowed.

×   Your link has been automatically embedded.   Display as a link instead

×   Your previous content has been restored.   Clear editor

×   You cannot paste images directly. Upload or insert images from URL.

×
×
  • Create New...

Important Information

By viewing this site you accept our terms, conditions and privacy policies.