Jump to content

NSD Eyeball 1

   (3 reviews)

2 Screenshots

About This File

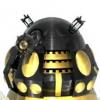
This is my version of the 3d printable 2005 Dalek eyeball. The thing that makes this different is the screw function allowing the front of the eye and the back to screw together. This is in case something goes wrong with the wiring and the light stops working. Just thought it would make things easier for everyone. Enjoy

  • Like 2

User Feedback

Recommended Comments

I don't have a 3d printer available to use either, but I figured I could buy it through cubify.com. Bad idea, its like $150. Eesh.

Link to comment
Share on other sites

CannonFodder30

Posted

Thankfully I had a guy at work who was willing to print it for me using his 3d printer. It came out great. I will add pics later tonight if I get some time.

Link to comment
Share on other sites

paulroughton81

Posted

im trying to send this file to a 3d printing firm but the file format isnt right.

I need anstl file but its saving as stl.txt on my desktop, anyone know how to rectify this?

Thanks in advance

Link to comment
Share on other sites

I downloaded this file about 3 weeks ago, printed it last weekend and it worked perfectly.

I am really impressed with the detail.

Link to comment
Share on other sites

Hey dalek builders! I have tried printing this file many many times in pla. Many many times it has failed. Usually with in the first hour. I am new to 3d printing and hoping my fellow builders may give me some insight to why I am failing at this.

Link to comment
Share on other sites

cdngoose

Posted

I love how this file has threads which allow the front of the eye to separate from the rear! This one is a gem! You cannot be disappointed with this file! I printed in PLA.

  • Like 2
Link to comment
Share on other sites

frenchdalek85

Posted

Thanks a lot for this eye. I will put some pictures of the result on the forum :)


  • Like 2
Link to comment
Share on other sites

I've had no trouble at all with the back part, but I'm having  a devil of a time with the front. (I too split them apart to print separately). Using a Flashforge Adventurer 3 with their own-branded PLA. I'm currently on the 3rd attempt at the front. The first attempt I printed 'face down' I got awful stringing inside the recess between the concentric rings. Even cutting it away left a very poor quality finish on the surface of the rings, so I'm not at all happy with that print. (although it did finish, and does fit into the back OK). I guessed it was probably because of the overhang on each ring.


I Inverted the part and printed it face-up (as per the original orientation in the dowloaded .stl file). This turned out an absolute mess... there is terrible stringing right from the start as can be seen in pic fail1. then the inner section isn't even formed as a single piece...When printing "the right way" up, I'm guessing I should be adding support for the outside overhang after the smaller threaded section? and also for rear of the smallest concentric ring - I only just now noticed that this surface isn't sitting on the bed... that's the only thing I can think of which may be the problem...  sound right? (I'm a n00b to 3d printing).


TIA


Paul G.


fail1.jpgfail2.jpg

Link to comment
Share on other sites

Mark Casto

Posted

This is such a useful file for the eye it is perfect for adding a fish tank led inside and looks great thank you.

  • Like 1
Link to comment
Share on other sites

Join the conversation

You can post now and register later. If you have an account, sign in now to post with your account.

Guest
Add a comment...

×   Pasted as rich text.   Restore formatting

  Only 75 emoji are allowed.

×   Your link has been automatically embedded.   Display as a link instead

×   Your previous content has been restored.   Clear editor

×   You cannot paste images directly. Upload or insert images from URL.

×
×
  • Create New...

Important Information

By viewing this site you accept our terms, conditions and privacy policies.