


About This File
This is a working iris insert. It fits this eyeball by Slythenperior very snugly after both parts are lightly sanded smooth. This is in initial version. I'm going to add parts for attaching an led and stepper motor but I don't have either of those yet and thought the iris alone might be useful.
There are six object files:
- Casing - everything fits inside the casing and it fits into the front of the eyeball
- SlotRing - fits inside the Casing on two keys
- Leaf - you will need six of these
- Peg - you will need six of these, one for each leaf
- HoleRing - this has a handle for attaching a stepper motor
- LockRing - keeps it all together

Note that the casing has some slots with overhangs. Automatically generated supports did not work so I added some tiny blocks instead. Once it's printed just clean them out. Don't use supports or raft.
One end of each leaf has a pin which is offset from the center. The other end has a hole through it and an indent on the same side as the pin. Press a peg through the hole so that there's a pin on each side of the leaf and the base of the peg fits into the indent. The peg should lock into place. I had to print a few extra leafs because some of them were too loose a fit. You can use glue if the pegs don't fit tight enough. Make six leaf/peg assemblies and lightly sand them smooth.

Insert the slot ring into the casing lining up the notches with the keys:

Lay the leafs in one at a time. The offset pin (the one printed as part of the leaf) goes in one of the slots. Place each leaf on top of the previous ones. The first 4 are easy. The last two, you have to slide them under the first leafs.


Once you have all six leafs seated in the slot ring, place the hole ring on top. Wiggle it around until all six pins are set. Then add the lock ring, pressing it down and turning it.


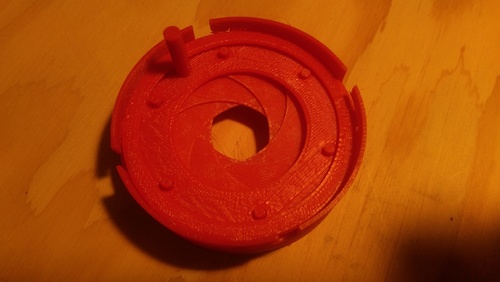
Here's how it looks when done:


Here is a zip file of all the parts (version 1.1): NSDIris1.1.zip
What's New in Version 1.1.0 See changelog
Released
I just realized I uploaded the wrong file for the casing. It will work but is a little too loose. Here is the proper casing. It is 20mm tall rather than 21mm. All the other parts are ok.