


About This File
Hello,
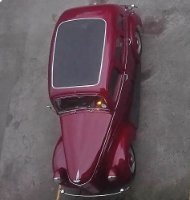
Please find the STL files for my 2005 Dalek’s shoulders. I took the original model shell from daviddz and put it into Tinkercad. There I added a further double skin with connecting internal blocks so that it would be rigid without any need to skin inside with GRP or further reinforcement etc. Once assembled the structure is very strong with no flex at all and is still quite light. This is great way to avoid building the complex curves in wood and will last a very long time. As the original sections were very large, I also split them up so that they would easily fit on my CR10’s 300 x 300 x 400mm bed. Some further simple cuts on some of the taller sections would get them to fit on smaller machines such as an Ender.
All the 16 sections have been pre-orientated for printing and only two sections need any form of support, which saves a huge amount of material and build time. The two parts that do need support, only need a small amount of tree support on one side which just snaps off with no difficulty. Even if this is your first print you will find this a very easy project, although you will need to be patient as it’s a lot of printing. If you are confident in your printer, then some parts can be grouped on the same build plate, but it doesn't really save a huge amount of time to do so and risks losing two parts if something goes wrong. You will need about 8kgs of filament, and it is best buying this in 5kg spools which I hang of the wall. I just google for the cheapest stuff I can find.
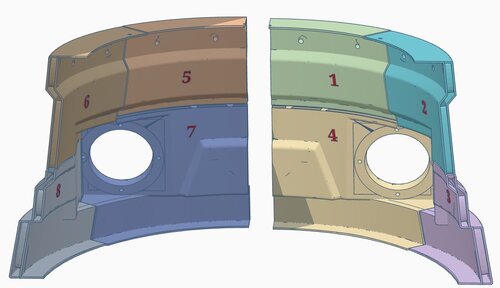
I have printed all the parts which have come out perfectly. To join the sections together I welded them with a 30 watt soldering iron rather than glue as it is much stronger. I have carefully split the sections so that joints would be easy to sand, I never bothered sanding the inside as it just looks like metal welding. For bed adhesion I have only been using thinned down white glue, about 5- 10% with water, this works great and have never had a failure. When working through so many parts I would recommend, just going from 1 – 16 printing one at a time. I have numbered the inside surface of the sections to avoid mix ups and added some matching assembly screenshots. I added two wooden rings to the inside of the top and bottom lips which were added before the front and back sections were welded together. I used Tiger seal adhesive between the plastic and wood which is extremely strong. Although the printing of these is really easy, it is a large undertaking so I would suggest you thoroughly study the files and confirm they will all fit on your machine, parts 14 & 12 being the tallest.
Enjoy!
I used the standard setting on Cura with the following overrides –
All parts except 4 & 7
Wall count = 4
Infill = 20%
Support type = none
Adhesion type = Brim
Brim with = 20mm
Parts 4 & 7
Wall count = 4
Infill = 20%
Support type = none
Adhesion type = Brim
Brim with = 20mm
Support type = tree
Support = touching build plate
Support angle = 70degs
I've tried to be as careful as possible but if I have goofed up somewhere let me know asap!
What's New in Version 1.0.0 See changelog
Released
I have added a sectional view to show how the wood rings sit within the shell.