-
Registration
Please register an account to access the Forum topics and features.
An Active Membership subscription gives you access to extra features and exclusive content!
Choosing Active Membership is a great way of supporting the community and showing your appreciation for our resources.
Please note that you need to register BEFORE you can use Facebook, Twitter or Google as a sign in method.
Our Picks
Top content from across the community, hand-picked by us.
Post in Geek's Retro NSD
Geek1138 posted a post in a topic,


Picked By
John,


Post in Imperial Emperor - Dalek Geo
jorj posted a post in a topic,
..... Then it's time to cut out the centre of the bottom dome! Which I want to make sure is properly centred. First level a board in the shed, then put the dome on it; balance the skirt on it, upside-down, and make sure it's level too; mark it up, on the inside and outside of the skirt; and finally mark where I want the cutout.
The general plan is to mount blocks of wood on the inside of the skirt, bolted through where they (and their eventual washers) will be hidden by the hemis; then use cabinet toggle latches between the dome and the block of wood. This quick mock-up looks pretty good; I'll add some epoxy and glass to finish it off, and get some shorter bolts and washers so I don't rip a hole in the fiberglass....
Picked By
John,


Post in Brihammy's Mk1 Dalek
brian hamilton posted a post in a topic,

Picked By
RepeatedMeme,
Post in Red5Ive's NSD - Dalek Bob
Red5ive posted a post in a topic,
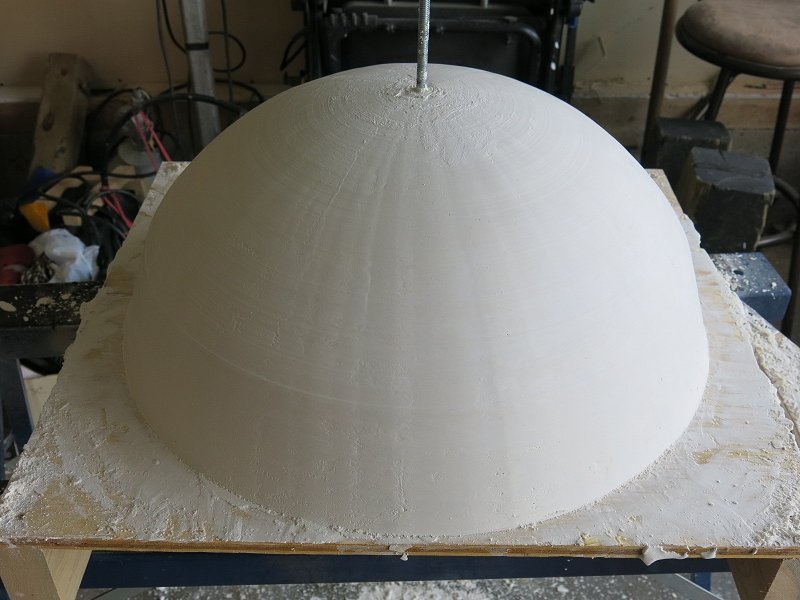
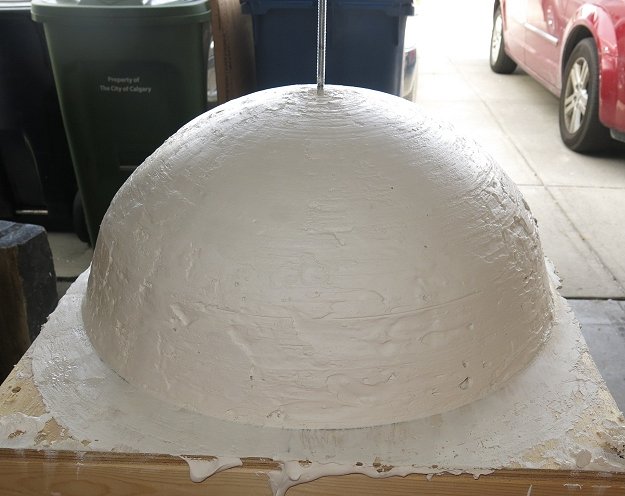
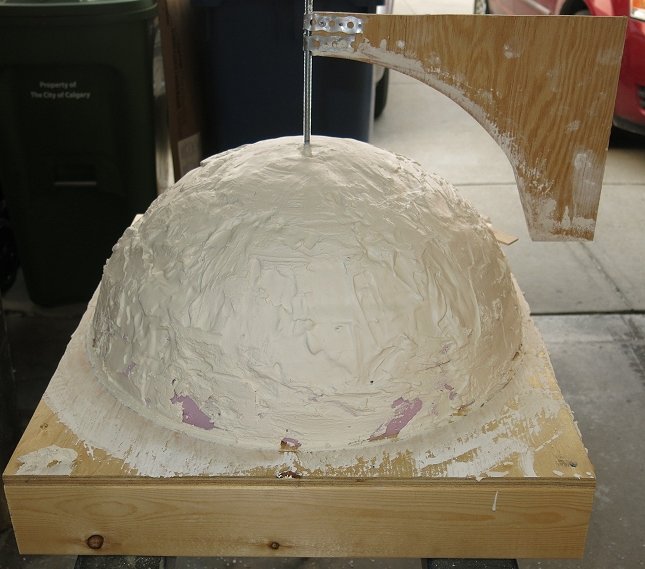
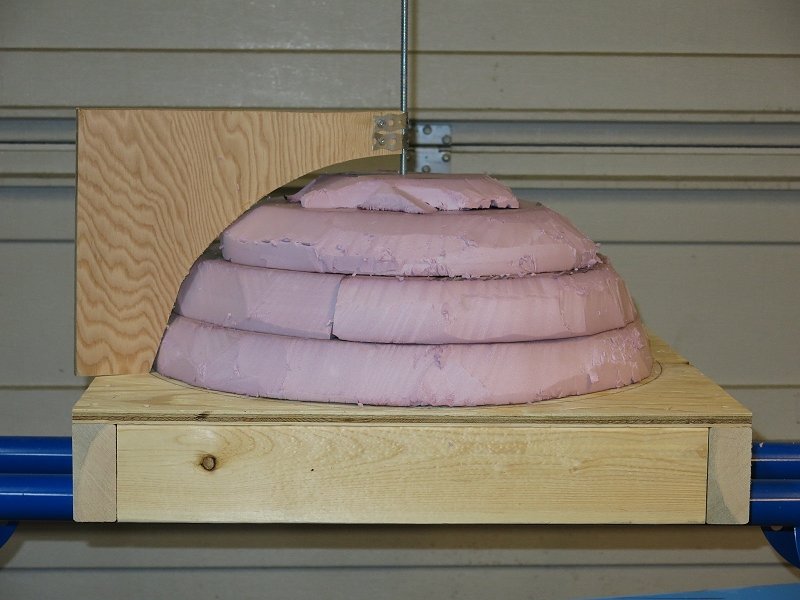
I added the foam, carving each layer as it went on. Wood glue does hold the foam together, but I switched to spray adhesive and that worked great!
With my foam close enough, it was on to the plaster - one coat at a time, rotating the former to shape the dome.
And am I very glad I did this in the garage!
Picked By
RepeatedMeme,


Post in Jonathan's Pertwee-Baker Era Dalek
moviedalek posted a post in a topic,
Some excellent research has already been done on this by forum member Ssorguk and illustrated into excellent diagrams by Ramjet, which have been of huge help in making this. Link to topic.
The starting point was finding one of those 2” mortar tail fins. Mint condition examples do seem to be available from specialist dealers, but I wasn’t willing to pay a small fortune for one. In the end I picked up a used one for a fiver. This is one of those ones which was fired off during the war, which has then been found by a metal detectorist.
Because it has been fired, the end of it was deformed so I had to saw it off right up to where the fins start. I drilled and then turned an insert on the lathe so that it could be joined to a 20mm tube.
Looked a bit rough at first, but after a bit of a clean up with filler and primer it looked good enough to use.
Having compared this to the ones as seen on screen, I am now not entirely convinced that this is what was actually used on the Dalek guns. On screen, the six fins and the barrel appear thicker than on the original mortar fin. Perhaps newer, chunkier casts were made at some point.
Anyway, next up was the barrel. I marked out the aluminium tube by hand and then centre punched each hole before drilling it on a pillar drill. First with a centre drill, then with the main 11mm bit. The spacing isn’t perfect, but I can live with it. I’m certainly not doing it again - it took hours!
Going back to the lathe I cut some aluminium inserts to hold the inner and outer barrels in position. I have simplified the design of the gun slightly by just having one length of 20mm tube as the internal barrel. The two rectangular holes at the front of the outer tube were done by drilling a zillion little holes in a rectangle which was then cleaned up with a file.
I’ll need to pick up some suitable grub screws to hold the two parts together, but the majority of the work is now done.
I’ve given the barrel a spray with U-pol acid etch primer as I’m going to spray up the whole gun in silver once I have a ball joint sorted out. I don’t think I’m going to use a wooden ball on this as it is already extremely heavy. I may opt for a fibreglass version.
One last thing - you may notice that the barrel front now looks thicker on the mortar fin. I glued in a short length of copper plumbing tube on the inside to beef it up a little. Bit of a crude fix but I think it now matches the on screen versions a little better.
It's been a tricky thing to make but I’m quite pleased with it overall. I’ll be back to familiar territory for the next update which will be the shoulder trim.
Probably.
Picked By
John,


Bec & Jek's Cardboard NSD
DrJekyll posted a topic in Completed Build Archive (Special Projects),
It's hard to find large hole free pieces of cardboard.
The panels taped together to test the fit before we started to glue them.
A few panels getting glued with PVA. The inside edges of the panels were squashed flat to simulate a chamfer, the panels were laid flat and butted to its mate. The outside edges were taped together then folded the wrong way, PVA glue was applied to the seam then they were folded into the correct position and held in place until dry. This method of joining the panels gives a very good join with no gaps.
-
- 111 replies
Picked By
John,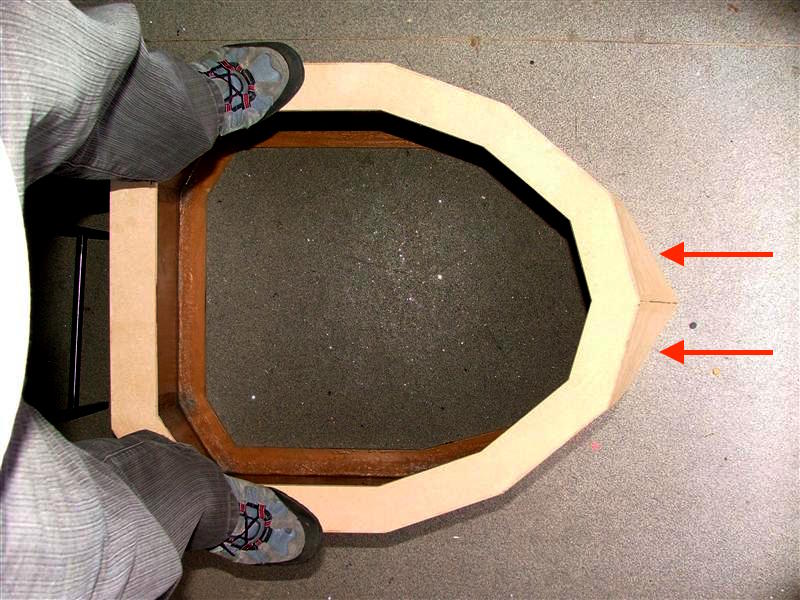
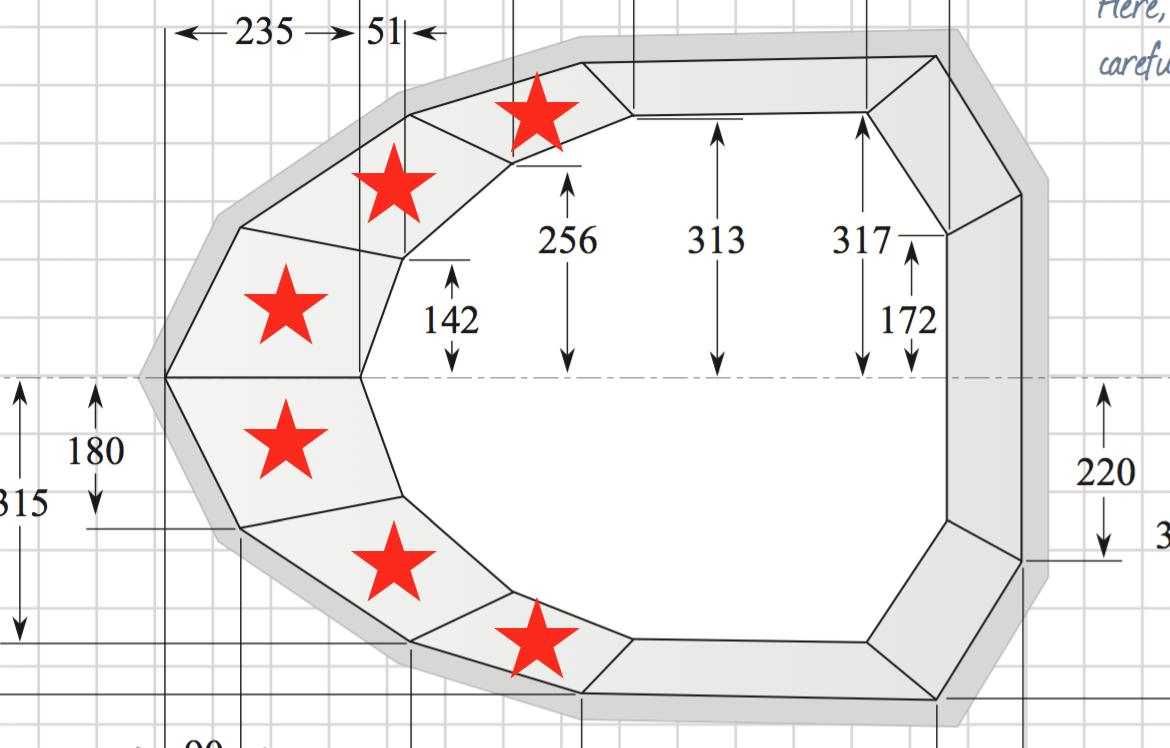
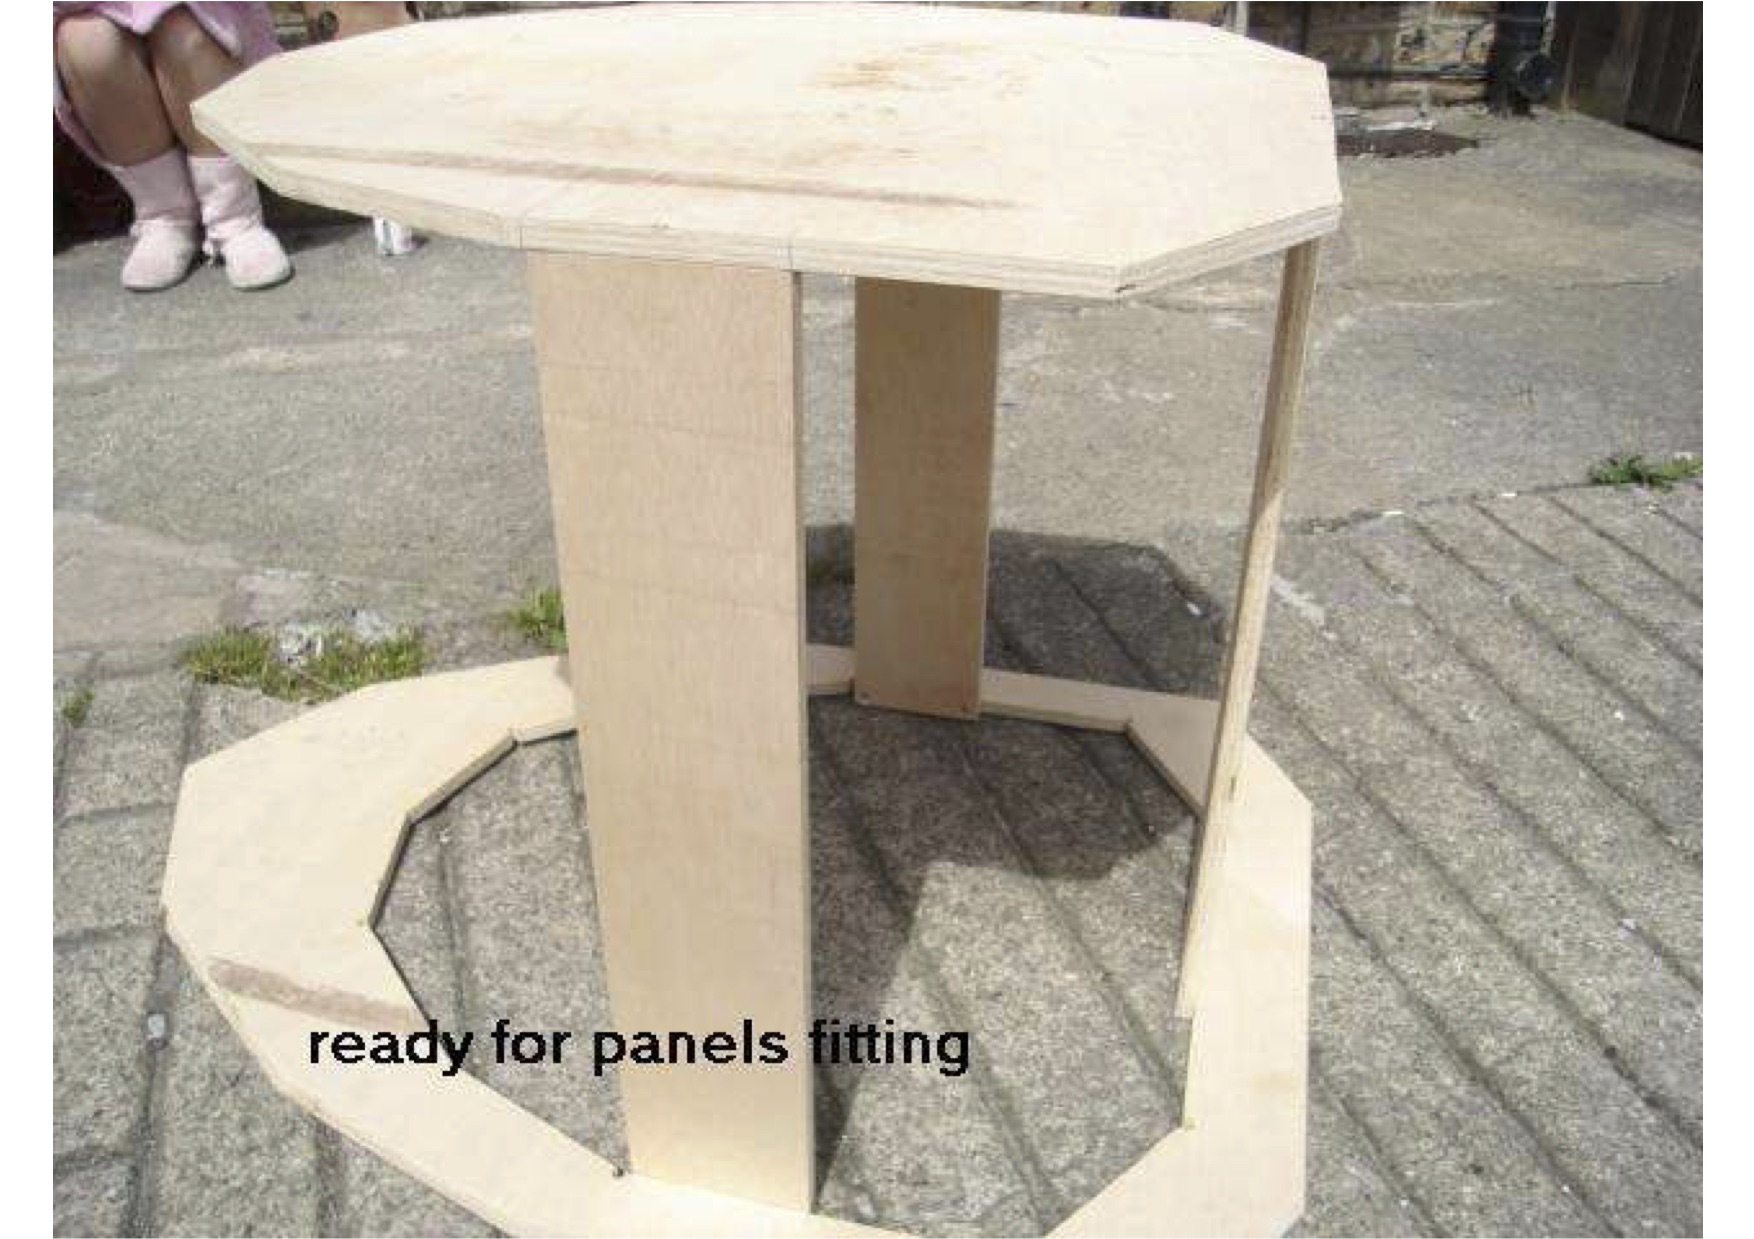
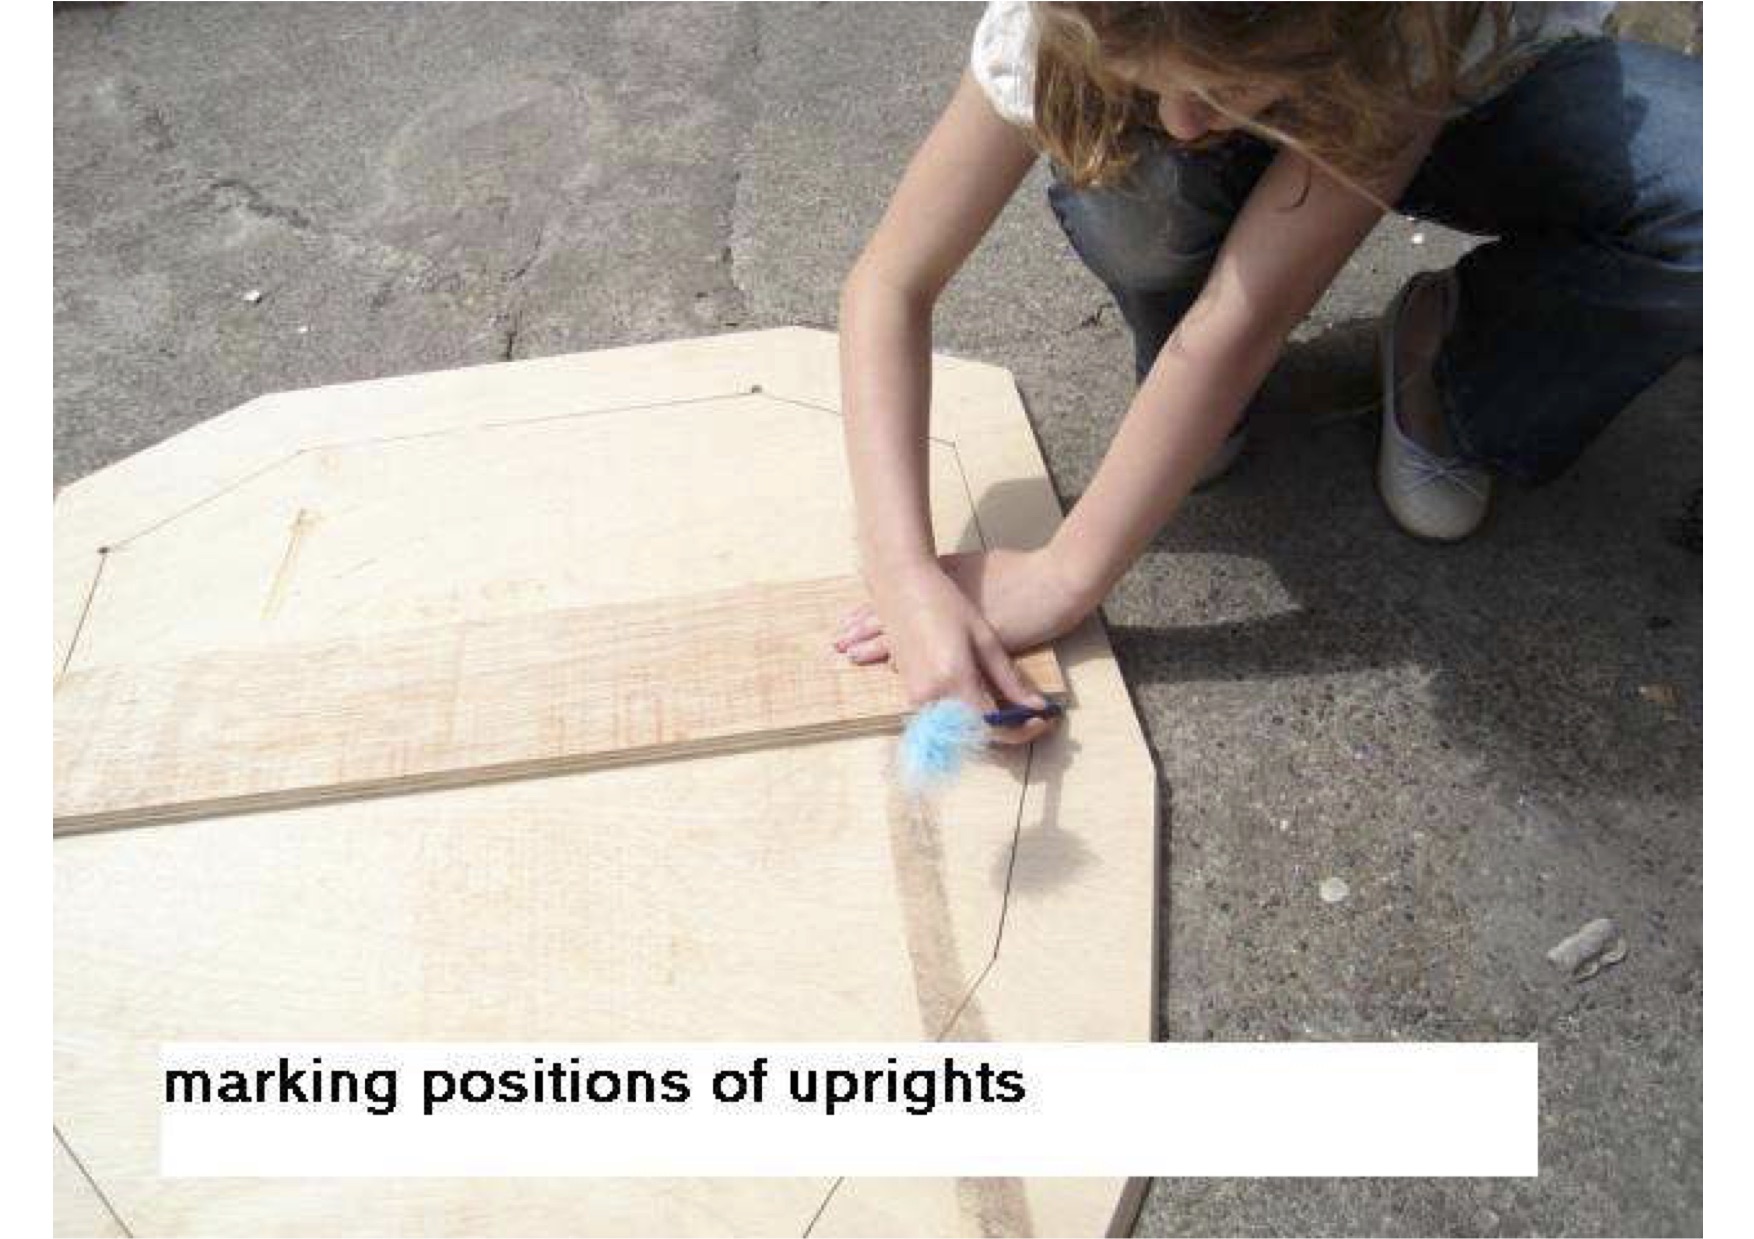
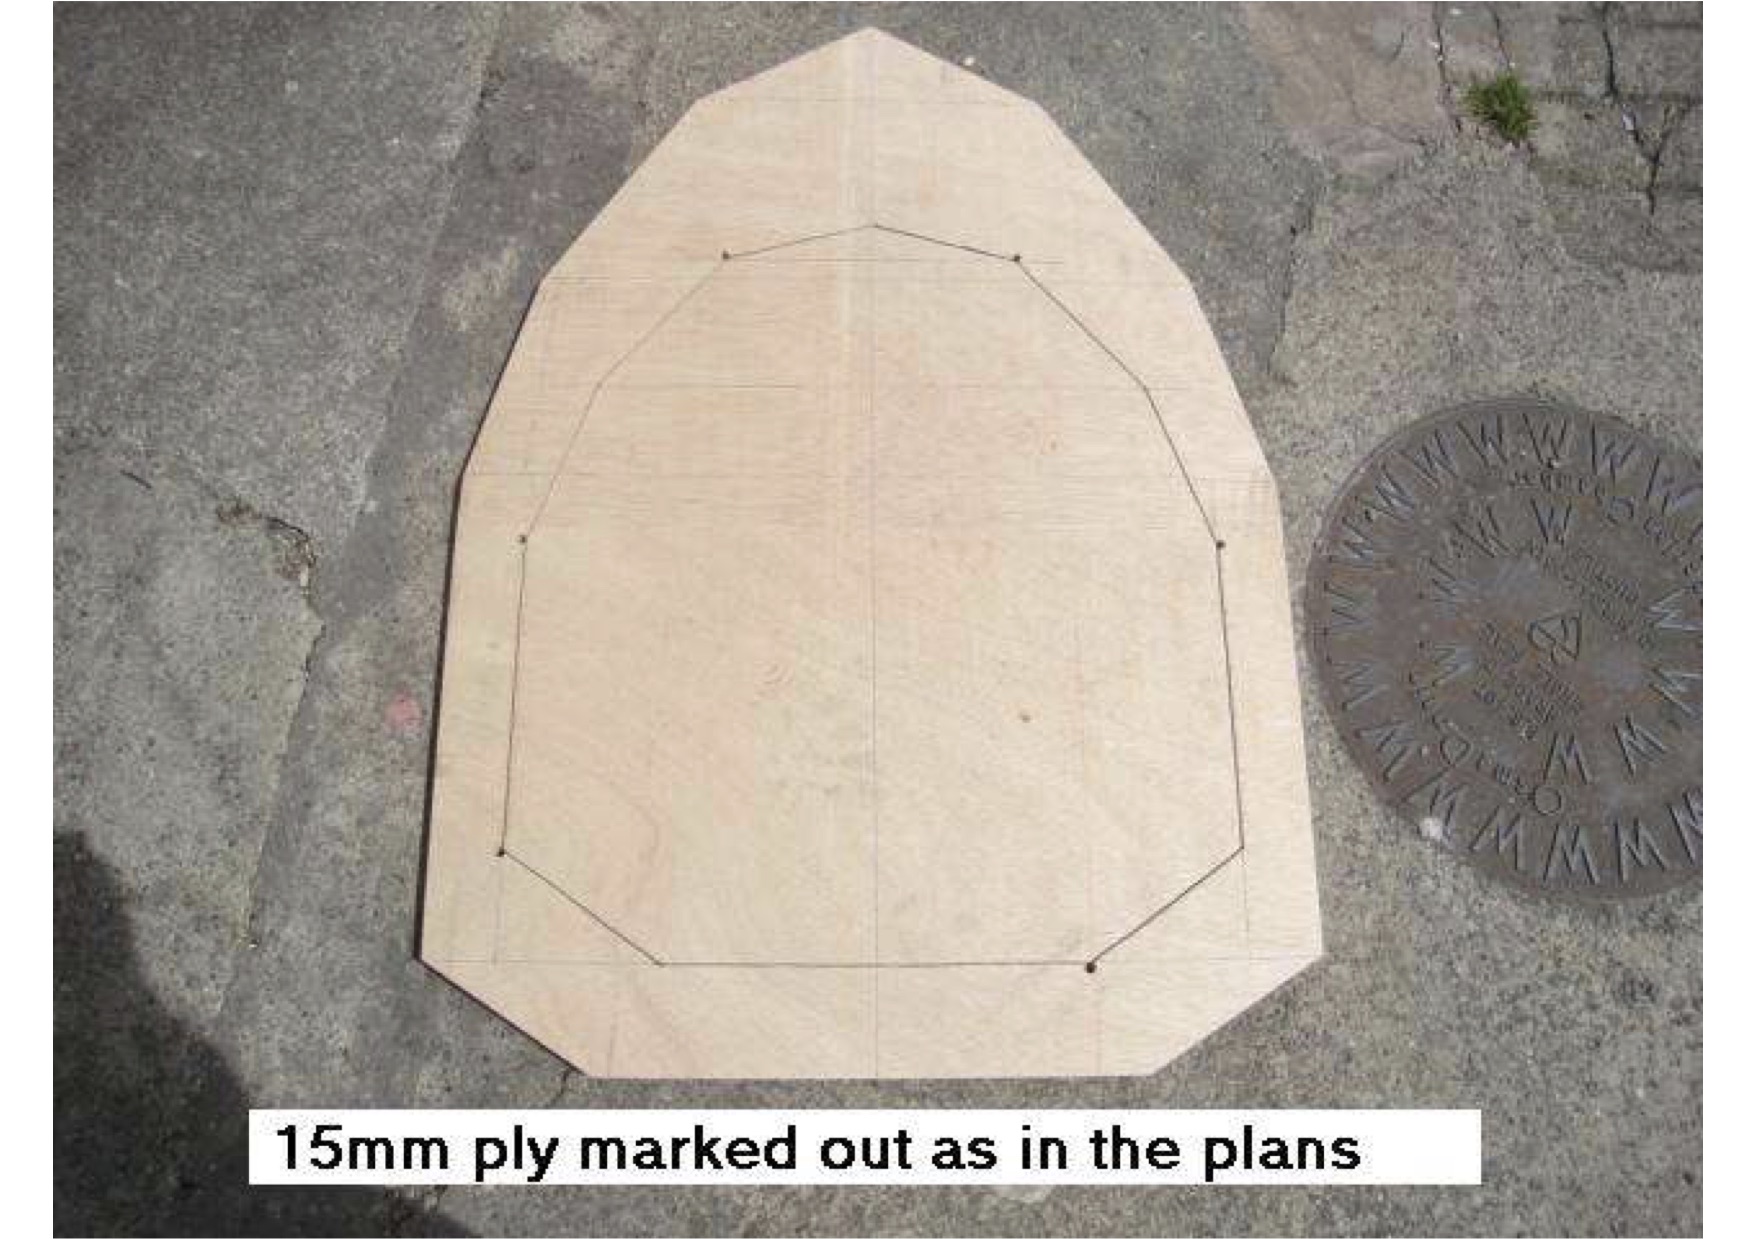
Post in Skirt Panel Twists - Twisted Panels?
Sacristan posted an answer to a question,
It gets discussed - a lot and it catches most new builders when they meet it
It's one reason not to draw & cut all the panels to size before making up the skirt
(yes, it is possible to do it that way but there are easier ways)
Basically if you cut the panels oversize and trial fit them in turn, marking what will be the 4 corners against the vertices of the skirt end-plates the twist is preserved without having to do strange things to make thing everything fit.
Picked By
RepeatedMeme,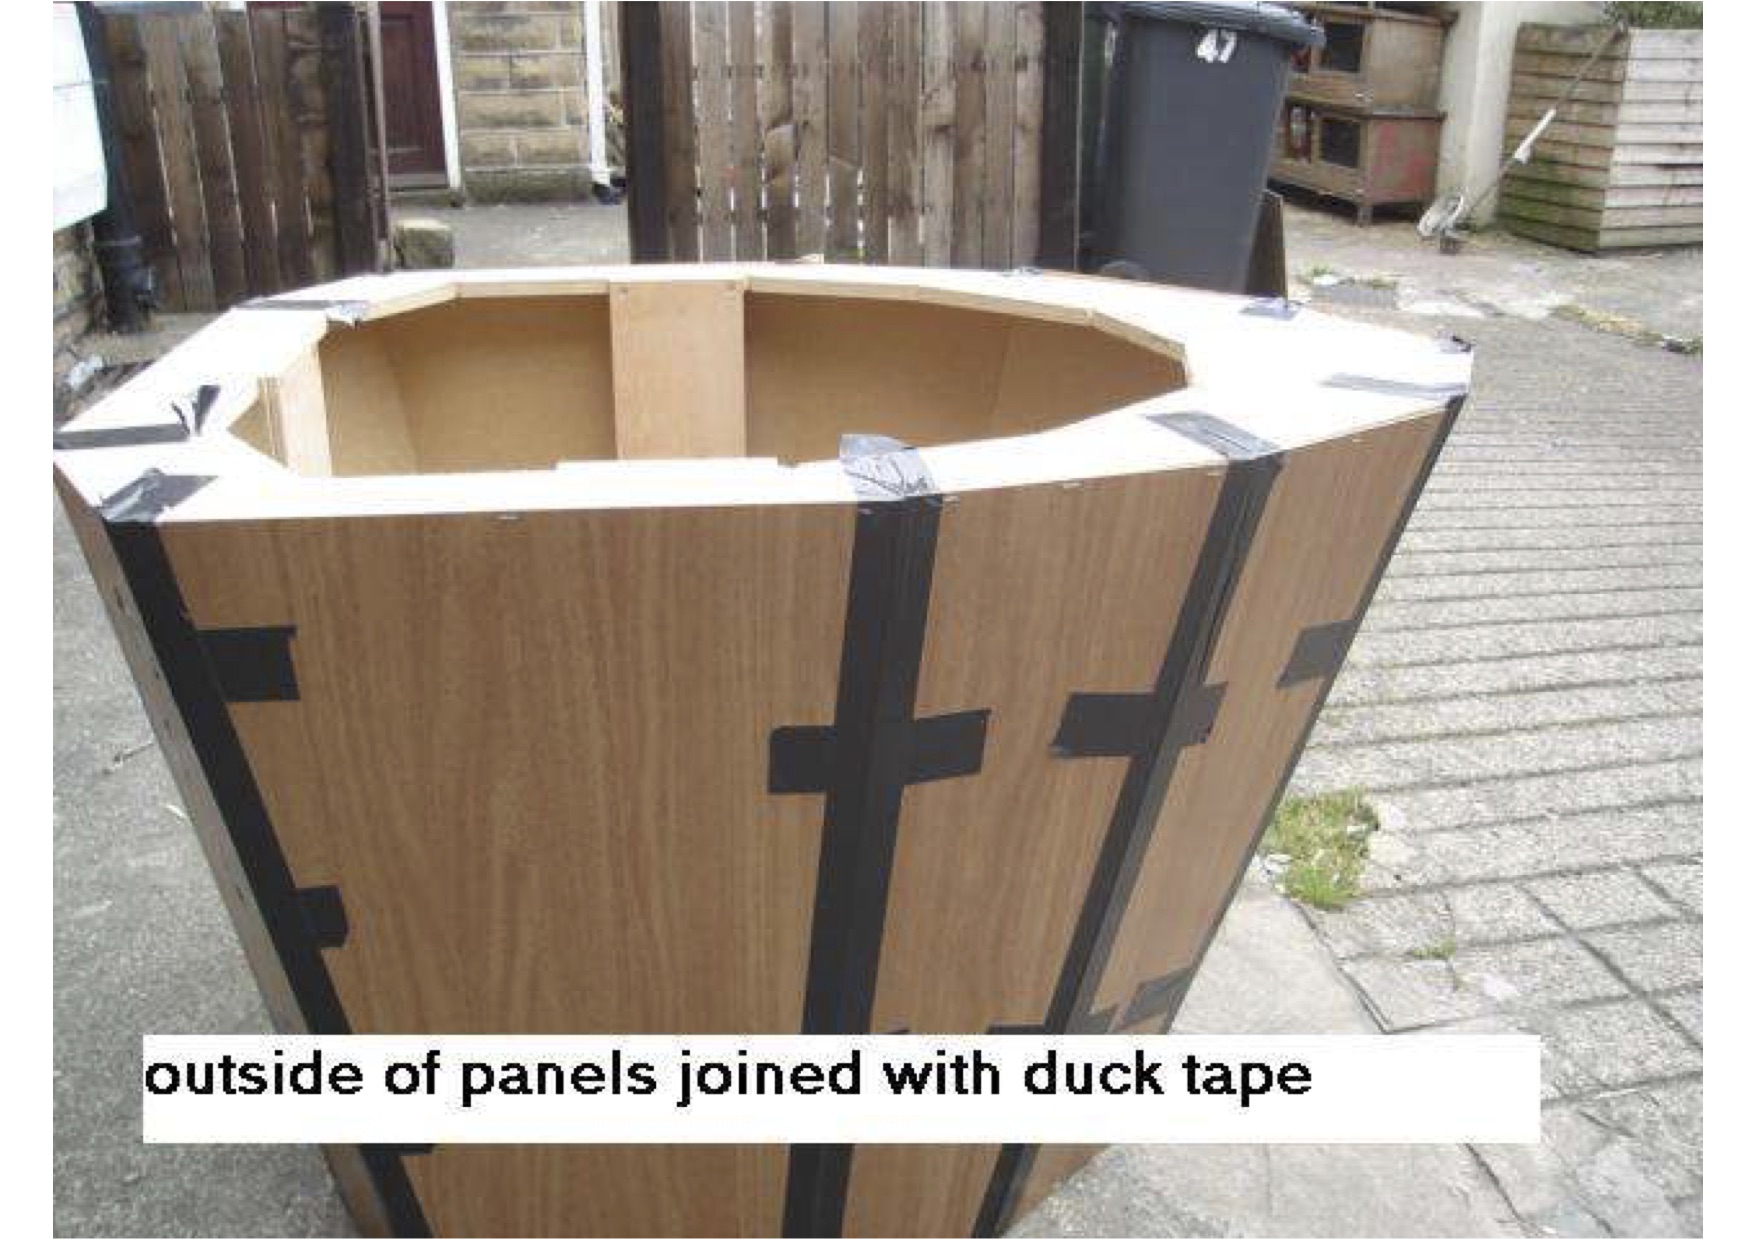

Building a skirt in a day - child's play
Shytalk posted a topic in General Dalek Skirt Discussions,
inspired by a very nice cardboard dalek diary
-
-
- 31 replies
Picked By
RepeatedMeme,


Post in New Series Davros
r_j_young2003 posted a post in a topic,
Has any one any idea of how I could connet the joystick knobs to toggle switches. The ends of the knobs have a little bolt that screws on the bottom? I really need to somehow glue the bolt onto the toggle switch so that I can screw the top off to fit the rubber bellows.
Rich
Picked By
RepeatedMeme,


Cardboard Cutout Dome - Basis For A Plug?
Shytalk posted a topic in General Dalek Dome Discussions,
one of the main drawbacks of making a dome is making the plug first, so i thought if someone could make a template that can be printed onto a4 and then that in turn can be stuck to some thick card then cut out and folded into a slightly smaller dome former that will need minimal filling to get to the dome plug shape...
does that sound sensible
i kinda mean something like this.
but about 10mm smaller than the finished dome plug.
-
- 62 replies
Picked By
RepeatedMeme,


Post in Imperial Emperor - Dalek Geo
jorj posted a post in a topic,
2 hours of bondo work and about 6 hours of sanding today. I'm amazed that my orbital sander hasn't melted.
I started with some quick bondo over yesterday's sanding.
When I came back to clean it up, it quickly became clear that the paint, primer, and/or drywall compound underneath it had been compromised by the acetone. I wound up sanding most of it back to wood.
Then a quick skim coat of bondo to even it all back out and a lot of sanding. It's not done; I'll have to come back and do some more touch-up tomorrow.
An hour or so of sanding the lower dome and it's back to where I was last Tuesday.
The upper dome I'd spent a while finding air bubbles, cleaning them out, and then slathering bondo over them. Today I spent a couple hours sanding all that bondo back off.
Then a quick rinse of both and I grabbed the painter's tape and a cheap can of white spray paint. How bad is it, I wondered? How many bubbles were going to be waiting for me?
A lot, it turns out.
I'm not exactly sure how to best fill those. They're obviously too small for bondo; there was a coat of bondo right over those.
Maybe a thickened epoxy?
Picked By
John,


Trapped In Amber
mechmaster posted a topic in Mechmaster's Daleks,
-
-
- 177 replies
Picked By
John,


Storm - Special Weapons Dalek
alansdalek posted a topic in Completed Build Archive (Special Projects),
with the help of mechmaster down there in the cgi section
and me in the wood and bodyfiller..section
may i present Storm...a one off special weapons dalek...
brought to life in the real world...
he is not going to be easy and he may take a while
to do..but im going to have a go...
alan
-
- 364 replies
Picked By
John,Adam's Classic Diary
AdamSt_2005 posted a topic in 60s TV Daleks,
- 0 replies
Picked By
John,Adam's NSD Index
AdamSt_2005 posted a topic in 2005 Design Daleks,
- 0 replies
Picked By
John,


Jonathan's Mix N Match Daleks
moviedalek posted a topic in 60s TV Daleks,
The skirt... To start off, this frame was made up from 12mm ply and softwood. It was very flimsy but once the panels (6mm ply) went on it became quite sturdy.
It needs a coating of GRP along the insides of the panel joins and then I'll set to work with a can of filler!
When it is done this skirt will act as a former for a GRP mould. Onto the shoulders Some of you may remember this rather naff looking Dalek which I took to Longleat in 2003:
Despite the inaccurate colour scheme, it had a very nice GRP 'movie' style shoulder section which unfortunately got damaged not long after when a mould was made from it. A replacement set was made at the time, but I kept the damaged shoulders too. I wanted a set of TV shoulders for this build, which would have been quite straightforward to make from scratch but I wondered if I could instead have a go at repairing and converting the damaged movie set. First of all, the heavily cracked and chipped top return of the shoulder was removed and a strong plywood insert glassed in place. Next, the movie gun boxes were cut out with a dremel. This left holes far too big for TV gun boxes to occupy so these were 'bandaged' over with plasticard. I taped the plasticard down tightly so that it would follow the contours of the shoulder and then fibreglassed the inside.
...more in topic...
-
-
- 181 replies
Picked By
John,-
Forum Statistics
8.8k
Total Topics169.6k
Total Posts