-
Registration
Please register an account to access the Forum topics and features.
An Active Membership subscription gives you access to extra features and exclusive content!
Choosing Active Membership is a great way of supporting the community and showing your appreciation for our resources.
Please note that you need to register BEFORE you can use Facebook, Twitter or Google as a sign in method.
Files For 3D Printing
Files that can be used to for 3D printing physical versions, using your own printer or a service such as Shapeways etc.
Note that files for CNC and laser cutting can be found in their own sub-section, inside.
248 files
-
Free
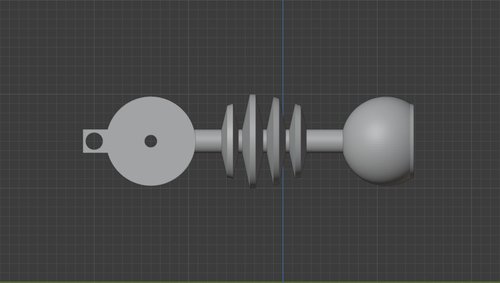
Accurate plunger - high poly
By ansonjames
60's/70's Style plunger created using the newer plans. Can be printed with FDM or SLA.
I added a rod at the bottom to slide onto the last stage of the arm, if you don't intend to use this part then you can import into Microsoft 3D builder, go to edit and split model.
93 downloads
-
Free
70's Dalek Eyes 1 - Day of the Daleks high poly STL.
By ansonjames
No supports required except for the back of the eye, remove supports on this part and insert the ring which is for aligning the front and the back of the eye.
If the part layout is too big for your print bed just separate the parts in printing software or import into Microsoft 3D builder (free software) edit file and split keeping both top and bottom.
Parts are oriented for best printing speed and quality - 20% infill, 3 perimeters recommended. Send me a PM if you need assistance!
11MM diameter hole is for the eye stalk/pivot files which I'll upload soon, the finished prints are kept together with an M10 threaded bar and nuts.
111 downloads
(0 reviews)0 comments
Updated
-
Free
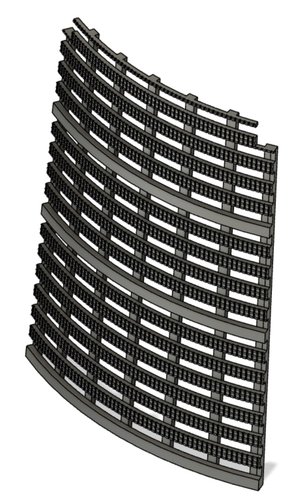
NSD Neck Matt
By elembivos
STL files to print replica pool matt for an NSD neck. Modeled after actual pool matting used on my first NSD build, which was not authentic Heronrib/Heronair. Just the closest equivalent I could find at the time. Designed to glue into a 3D printed set of neck rings. 3 levels are designed smooth where they will mate to the neck rings to provide more surface for gluing. You may need to trim here and there to fit your neck rings.
146 downloads
-
Free
70's Dalek eyes 2 - Genesis of the Daleks style eye
By ansonjames
No supports required except for the back of the eye, remove supports on this part and insert the ring which is for aligning the front and the back of the eye.
You may need to reduce the size of the joiner to 99% to help it fit into the recesses, do this in your slicer and scaling.
I recommend 20% infill and 3 perimeters. Send me a PM if you need assistance!
11MM diameter hole is for the eye stalk/pivot files which I'll upload soon, the finished prints are kept together with an M10 threaded bar and nuts.
79 downloads
(0 reviews)0 comments
Submitted
-
Free
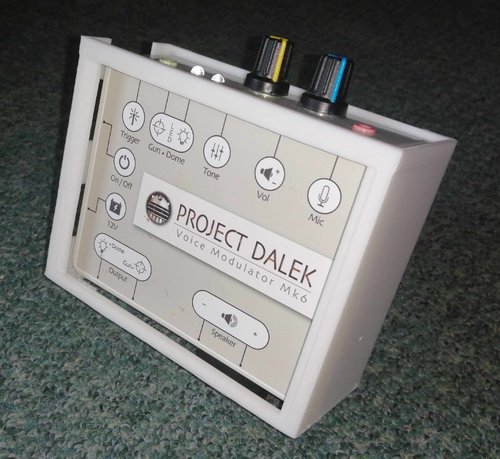
PDF VOICE MOD HOLDER
By Kev Handley
I made this to stick inside my Daleks. It's a little on the large side so I can add neoprene inside to prevent rattles. I can now easily swap out my mods to my desired Dalek. Mine took about 8 hrs to print and used 85 G (28.35m) with tree supports.
I used No More Nails to stick this inside the front of the shoulder section of my NSD and it does the job as planned.
31 downloads
(0 reviews)0 comments
Updated
-
Free
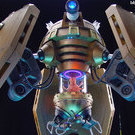
Imperial Dalek : Dome Lights
By Necrosis
This is a download for the Imperial Dalek dome lights. The files are in .stl format making them easy to 3D print or to use as digital references/models. These parts are 1:1 scale and match the most recent revision of the Imperial Dalek plans making it plug and play to print or easy to scale to your Daleks needs. I personally 3D printed these units to create molds so that I can cast the parts. I cut the center piece from acrylic using the print as a template. However, the parts look great as 3D prints with some filler and primer and you can print the center disc from a transparent filament with out any hassle; SLA resin printers also work great for this kind of part. Recommend printing these parts slow and precise at 15% infill for best results.
(Would love to see any print results from anyone who chooses to share on this thread)
Details:
Scale - 1:1 (In compliance with Imperial Dalek Plans Version 3.5)
Parts included in this download - VHE-275 * Acrylic Disc * VT-250
NOTE: For ease of assembly, parts VT-250 and Acrylic Disc have 6.5mm holes through them, this allows a 1/4" bolt or 6.35mm bolt to go through and connect them; there are two recessed locations on part VHE-275 (Elliptical head) where the hex/head of the bolt can be mounted in place. This is not visible from the outside and ensure perfect placement of the parts and allows easier installation on the dome. All parts also have a 26mm hole in the center to allow the placement of a small bulb.
I will keep these files up to date and if you have any suggestions or find any errors please let me know so that I may update the parts.
21 downloads
-
Free
Imperial Dalek: Eye Stalk
By Necrosis
This is a download for the Imperial Dalek eye stalk. The files are in .stl format making them easy to 3D print or to use as digital references/models. These parts are 1:1 scale and match the most recent revision of the Imperial Dalek plans making it plug and play to print or easy to scale to your Daleks needs. I personally 3D printed these units to create a mold that allows me to cast the part with perfect detail. You can achieve the center reflective disc by printing the part and then covering it with a reflective film as shown in the screenshots above. However, I prefer the none reflective disc on my personal Dalek build. The parts look great as 3D prints alone with some filler and primer and detail work. Recommend printing these parts slow and precise at 15% infill for best results.
(Would love to see any print results from anyone who chooses to share on this thread)
Details:
Scale - 1:1 (In compliance with Imperial Dalek Plans Version 3.5)
Parts included in this download - Eye Stalk * Eye Piece * Reflector * 4 Stalk Discs * Eye Pivot
NOTE: For ease of assembly, parts have a 0.5mm to 1mm tolerance. The eye Pivot has a 12mm (1/2") hole in the center for a bolt and a larger hole on the backside that can be used to attach a control rod for the eye stalk.
I will keep these files up to date and if you have any suggestions or find any errors please let me know so that I may update the parts.
49 downloads
-
Free
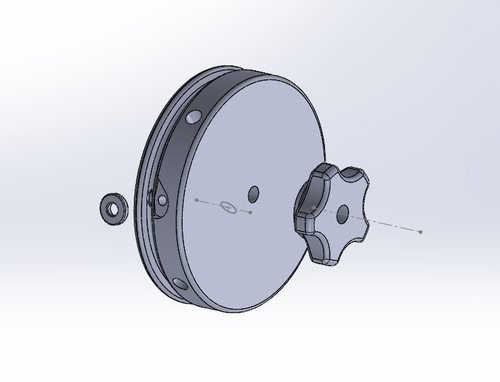
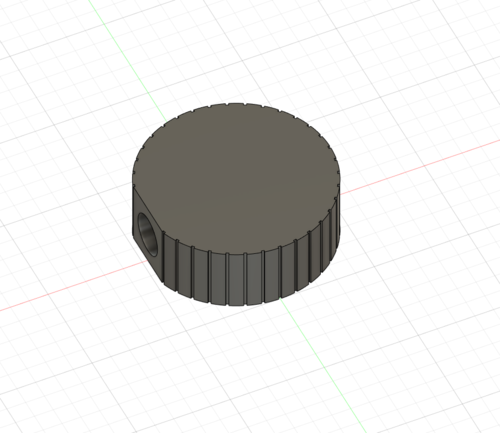
Shawcraft Eye Control
By kevin pedley
This is a copy of the Shawcraft eye control. The diameter of the "pulley" is 102mm, the same as the eye pivot so should give a 1:1 ratio when rotating the control. There are 4 holes around the outside of the control 8mm in diameter - idea if you have some 8mm dowel left over from the neck struts. The centre hole is 8mm, and the control lock is designed to take an 8mm nut with plastic insert.
61 downloads
(0 reviews)0 comments
Updated
-
.thumb.JPG.01120d5af1ebf179de81a06018ed4768.JPG)
Free
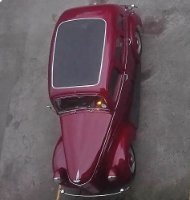
Louis Marx Bump and Go Toy Dalek
By erichdalek
This is a model of the Louis Marx Bump and Go Toy Dalek of the 60's, as used in the production of Evil of the Daleks per information from this gallery entry and this BBC photo.
Provided is:
-.SLDPRT of the whole thing, for your personal improvements or modifications
-.STL of the whole thing
-.STL's of it with the eyestalk and appendages in separate files for you to glue on
Let me know any ways I could better the screen-accuracy or proportions.
307 downloads
-
Free
NSD Eye Back
By Mr McGoo
CREATOR's EDIT: My apologies, I only just realised this has 8 rods, not 12 going around the eye. I'll leave the files up for now in case anyone wishes to modify them, as I don't have the time right now. My plan is to sand off the rods printed on the eye, and make/glue the vessel tubing as a separate part so to not bin the one I currently printed. Just wanted to be fully transparent about this mistake!
I created my own CAD files for the NSD eye to print because I wasn't happy with any that I found, they all needed some unsightly supports.
I designed these to be easy print (I did mine on an Ender 3, came out great) The front section doesn't need supports, orientate it so the front section faces up and it'll print nicely. The back section needs a support in the middle to print the stem, which broke off easily for me. Tolerances are pretty tight and will need some light sanding to make it a little looser. Then you just have to drill your holes for your allen bolts and you're good to go!
79 downloads
(0 reviews)0 comments
Updated
-
Free
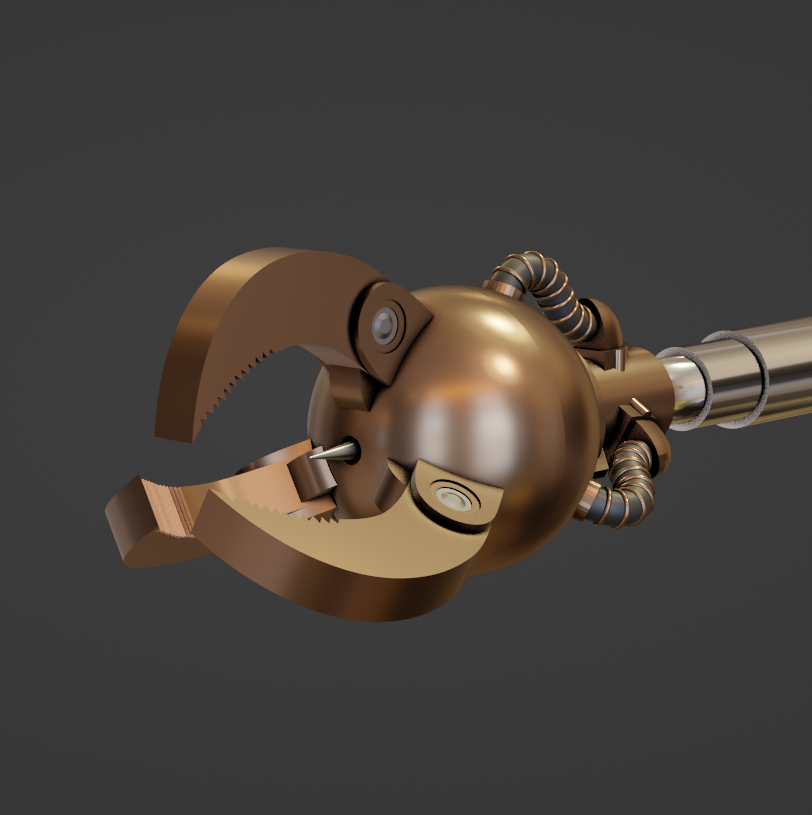
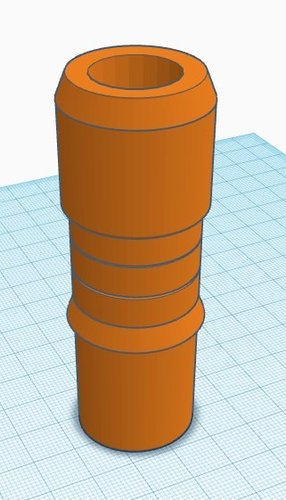
NDP Telescoping Joint
By bryanxiii
This is the joint you see at the midsection of the telescoping plunger arm.
Measurements based on NDP Plans.
I added a tube at the bottom to push into the larger portion of the plunger arm to help secure it and have something to glue to.
The OSD of addon tubing is 27mm.
The ISD overall is 18mm to give 1mm of clearance on the 17mm OSD telescoping tube.
Print orientation: I would suggest printing this with the tapered section down with a build plate.
Density: My suggestion on this is 100% mainly to give strength to the section where it gets glued on.
If you need an alternative sizing version PM @bryanxiii
17 downloads
(0 reviews)0 comments
Submitted
-

Free
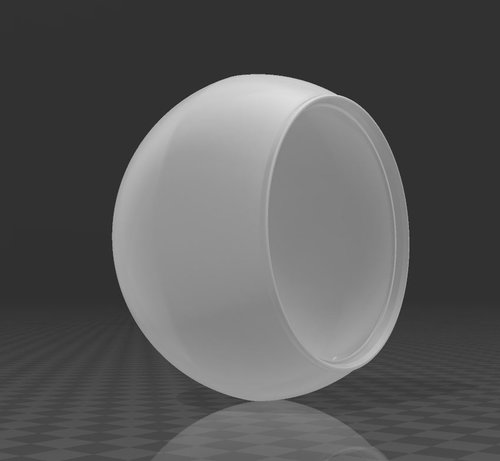
Alternative Dome Light Cages for use with Quilted Mason Jars
By anthony lathrop
Instead of the canonical MoFlash dome light lenses, my son and I used 1/4 pint quilted Mason jars (widely available in the US, not sure about elsewhere).
The jars are a bit shorter and squatter than the MoFlash lenses and they have a diamond embossed pattern instead of the vertical grooves - but they look pretty close and behave similarly when lit from inside.
These files comprise dome light cages that fit the Mason jars.
The .stl files are low poly.
Also including the solidworks files so you can make your own high poly .stl files if desired.
42 downloads
(0 reviews)0 comments
Submitted
-
Free
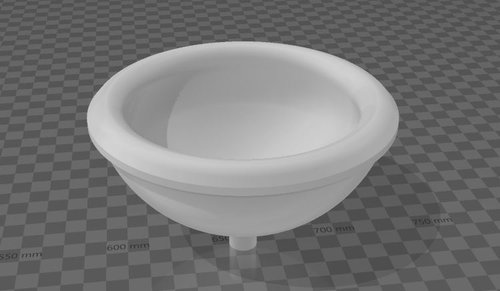
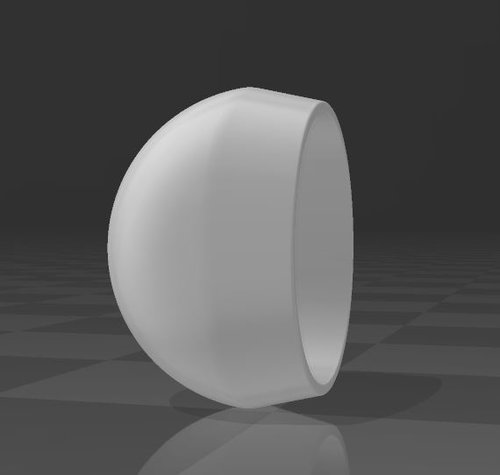
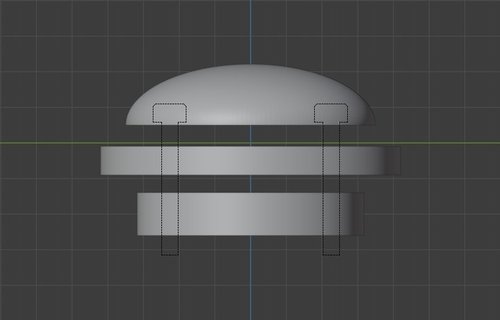
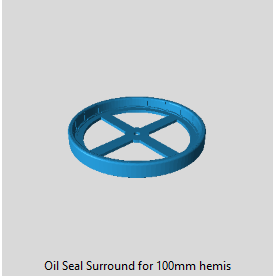
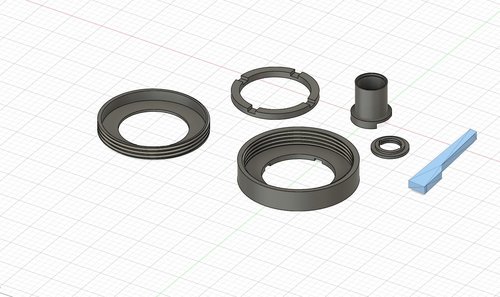
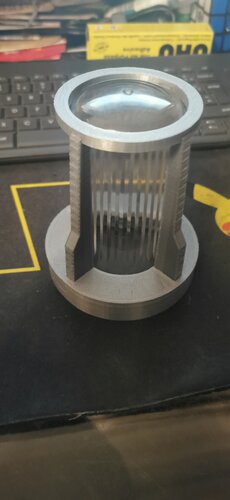
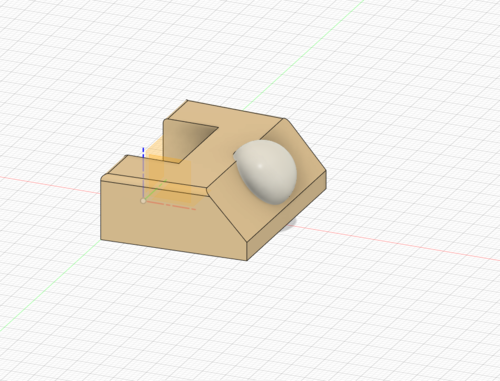
Oil Seal Surround for 100mm hemis
By napier1973
ok i jumped on cad and changed the surround a little so it fit the 100mm hemisphhere only changed is the walls thicker.
82 downloads
(0 reviews)0 comments
Submitted
-
Free
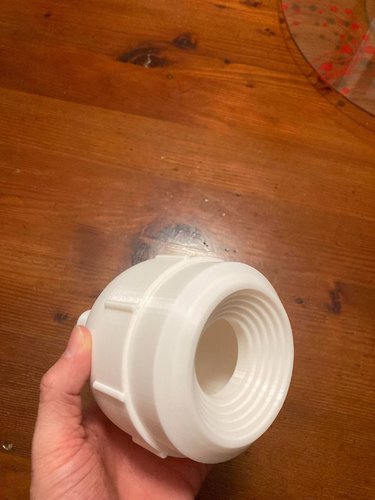
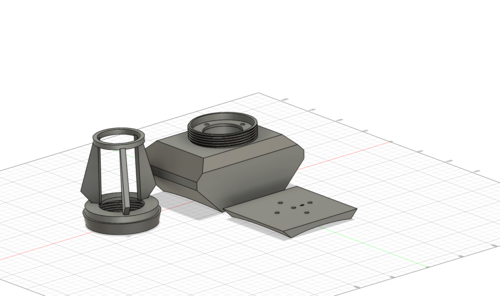
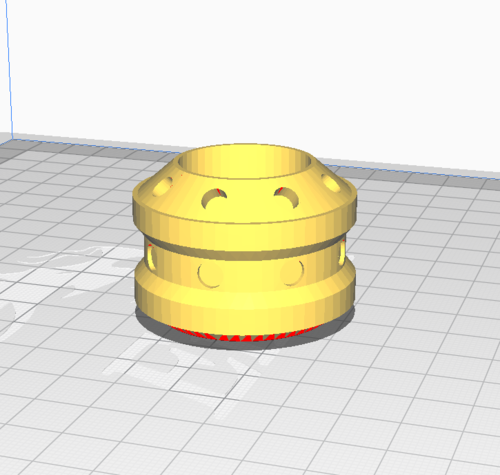
NSD Light Cage with Thread
By DalekDucky
NB: Single zipped folder or 6 individual files - your choice
So I wanted a light cage that did not show screws when assembled and came up with this solution.
It's essentially a remix of @Ultrastar Light cage with the following modifications.
Added thread to the lower part of the cage plus the inner part of the threaded piece to be attached to the Dalek head The hole for the base and top is slightly larger to make screwing around the cage easier no change to his support
In this file I also included the surround part I did for my bulb using a trailer light. The spring from the light lid holds it in place to the lower part so no attachments required.
I used a Ping Pong bulb inside the moflash. so you may want to use some hot glue to secure that part.
The lower part has indentation to allow for my trailer base, if you don't need that, that part is low enough that should not be seen in your cage.
Enjoy
P.S. You will need to rotate a few pieces for print. support needed for some parts depending on your printer calibration.
158 downloads
-
Free
Goon X Eye - As Per PDF Plans.
By ansonjames
Supports required front/back of the eye, remove supports on these parts and insert the ring which aligns both parts.
If the part layout is too big for your print bed just "select all" and "ungroup" in Microsoft 3D builder.
Parts are oriented for best printing speed and quality - 20% infill, 3 perimeters recommended.
11MM diameter hole is for the eye stalk/pivot files which are located here;
The finished prints are kept together with an M10 threaded bar and nuts.
19 downloads
(0 reviews)0 comments
Updated
-

Free
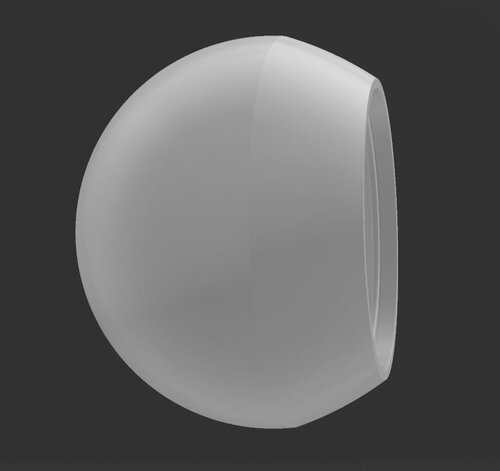
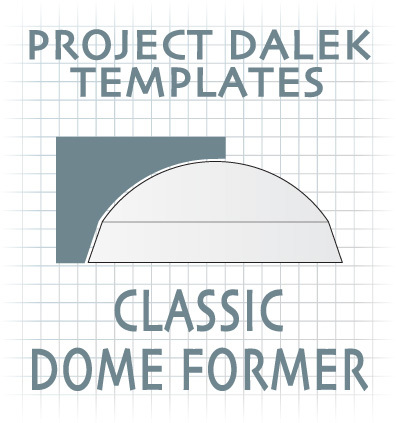
Dome sander
By kevin pedley
This is a sanding pad that is concave on the sanding face - to match the radius of the original Shawcraft domes.
It allows finish sanding without loosing the profile.
After printing (recommend printing it on it's edge to get a better concave profile) strips of wet and dry are glued to the surface, and away you go.
Sand with a circular motion. It maintains the edge between the radius and the taper of the dome.
35 downloads
(0 reviews)0 comments
Updated
-
Free
(0 reviews)0 comments
Updated
-
Free
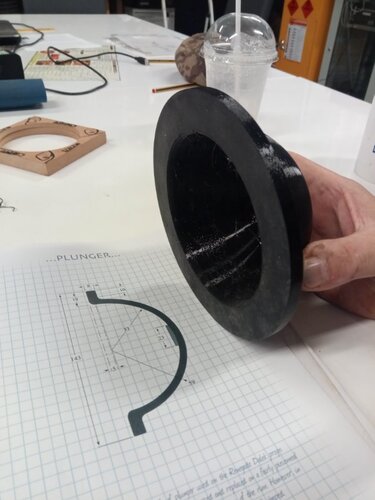
Renegade Dalek Plunger
By DrBullas
Just printed off a file a work colleague created for me from the Renegade Dalek Plans plunger drawing, printed in semi flexible black it looks pretty good! Printed off nice a slow didn't need supports.
11 downloads
(0 reviews)0 comments
Submitted
-
Free
Reworked NSD moflash cage.
By bappi
I downloaded the zip file from Ultrastar's downloads and noticed that 2 of the files were labelled wrong so corrected that with these files here, I also noticed when i had printed the base that when screwed on tight there was at least 5 mm gap around the bottom so i resliced the file and now it has a nice flat base i then drilled 2 holes through the base and bolted onto the dome.. I bought 2 twist fit bulb holders as u can see in the pics, this fits through the dome nicely and fits inside the mosflash lense very snug, to change the bulb just unscrew the cage.
227 downloads
(0 reviews)0 comments
Submitted
-
Free
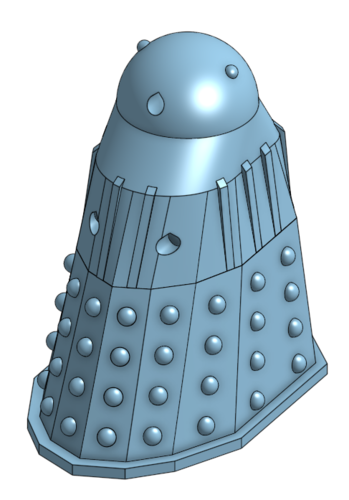
Renegade Dalek Styled 3D Print
By Zach
The body of a dalek loosely based on the Renegade dalek. The whole thing can be printed in one go. I printed it at 50% scale with 20% infill and it came out great. The three holes are for the eye and turrets; I haven't yet finished modeling them, but when I do I will add the files here.
6 downloads
(0 reviews)0 comments
Submitted
-
Free
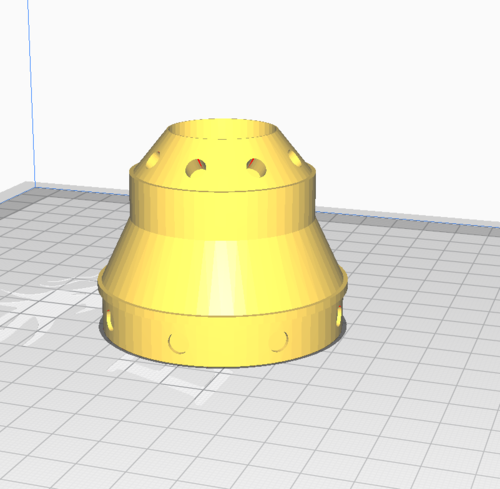
NSD Supreme Screw on Light cage w base
By DalekDucky
This is the screw-on light cage with base for the NSD Supreme Dalek complete with the dome base.
Printing
The inner base prints hallow, I recommend you print it on one of its side with support on the baseplate only. If your bridges are well calibrated it prints no problem for the top of the print (opposite side)
The base follows the contour of the NSD dome perfectly.
There are four holes in the base to screw onto to the dome. Two screws is likely all you need (Top and bottom) but why take a chance
I included a guide to help you properly place the pilot holes on your dome for the base, c/w a little arrow on the template as well as inside the base piece for correct orientation.
The light cage just screws on top of the base. Making both painting and changing bulbs easy.
35 downloads
-
Free
Marx_BumpNGo_parts
By LabRat
STL for replacement plunger, gun, and eye-stalk, for the 6.5" (1974) Bump and Go toy. Used online images for reference and scale, as I had no access to originals to measure. Photo shows first print attempt (with some sagging, as I didn't have enough supports in place). Also included are versions of the laser and eye-stalk with a hole ready to accept 3mm acrylic rod (in case you want to add additional "blinky/flashy" effects.
Post pics if you print these for you Dalek.
17 downloads
(0 reviews)0 comments
Submitted
-
Free
(0 reviews)0 comments
Updated
-
Free
(0 reviews)0 comments
Updated
-
Free
(0 reviews)0 comments
Updated
-
Top Downloads
Week
-
Free
-

Free
-
Free
-

Free
-
Free
Month
-
Free
-
Free
-
Free
-
Free
-

Free
Year
-
Free
-
Free
-
Free
-

Free
-
Free
All Time
-
Free
-
Free
-
Free
-

Free
-

Free
-
-
Recent File Reviews
-

Michael56 4
I'm in my late 60's. I live in Australia and have always enjoyed Doctor Who from the very first episode aired here around 1965 when I was 9 years old. Thought how amazing it would be to have a Dalek but had no idea how or where to even begin UNTIL I came across this site. Thanks for giving me the opportunity to at least be able to start on a Dalek build and will detail my progress as it goes along.
-
Mark Sheriff 6
Excellent , looks great and very well designed , well thought out . thank you
-
Marc Harris 63
I'm in my 50s and have since I was a boy watching Dr Who in the 70s always dreamed of making a Dalek for fun, now I have the time and resources, along with your forum's help it's time to live that dream.
I have watched some of the members videos, and I am very impressed with what I have seen.
Long live the Who verse.
I will document my progress and share any innovations I make
-
Chris R 25
Great set of models that printed and fitted together really easily. Can't comment on accuracy as I'm no expert but very happy with the result
-

Dalek Hal 312
Great file, easy to print
-
doctorone 3
Great plan but the pivot does not print as it is not complete like the eye stalk
-


-
Download Statistics
-
Recent File Comments
-

-
By WhosWho · Posted
@RepeatedMemeDid you change something? I haven't touched anything. -
By RepeatedMeme · Posted
@WhosWho @dalekray It's only showing an update because the (written) details were edited. -

-
By life size · Posted
I printed mine in PTEG, 235 nozzle, 60 Bed , no supports and it printed with no mess at all. I ran it at a 40 percent print speed, and the orientation was large cup facing down on my print. -

By John · Posted
See this FAQ topic for more on Downloads availability: -
By ChristmasDalek · Posted
Welcome to the forum! Sorry you have encountered a problem... While waiting for someone who knows more about the downloads section than I do to answer, you may find the explanation in @Johns answer to this thread: Be well, Kathy -
By tardis112 · Posted
Why am I not permitted to download this? -

By Mark Casto · Posted
This is such a useful file for the eye it is perfect for adding a fish tank led inside and looks great thank you. -
By DarthCranium · Posted
ok @Bodule. i apologize if i caused any issue. -

By Bodule · Posted
Hi @DarthCranium Can I suggest that you ask your question in the 3D Printer Discussions section of the forum please? https://www.projectdalek.com/index.php?/forum/209-3d-printer-discussions/ That section itself may be worth a read through, as is @ChristmasDalek's post above yours 👆 here as it may provide additional useful information on how to use the forum. -
By DarthCranium · Posted
What is a good size of 3D printer youd recommend if i wanted to make a dalek of my own? please let me know when able. Thanks -
By Dalek-Nik · Posted
Moflash lenses appear to be slightly difficult these days. the best bet in my opinion is 3D printing them. there are many accurate models here that can be printed on any FDM printer you can find. there is a chance that you can find the lenses online to buy, but those sites can be slightly sketchy. depending on the filament you buy and the printer you have/find, they can be produced fairly accurately. filament can come as cheap as 17 dollars, but do keep in mind that they can some
-
-
Highest Rated Submitters
No ratings this week.
No ratings this month.
-
1
-
2

-
3

-
4
-
5

-
1
-
2

-
3
-
4

-
5
-
-
Current Donation Goals
-
Finance the Forum Hosting 2024Raised £113
-
-
Top Templates
-
Free
-

Free
-

Free
-

Free
-

Free
-