-
Registration
Please register an account to access the Forum topics and features.
An Active Membership subscription gives you access to extra features and exclusive content!
Choosing Active Membership is a great way of supporting the community and showing your appreciation for our resources.
Please note that you need to register BEFORE you can use Facebook, Twitter or Google as a sign in method.
Files For 3D Printing
Files that can be used to for 3D printing physical versions, using your own printer or a service such as Shapeways etc.
Note that files for CNC and laser cutting can be found in their own sub-section, inside.
247 files
-

Free
NSD 2005 Big slat template
By ramsesvp
A template I am using for creating the right distance for the slats of my NSD Dalek
41 downloads
(0 reviews)0 comments
Updated
-
Free
Imperial Dalek & Emperor Dome Lights
By Luke S
So It Was a Simple Design and I was Bored last Night as I couldn't sleep after I was brainstorming how I would be My Mk1. So Here the Imperial Daleks And Emperor Dome Lights. It's In separate pieces, Hollow, and Able to fit on a minimal 233mm by 233mm print space. The Gray Disc(As it Look in the Pictures above) are really clear Perspex disc, so you could use that instead of what Is in the print. IF YOU USE THE GRAY DISC THEN PRINT USING A TRANSLUCENT OR CLEAR FILAMENT!The Hole In the Gray Disc is 20mm by 20mm hole, just as a middle point to help you. You can make it larger for the light.
Print Settings
Printer brand:
Creality
Supports:
Yes
Resolution:
0.1mm
Printer:
Ender 3
Infill:
20%
Filament_brand:
Filament_color:
translucent white, brown
Filament_material:
PLA
25 downloads
(0 reviews)0 comments
Updated
-
Free
Necros/Renegade BASE (only) For Dome Lights
By Luke S
Took a long time and labor... just to get the slits in the bottom part. I used the Plans from the Necros and Renegade Daleks. Some Sanding may be needed after printing. It would be best for you to make a cast of the light part, and when you get those cast maybe you could sell them in the Sec shope for others 🤔
These Lights work perfectly for the Renegade Supreme, but you will need a band around the bottom.
Print Settings
Printer brand:
Creality
Supports:
Yes
Resolution:
0.1mm
Printer:
Ender 3
Infill:
100%
Filament_brand:
Filament_color:
Translucent white, Black
Filament_material:
PLA
59 downloads
-

Free
Dalek Destiny Bomb
By Luke S
I just finished making my other 3d print of the Dalek Destiny Bomb. I notice people were looking what the bombs were, but could not find what it was, So i decide to make this. The Yellow band Is Not in the File! You should use yellow paper like the prop did!
If you find that its measurements should be changed then tell me and I will update them.
IF You have Downloaded any of my Prints please Pm if I have added or edited it, so i can send you the newest copy.
Unauthorized sales and distribution, in any format, is strictly prohibited.
Print Settings
Printer brand:
Creality
Supports:
Yes
Resolution:
0.1mm
Printer:
Ender 3
Infill:
100%
Filament_brand:
Filament_color:
red
Filament_material:
PLA
37 downloads
-
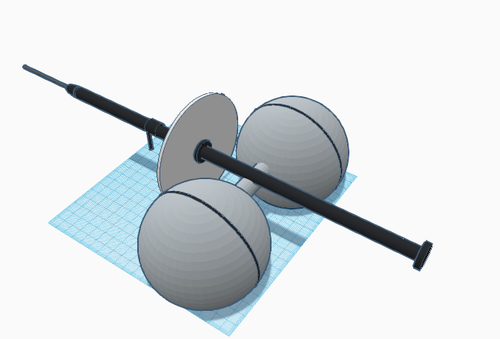
Free
Mk1 Gun Rods
By Luke S
So here my version of a mk1 gun rod, kinda like a clear acrylic one. You can print it colored or clear filler. The Rings, Rods, Octagons are separate pieces, so you can put it together easily and with the octagons not with it and giving you a hard time trying to paint it. The Gun Cylinder has pre cut holes for the rods to fit in.
Print Settings
Printer brand:
Creality
Supports:
Yes
Resolution:
0.1mm
Printer:
Ender 3
Infill:
100%
Filament_brand:
Filament_color:
white, Black, gray
Filament_material:
PLA
180 downloads
(0 reviews)0 comments
Updated
-
Free
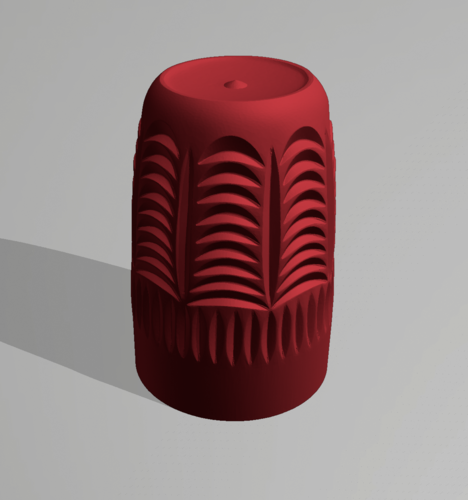
Classic Dalek Appendages Cutting Torch Kit
By Luke S
A Zip File of the whole items is in the download to save up download room.
The 10mm tube is 350mm long.
I Made the Cutting Torch From the First Dalek Story when they cut the door down. This come with everything besides the 10mm tube and bendy tube. The Tube in the Screen Shots are just to show you what it looks like. Also The Colors in the screenshot are what you could spray paint it, besides the yellow tube, spray that black.
IF You have Downloaded any of my Prints please Pm if I have added or edited it, so i can send you the newest copy.
Unauthorized sales and distribution, in any format, is strictly prohibited.
Print Settings
Printer brand:
Creality
Supports:
Yes
Resolution:
0.1mm
Printer:
Ender 3
Infill:
100%
Filament_brand:
Filament_color:
white, Black
Filament_material:
PLA
63 downloads
(0 reviews)0 comments
Updated
-

Free
Classic Dalek Appendage Electrode Unit
By Luke S
A Zip File of the whole items is in the download to save up download room.
I Made the Electrode Unit from The Chase. Noting really about this model but that you will need to make the coil around the prongs and they are blue just to let you know and that this may need to be split into parts. if anyone want to link the split up one in the comments go ahead. You may just want to build this when 3d printing is stronger. This in my opinion is the worst looking appendages I have made
IF You have Downloaded any of my Prints please Pm if I have added or edited it, so i can send you the newest copy.
Unauthorized sales and distribution, in any format, is strictly prohibited.
Print Settings
Printer brand:
Creality
Printer:
Ender 3
Infill:
100%
Filament_brand:
Filament_color:
white, Black
Filament_material:
PLA
43 downloads
(0 reviews)0 comments
Updated
-
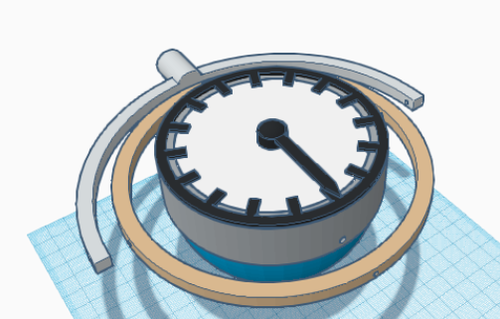
Free
Classic Dalek Appendage Seismic Detector
By Luke S
A Zip File of the whole items is in the download to save up download room.
There are 7 parts, the Bottom Half, numbers, the top, white band, outer gyro ring, inner gyro ring, and Diel. There are already to holes in the print for the dial thingy that spins and the rods that connect to the gyro. The holes for the rods in the print are 4 mm in diameter. US Also You may need to add washers around the pins to stop the rings from sliding off. Thanks to @James O and @Dave'O for there estimated gused blueprints.
IF You have Downloaded any of my Prints please Pm if I have added or edited it, so i can send you the newest copy.
Unauthorized sales and distribution, in any format, is strictly prohibited.
Print Settings
Printer brand:
Creality
Printer:
Ender 3
Infill:
100%
Filament_brand:
Filament_color:
white, Black
Filament_material:
PLA
107 downloads
-
Free
MK1/2/3 Movie1/2 EyeDisc & Tube Set
By Luke S
I used the Plans to make these. It Fits with my Dalek eyestalk set. You may want to use clear filling for the tube. You may want to break it apart if you have a small printer.
159 downloads
(0 reviews)0 comments
Updated
-

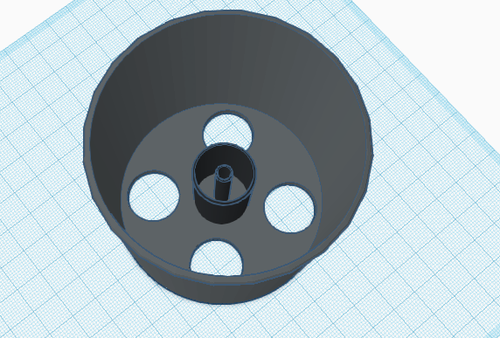
Free
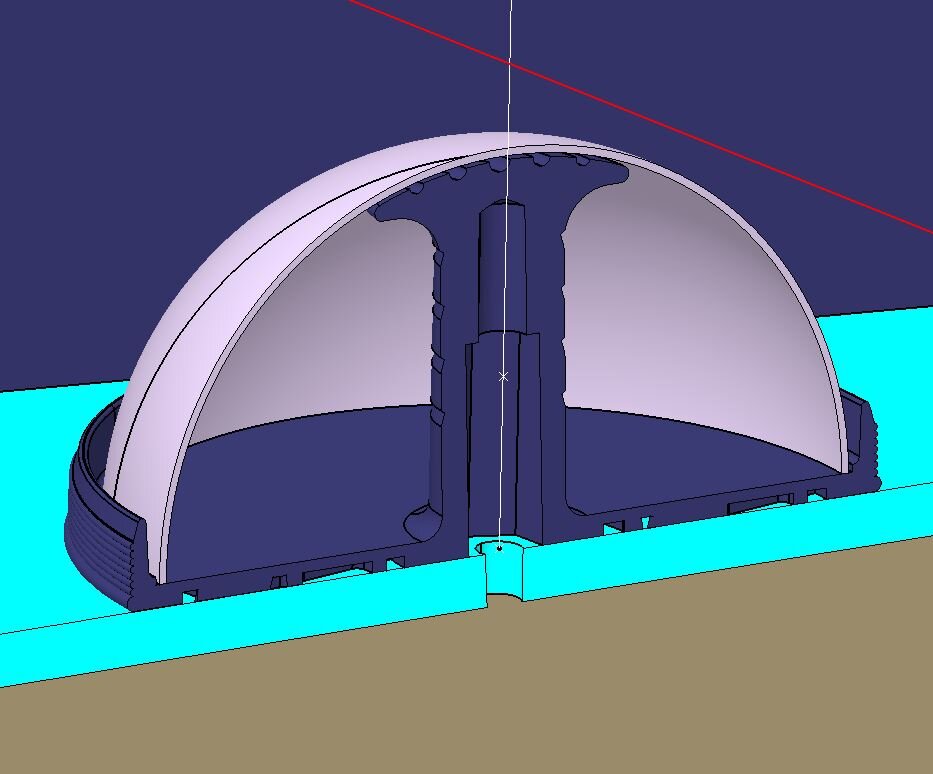
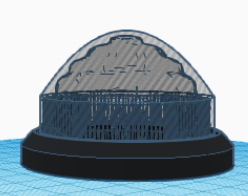
Servo Iris Assembly
By trickster
UPDATE: I noticed lots of people are downloading the model files one at a time. It's much easier to download the complete package and avoid the download limits. Here's the zip: ServoIris.zip
UPDATE: There are pictures illustrating the assembly process in my build diary. Note that there are two iris versions in the diary. This is the second one.
This is a complete set of 3d objects to create a micro servo driven iris insert. It is designed to fit into this eye with a little bit of sanding and work with this servo and this LED disk. All parts have the proper clearances based on my printer using .2mm layers. Some of these are pretty close to the wire and you might have to fiddle a bit. I printed everything but the LensPlate using white ABS and painted various surfaces black. The LensPlate is translucent blue ABS with an acetone vapor bath. The leafs and SlotRing were lightly sanded smooth.
Objects included (bottom up):
Casing SlotRing peg (6 required) leaf (6 required, note the stl file is flagged as broken and can't be repaired, but it prints ok. Don't use a raft.) LensPlate (print using translucent filament) [LED disk] LockRing (orients with tabs at the top) DualSlotLEDPlate (LED disk attaches to this) ServoArm (servo horn fits inside) [servo horn] ServoArmCover ServoMountRing ServoStandoff (2 required) ServoMount [servo] ServoMountCap
Check out my build diary for pictures illustrating assembly described below. Note that there are two iris versions in the diary. This is the second one.
Assemble the Bottom Iris Section
Assemble the slot ring into the casing. Spray the front and inner lip flat black.
You will need to print 6 each of the leafs and pegs. Then assemble each peg and leaf so that the peg sticks out the opposite side from the post on the leaf. Give them a light sanding to get them smooth. Now paint them flat black and sand smooth again. Leaf assemblies orient with the offset post (the one printed as part of the leaf) down. You have to get all 6 properly nested.
The LensPlate is printed with blue translucent filament and acetone vapor bath smoothed out. Orienting this piece is the tricky part. You will probably have to spin it a few times to figure out which way works. LockRing goes on top of the LensPlate and fits the slots of the casing. You have to clear out the tiny support thingies on the casing btw. Orient the LockRing with the tabs on top.
The LED disk has 4 holes punched in it. Find the pair that fits the DualSlotLEDPlate and press it on with the wires through the hole. Then add the plate to the stack with the LED facing down. The posts on the LensPlate should be at one end of the slots and should move within the slots to open and close the iris. If this is not the case, try disassembling and rotating the LensPlate one step around the leafs until you find the way that works.
At this point you should be able to operate the iris by hand. This is a good time to sand the outside of the casing and inside of the eye front until they fit together properly.
Assemble the Top Servo Section
I used the micro servo with feedback from Adafruit. Eventually I plan to use the feedback wire to know the servo's current position. I believe the non-feedback micro server is slightly different and probably won't fit this mount. You could use a different servo but would have to adapt the ServoMount and ServoMountCap. Trap the servo between the ServoMount and ServoMountCap so that the servo shaft is in the center of the mount. The pieces should fit together snugly.
The servo comes with several horns. Find the one that matches the hollow in the ServoArm. Trap the horn between the ServoArm and ServoArmCap and snap the pieces together. It only fits one way.
Rotate the servo shaft by hand to determine the limits and set it to the center of its range. Attach the arm assembly to the shaft so it is at a right angle to the servo mount and secure it with the screw.
Assemble the servo assembly, two ServoStandoffs, and the ServoMount Ring. If the standoff pegs are too tight, lightly ream out the holes.
Final Assembly
Operate the iris by hand so it is at the halfway point. Attach the servo assembly to the iris. Everything should be properly oriented and the servo assembly should fit snugly on the casing. Make sure all the tabs are lined up. Try operating the servo arm by hand and verify the iris opens and closes. It will not close 100% and will probably not reach the limit on the slots.
Now you have to connect it all up. I used an RJ45 socket and ethernet cable connected to a Raspberry Pi with Adafruit servo/PWM and PifaceRelayPlus HATs. Here's the software. You will have to experiment with the servo to determine what relay and PWM values to use.
Here's the zipped objects: ServoIris.zip
504 downloads
-
Free
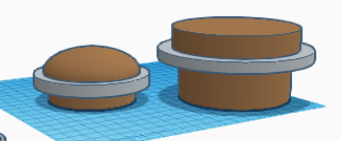
MK1 Dalek Hemis
By Luke S
I Just made this for people who want a rim around there hemis to fit in the skirt perfect. Its Hollow in the Inside to save some of your print. IF you Don't have a Printer In America You can use this site to print it https://www.sculpteo.com/en/upload/
47 downloads
(0 reviews)0 comments
Updated
-
Free
Movie Dalek Domelight Beaker 3D Scan
By audrey2
This is a 3D scan I took off an original beaker from the 60s. The file was then cleaned up, and an interior shape was cut to reasonably match the original.
Can be used to 3D print or carve.
171 downloads
(2 reviews)0 comments
Updated
-
Free
Classic Dalek Appendage Flame thrower
By Luke S
Here is My Second Classic Appendage Model. This is the Flame Thrower seen from Daleks Master Plan. There nothing really other to say is to spray paint the inside black and the other side gray? Like How @moviedalek did his. the way to attach this to your is by glue it or adding a wooden circle behind it then screw it in.
Unauthorized sales and distribution, in any format, is strictly prohibited.
21 downloads
(0 reviews)0 comments
Updated
-
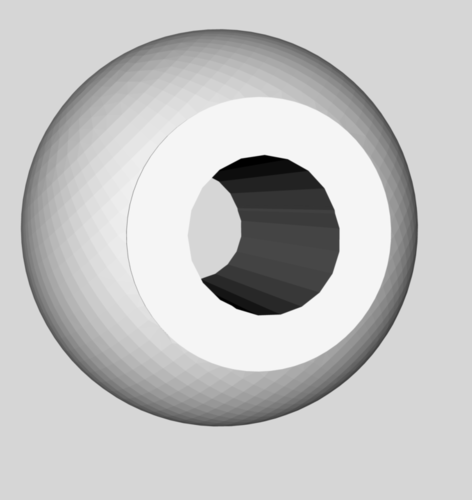
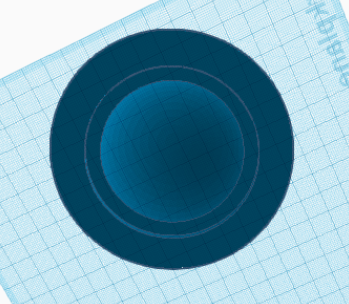
Free
NSD sphere for gun or plunger
By Mr zen
NSD gun / plunger barrel sphere the hole can be altered to suit the diameter of the tube your are using for your build. when fitted i used felt to stop any friction when in place
113 downloads
-

Free
(0 reviews)0 comments
Submitted
-

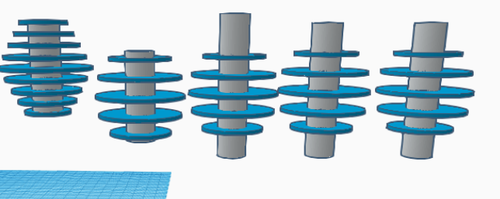
Free
NSD EyeStalk Disks
By Luke S
Here's my way of giving back to Project Dalek. There are 3 disk in the Set, each different sizes. Each are scaled from the Plans. This is my First 3d Printed Model, If this goes well i might make some more 3d prints. When I made these there is a flat bottom to them so, you may want to cast them in fiberglass molds or something. to make them hollow/curved in the inside. I wish you the best of luck of building your Dalek!
211 downloads
(0 reviews)0 comments
Updated
-
Free
Movie Dalek Claw
By Aaron J Climas
Here's a quick STL of half the claw that should be 1:1 scale, with an 8mm hole at one end.
43 downloads
(0 reviews)0 comments
Submitted
-
Free
NSD Eye EMA Parts
By Chris Moliere
These are 3d models of the individual pieces of the NSD's eyeball. They were created using the CAD files in our downloads sections. Do to the small size of some the parts, I would recommend SLA or other forms of resin 3d printing. I also made a version of the VT-400 with the MRH-160Ps attached, in case the parts are too small to print individually. Enjoy!
55 downloads
(0 reviews)0 comments
Submitted
-

Free
SWD Gun Parts
By bryanxiii
.STL files for a Special Weapons Dalek based on some blue prints I found on this site, you will also have to slice the file for your printer,
These were made using tinkercad, please also note that the centre whole on the barrel is set to 50mm or around 1 1/2", the plan calls for a central pipe of 1 3/4", I however was unable to source an pipe in that size so I sized down.
65 downloads
(0 reviews)0 comments
Updated
-
Free
Movie Beaker (Updated)
By WhosWho
Here's my model of a Movie Dalek Beaker. I hope this helps any who don't have an original to take molds from.
196 downloads
-
Free
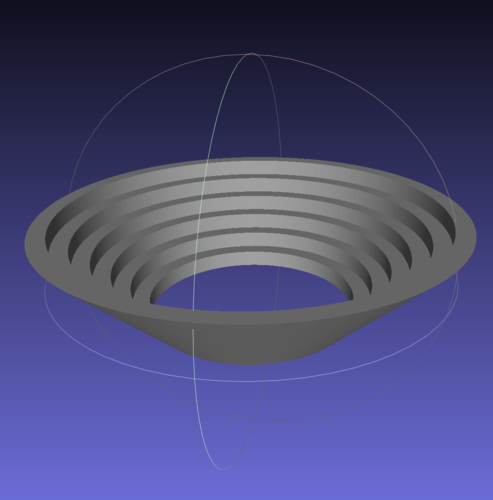
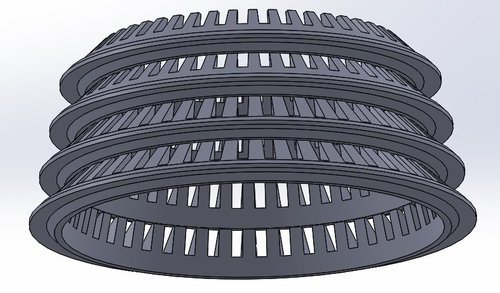
TDP Neck Rings - Corrected Files
By MechDesign
Although these may have been posted before I've designed these with internal coring that ends up with just over 55% less material.
The "base" pieces are the solid rings underneath each level of the structure, Ring1 is on the bottom.
8 pieces of each will need to be printed. The longest dimension is a tad over 8.5 inches so this can be done with larger format printers.
If you have the capability to manipulate the imported STL files I suppose you could cut them in half and print them on a smaller frame printer.
Nigel was able to print a 2 rib partial piece of Ring1 so I'm going under the assumption that he can print a full sized set. In fact he will be doing this set for his new dalek this next year.
44 downloads
-
Free
3d printable NDP Shoulders
By Chris Moliere
Here it is! This thing took an eternity to design, and would have taken much longer if the Loft tool didn't exist. There are 66 bodies in this, which I might need to rename soon, but I think their size will help with their placement. Enjoy!
179 downloads
-
Free
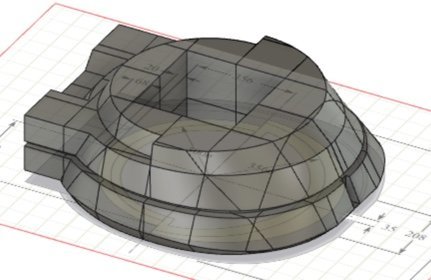
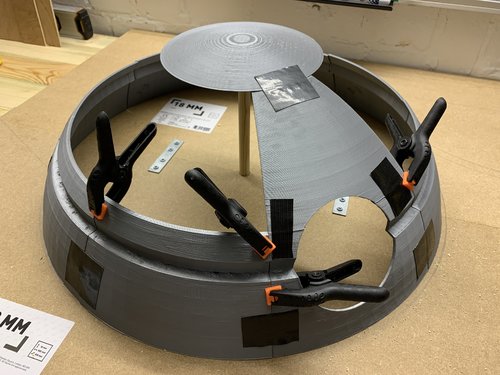
TDP Dome - Whole STL, Plus Meshmixer Cut STL Files
By TimW
I drafted a TDP dome based on the plans from the forum using Fusion 360, diameter 500mm, height 190mm, arc radius 260mm. I used the revolve function from a sketch to get the dome shape then punched a hole in it where the eye is to go. I split up the dome STL into about 17 pieces (the number varied with on various attempts) using Meshmixer (top tip use plane cut with Cut Type - slice and Fill Type - remeshed fill.
66 downloads
(0 reviews)0 comments
Submitted
-
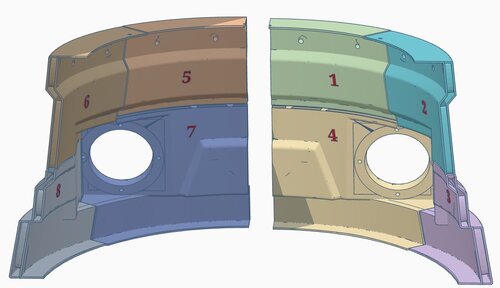
Free
3d Printable Shawcraft Skirt
By Chris Moliere
I scaled this model for my Prusa Mini, in order to print all the parts for it. I designed this to use for making a fiberglass mold, but with some modification, it might be able to be actually be used on a prop. However, if you decide to do so, you would most likely need to print the parts with 100% infill for push-through hemis. Enjoy!
492 downloads
(0 reviews)0 comments
Submitted
-
Free
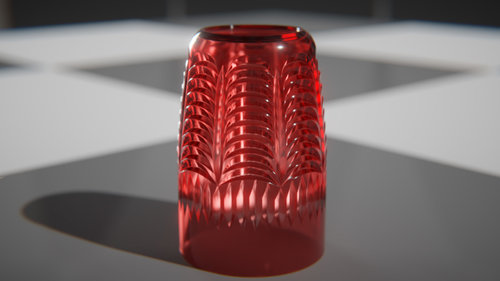
Heronrib Panels
By WhosWho
3D printable panels based on Heronrib matting for use in NSD neck bins. Includes two different versions with different gap alignments.
148 downloads
(0 reviews)0 comments
Submitted
-
Top Downloads
Week
-
Free
-
Free
-
Free
-
Free
-

Free
Month
-
Free
-
Free
-
Free
-
Free
-

Free
Year
-
Free
-
Free
-
Free
-
Free
-

Free
All Time
-
Free
-
Free
-
Free
-

Free
-
Free
-
-
Recent File Reviews
-

Michael56 2
I'm in my late 60's. I live in Australia and have always enjoyed Doctor Who from the very first episode aired here around 1965 when I was 9 years old. Thought how amazing it would be to have a Dalek but had no idea how or where to even begin UNTIL I came across this site. Thanks for giving me the opportunity to at least be able to start on a Dalek build and will detail my progress as it goes along.
-
Mark Sheriff 6
Excellent , looks great and very well designed , well thought out . thank you
-
Marc Harris 46
I'm in my 50s and have since I was a boy watching Dr Who in the 70s always dreamed of making a Dalek for fun, now I have the time and resources, along with your forum's help it's time to live that dream.
I have watched some of the members videos, and I am very impressed with what I have seen.
Long live the Who verse.
I will document my progress and share any innovations I make
-
Chris R 25
Great set of models that printed and fitted together really easily. Can't comment on accuracy as I'm no expert but very happy with the result
-
Dalek Hal 312
Great file, easy to print
-
doctorone 3
Great plan but the pivot does not print as it is not complete like the eye stalk
-


-
Download Statistics
-
Recent File Comments
-
By life size · Posted
I printed mine in PTEG, 235 nozzle, 60 Bed , no supports and it printed with no mess at all. I ran it at a 40 percent print speed, and the orientation was large cup facing down on my print. -

By John · Posted
See this FAQ topic for more on Downloads availability: -
By ChristmasDalek · Posted
Welcome to the forum! Sorry you have encountered a problem... While waiting for someone who knows more about the downloads section than I do to answer, you may find the explanation in @Johns answer to this thread: Be well, Kathy -
By tardis112 · Posted
Why am I not permitted to download this? -

By Mark Casto · Posted
This is such a useful file for the eye it is perfect for adding a fish tank led inside and looks great thank you. -
By DarthCranium · Posted
ok @Bodule. i apologize if i caused any issue. -
By Bodule · Posted
Hi @DarthCranium Can I suggest that you ask your question in the 3D Printer Discussions section of the forum please? https://www.projectdalek.com/index.php?/forum/209-3d-printer-discussions/ That section itself may be worth a read through, as is @ChristmasDalek's post above yours 👆 here as it may provide additional useful information on how to use the forum. -
By DarthCranium · Posted
What is a good size of 3D printer youd recommend if i wanted to make a dalek of my own? please let me know when able. Thanks -
By Dalek-Nik · Posted
Moflash lenses appear to be slightly difficult these days. the best bet in my opinion is 3D printing them. there are many accurate models here that can be printed on any FDM printer you can find. there is a chance that you can find the lenses online to buy, but those sites can be slightly sketchy. depending on the filament you buy and the printer you have/find, they can be produced fairly accurately. filament can come as cheap as 17 dollars, but do keep in mind that they can some -
By Chris R · Posted
Thanks for uploading these files. Printed really nicely with the odds and sods of filament I had around and very pleased with it, haven't done any tidying up or painting but it looks great as-is.
-
-
Highest Rated Submitters
No ratings this week.
No ratings this month.
-
1
-
2

-
3

-
4
-
5

-
1
-
2

-
3
-
4

-
5
-
-
Current Donation Goals
-
Finance the Forum Hosting 2024Raised 100.00 GBP
-
-
Top Templates
-
Free
-

Free
-
Free
-

Free
-
Free
-