-
Registration
Please register an account to access the Forum topics and features.
An Active Membership subscription gives you access to extra features and exclusive content!
Choosing Active Membership is a great way of supporting the community and showing your appreciation for our resources.
Please note that you need to register BEFORE you can use Facebook, Twitter or Google as a sign in method.
Files For 3D Printing
Files that can be used to for 3D printing physical versions, using your own printer or a service such as Shapeways etc.
Note that files for CNC and laser cutting can be found in their own sub-section, inside.
247 files
-
Free
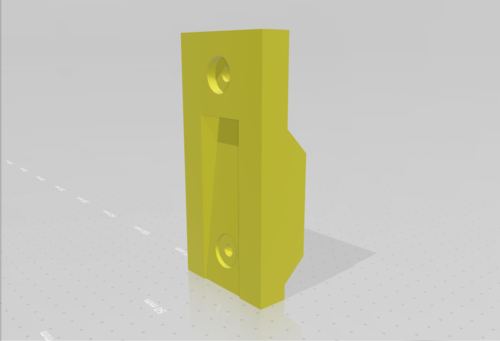
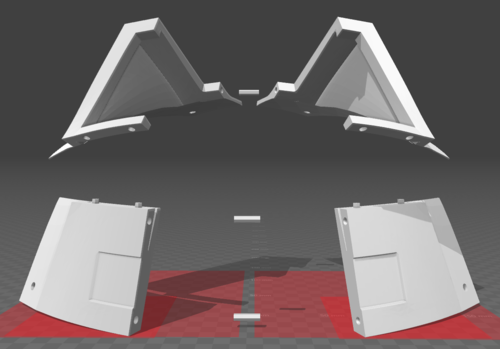
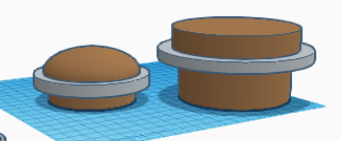
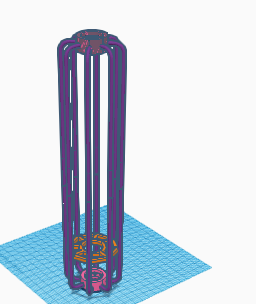
Davros-Plate, LH.stl
By jaguwa68
Base plate for my Bleach Davros air vent on the LH side of the console. Forms part of an assembly (to be used with vent centre dome and the upper and lower rings)
Davros-Plate, LH.stl Davros-Vent, Ring Upper.stl Davros-Vent, Ring.stl Davros-Vent, Centre.stl
11 downloads
(0 reviews)0 comments
Submitted
-
Free
NSD centered oil seal
By beeweasd
i found one similar to this but it was slightly to big, so i made one with the correct dimensions.
171 downloads
-
Free
NSD Cowl
By Macropod80
This is the most accurate-looking I could get going by the dimensions in the official plans back in 2017 (which don't seem to me to quite work exactly as specified?) Fits fine on my Dalek Kevin's dome (bumpy as it is). Of course my version of 'exactly according to the plans' may well differ from your version of 'exactly according to the plans', but that's Dalek-building for you...
This has been around for a while so I know at least one other builder in the world has used it successfully.
I printed in PLA for toughness and lack of distortion, at 0.2mm layer height. Just barely squeezes into an UpBox+.
186 downloads
-
Free
NSD Gunbox Detail
By Macropod80
I've done this in two layers to make the flat faces easier to sand (before sticking them together). I had trouble getting them to stay flat while printing, so ended up having to print them in halves to prevent lifting. I'd recommend painting them on both sides before screwing them on, to ensure they don't start curling up at the corners as time passes. I've noticed that's happened to some of the BBC Daleks.
306 downloads
(1 review)0 comments
Submitted
-
Free
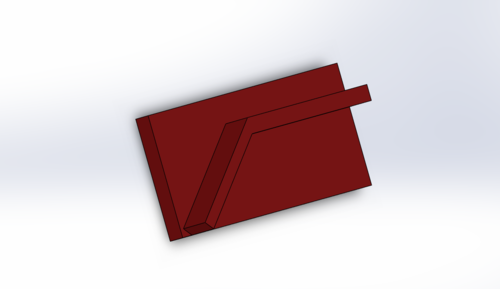
Former - NSD gun rods
By ddoherty958
A former for the NSD gun bars. To use it after printing, I marked out the place that needed the angle (25mm from end) and used a hammer on the edge of a table to slowly bend them. I use the former to check I'm correct. The slanted side is 25mm long too, so extra help!
I might redesign it to make it easier to use.
43 downloads
(0 reviews)0 comments
Submitted
-
Free
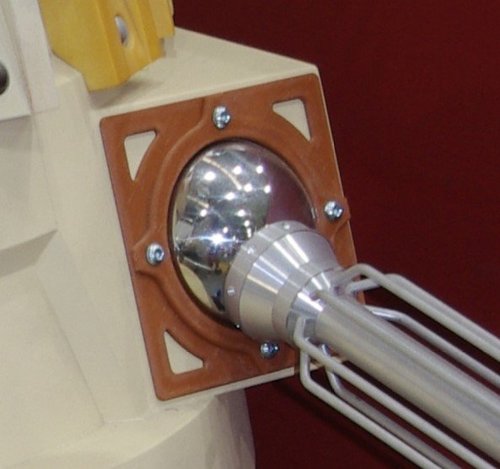
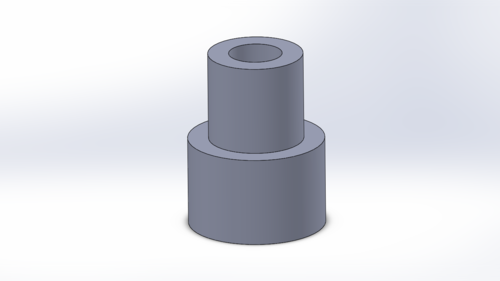
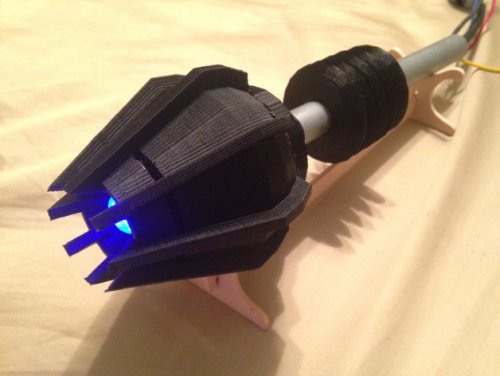
Eyestalk to Eye adapter (25mm pipe to printed NSD eye)
By ddoherty958
I made this to allow my printed eye to attach to my 25mm pipe. There's a hole in the center to allow wires from the bulb pass through.
Short side diam: 16mm
Long side diam: 25mm
15mm height on each side.
45 downloads
(0 reviews)0 comments
Updated
-
Free
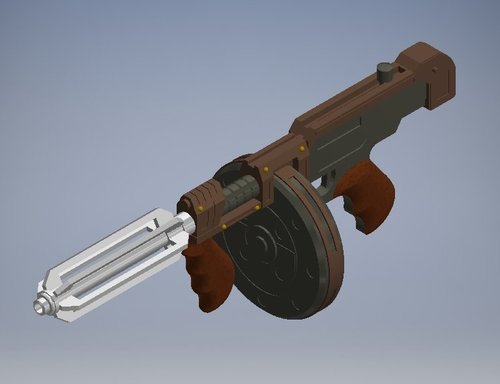
Dalek Thompson Submachine Gun
By Peekaymac
I drew these up so that my spotter could easily be in costume as a recognizable character that wasn't restrictive or limited movement. Basically they just need to wear 1930's style clothing and carry the Thompson and it's done. Oddly I didn't 3D print my own version - it was made by hand but I subsequently made these files for others to use.
You'll need:
6x Barrel Tines
2x Magazine Side 1
I have each of the magazine faces mirrored on my model but I can't remember why now.
1x each of everything else
I allowed 1.75mm pin holes for joining all the parts together.
Any questions please ask.
983 downloads
-
Free
2005 Slats
By ddoherty958
These are the 2005 full size slats. I had some difficult with the rear of the wide slat, It may need sanding to get a good fit. I may upload a second version once I get it on my NSD.
Enjoy!
300 downloads
(0 reviews)0 comments
Updated
-
Free
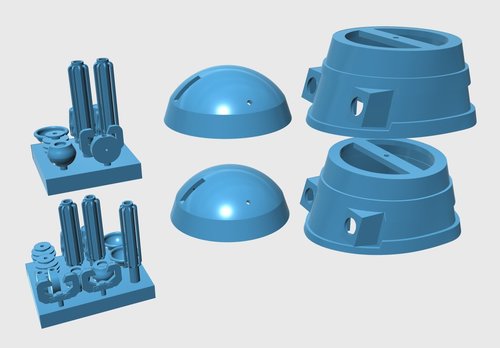
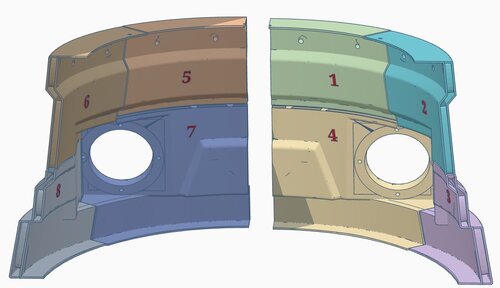
NSD 3D Print Components
By tlmxcpmpp
File contains various New Series Dalek components for 3D printing, including...
Claw Cowl Dome Dome Turntable Eye Gun components. Hemisphere Neck Rings Slats
Photo shows Dalek built using these components (along with traditional build methods).
440 downloads
-
Free
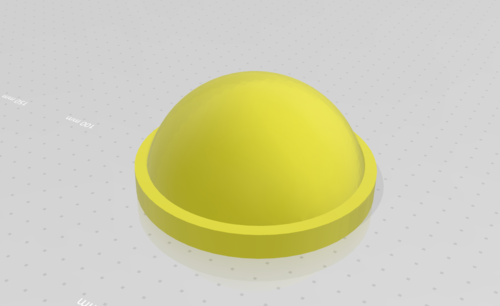
2005 Hemispheres
By ddoherty958
I wanted to give something back to PDF, so here are my NSD (2005) Hemis. I used the early dimensions because it'll use less filament, but it's only a 2mm difference.
64 downloads
(0 reviews)0 comments
Submitted
-
Free
comet_dalek.zip
By tobor2288
The dome on the comet kit is not very accurate. Here are replacment domes, as well as mid sections and appendages.
There are TV and Movie domes. One of the mid sections is designed for slats, the other without. There are appendages for the movie daleks only.
These files are not really designed for home FDM printers. If you have a SLA resin printer, they should work.
I got the parts printed by Shapeways and I.Materialise in various materials.
Note: The comet daleks are not 8th scale as stated on the box. They are about 92% of 8th scale.
These files also work for the Product Enterprise Infra red movie daleks, which are the same scale. There are two of them in the attached pictures.
91 downloads
(1 review)0 comments
Updated
-
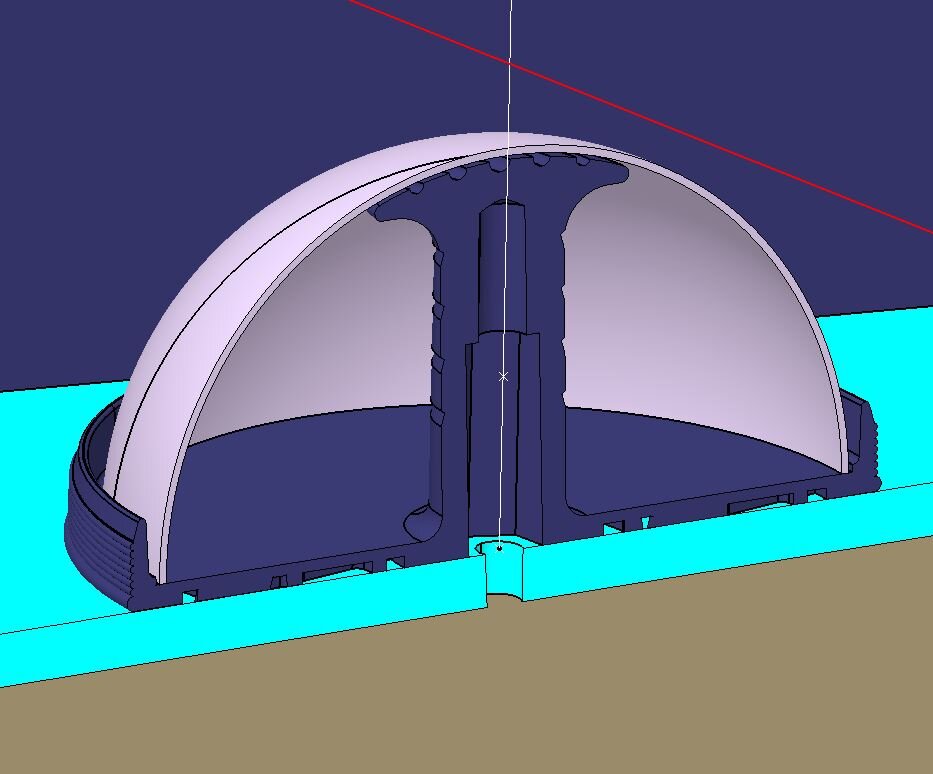
Free
NSD Cowl
By trickster
Here is a set of models for creating an NSD cowl. Jbourd was kind enough to gift me with a 3d model of a complete Dalek dome and cruel enough to ask if I could separate out the cowl. It took a while but I managed to remove the dome and leave the cowl intact. Of course it is far to big to fit on my build platform. So I tried cutting it in half vertically. Each piece could only fit my build space in a few orientations. And due to the size and nature of the parts, they all warped beyond use. I wasted nearly a kg of filament on failed attempts. I decided to split it into quarters. This allowed for smaller parts which would fit flat and any warp would be to the thickness. Thought I had it nailed, but the thickness was warped enough so that the towards the back of the cowl the opening was too small to fit the eyestalk pivot. So I added a shim to compensate.
I have been using 3d Builder which is included with Windows 10. It has issues. For whatever reason I was able to separate out and save three out of four quarter pieces but the fourth would not save no matter what I did. So instead I used Replicator to mirror the pieces along the X-axis. That is why only right side parts are included. You have to use your build software to mirror them for the left side parts.
I've included the full cowl model in case you want to slice and dice it on your own. I've included the shim I used and a long peg to use with it. I suggest building out the four main parts and see if you need it.
Also the bottom parts had an issue with one corner pulling loose from the build plate and warping the holes. So I put a throw away block next to that corner to hold it down.
I printed everything at 10% fill .2mm thickness. Use full support and raft for the main pieces but not pegs and shim.
One thing I did not expect but really like is that in producing the curves, the printer leaves a pattern which is similar to wood grain. This is another reason why I included parts for only one side. By mirroring the parts the grain pattern is symmetrical.
Here's some pics. You can see the grain effect.
.
328 downloads
-
Free
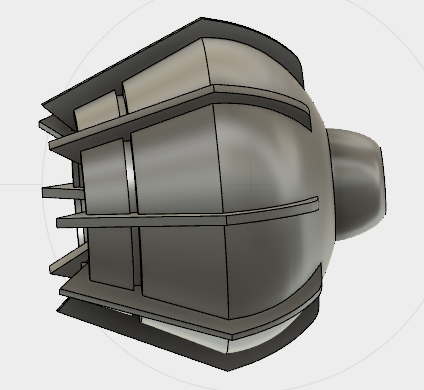
TDP Eyestalk
By cdngoose
This file was produced by Mr_Tesla, and can also be found on Thingverse. He has included the rights for anyone to use this file in any manner they deem fit. I have used this as a possible replacement for dreadnaughts eye and also as a display booth piece acting as a Dalek Periscope as seen on Asylum of the Daleks
185 downloads
-
Free
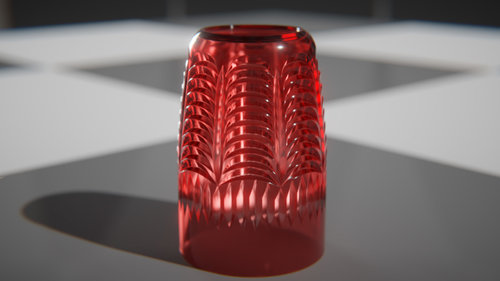
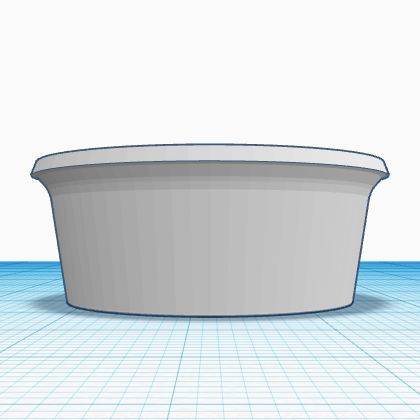
Movie Beaker (Updated)
By WhosWho
Here's my model of a Movie Dalek Beaker. I hope this helps any who don't have an original to take molds from.
196 downloads
-

Free
NSD 2005 Big slat template
By ramsesvp
A template I am using for creating the right distance for the slats of my NSD Dalek
41 downloads
(0 reviews)0 comments
Updated
-
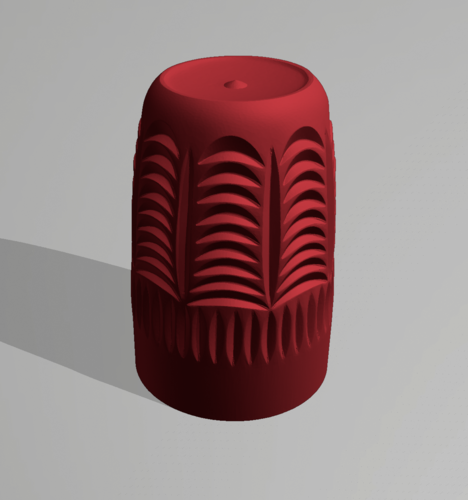
Free
NDP Eye
By threegringos
Here are the eye model files that I created for Orin - my NDP dalek build. All measurements were taken directly from the PDF plans.
You need to print one Front, one Rear, and eight Fins for the eye, and five Rings for the eye-stalk. I printed everything using 1.5mm wall thickness and 15% fill.
Everything was assembled with friction fit. No glue or screws. The fins fit tightly into the body of the eye and hold everything together.
When assembling, I started by inserting the rear of all the fins into the rearmost point of the eye body, then folded them inward one at a time. This works nicely because you can easily access any electronics that you install into the eye. Just open out the fins from the front until the eye front drops out.
244 downloads
-

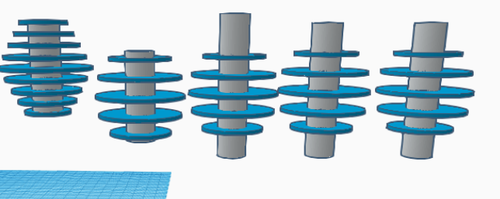
Free
Servo Iris Assembly
By trickster
UPDATE: I noticed lots of people are downloading the model files one at a time. It's much easier to download the complete package and avoid the download limits. Here's the zip: ServoIris.zip
UPDATE: There are pictures illustrating the assembly process in my build diary. Note that there are two iris versions in the diary. This is the second one.
This is a complete set of 3d objects to create a micro servo driven iris insert. It is designed to fit into this eye with a little bit of sanding and work with this servo and this LED disk. All parts have the proper clearances based on my printer using .2mm layers. Some of these are pretty close to the wire and you might have to fiddle a bit. I printed everything but the LensPlate using white ABS and painted various surfaces black. The LensPlate is translucent blue ABS with an acetone vapor bath. The leafs and SlotRing were lightly sanded smooth.
Objects included (bottom up):
Casing SlotRing peg (6 required) leaf (6 required, note the stl file is flagged as broken and can't be repaired, but it prints ok. Don't use a raft.) LensPlate (print using translucent filament) [LED disk] LockRing (orients with tabs at the top) DualSlotLEDPlate (LED disk attaches to this) ServoArm (servo horn fits inside) [servo horn] ServoArmCover ServoMountRing ServoStandoff (2 required) ServoMount [servo] ServoMountCap
Check out my build diary for pictures illustrating assembly described below. Note that there are two iris versions in the diary. This is the second one.
Assemble the Bottom Iris Section
Assemble the slot ring into the casing. Spray the front and inner lip flat black.
You will need to print 6 each of the leafs and pegs. Then assemble each peg and leaf so that the peg sticks out the opposite side from the post on the leaf. Give them a light sanding to get them smooth. Now paint them flat black and sand smooth again. Leaf assemblies orient with the offset post (the one printed as part of the leaf) down. You have to get all 6 properly nested.
The LensPlate is printed with blue translucent filament and acetone vapor bath smoothed out. Orienting this piece is the tricky part. You will probably have to spin it a few times to figure out which way works. LockRing goes on top of the LensPlate and fits the slots of the casing. You have to clear out the tiny support thingies on the casing btw. Orient the LockRing with the tabs on top.
The LED disk has 4 holes punched in it. Find the pair that fits the DualSlotLEDPlate and press it on with the wires through the hole. Then add the plate to the stack with the LED facing down. The posts on the LensPlate should be at one end of the slots and should move within the slots to open and close the iris. If this is not the case, try disassembling and rotating the LensPlate one step around the leafs until you find the way that works.
At this point you should be able to operate the iris by hand. This is a good time to sand the outside of the casing and inside of the eye front until they fit together properly.
Assemble the Top Servo Section
I used the micro servo with feedback from Adafruit. Eventually I plan to use the feedback wire to know the servo's current position. I believe the non-feedback micro server is slightly different and probably won't fit this mount. You could use a different servo but would have to adapt the ServoMount and ServoMountCap. Trap the servo between the ServoMount and ServoMountCap so that the servo shaft is in the center of the mount. The pieces should fit together snugly.
The servo comes with several horns. Find the one that matches the hollow in the ServoArm. Trap the horn between the ServoArm and ServoArmCap and snap the pieces together. It only fits one way.
Rotate the servo shaft by hand to determine the limits and set it to the center of its range. Attach the arm assembly to the shaft so it is at a right angle to the servo mount and secure it with the screw.
Assemble the servo assembly, two ServoStandoffs, and the ServoMount Ring. If the standoff pegs are too tight, lightly ream out the holes.
Final Assembly
Operate the iris by hand so it is at the halfway point. Attach the servo assembly to the iris. Everything should be properly oriented and the servo assembly should fit snugly on the casing. Make sure all the tabs are lined up. Try operating the servo arm by hand and verify the iris opens and closes. It will not close 100% and will probably not reach the limit on the slots.
Now you have to connect it all up. I used an RJ45 socket and ethernet cable connected to a Raspberry Pi with Adafruit servo/PWM and PifaceRelayPlus HATs. Here's the software. You will have to experiment with the servo to determine what relay and PWM values to use.
Here's the zipped objects: ServoIris.zip
504 downloads
-
Free
Imperial Dalek & Emperor Dome Lights
By Luke S
So It Was a Simple Design and I was Bored last Night as I couldn't sleep after I was brainstorming how I would be My Mk1. So Here the Imperial Daleks And Emperor Dome Lights. It's In separate pieces, Hollow, and Able to fit on a minimal 233mm by 233mm print space. The Gray Disc(As it Look in the Pictures above) are really clear Perspex disc, so you could use that instead of what Is in the print. IF YOU USE THE GRAY DISC THEN PRINT USING A TRANSLUCENT OR CLEAR FILAMENT!The Hole In the Gray Disc is 20mm by 20mm hole, just as a middle point to help you. You can make it larger for the light.
Print Settings
Printer brand:
Creality
Supports:
Yes
Resolution:
0.1mm
Printer:
Ender 3
Infill:
20%
Filament_brand:
Filament_color:
translucent white, brown
Filament_material:
PLA
25 downloads
(0 reviews)0 comments
Updated
-

Free
ParadigmGunFiles.zip
By threegringos
Finally, here are the files for my new dalek paradigm gun build.
I've included a text file in the .zip to show which order to assemble the prints, and how many you need of each.
Check out my Dalek Orin build under username @threegringos
87 downloads
-
Free
Movie Dalek Domelight Beaker 3D Scan
By audrey2
This is a 3D scan I took off an original beaker from the 60s. The file was then cleaned up, and an interior shape was cut to reasonably match the original.
Can be used to 3D print or carve.
173 downloads
(2 reviews)0 comments
Updated
-

Free
Dalek Destiny Bomb
By Luke S
I just finished making my other 3d print of the Dalek Destiny Bomb. I notice people were looking what the bombs were, but could not find what it was, So i decide to make this. The Yellow band Is Not in the File! You should use yellow paper like the prop did!
If you find that its measurements should be changed then tell me and I will update them.
IF You have Downloaded any of my Prints please Pm if I have added or edited it, so i can send you the newest copy.
Unauthorized sales and distribution, in any format, is strictly prohibited.
Print Settings
Printer brand:
Creality
Supports:
Yes
Resolution:
0.1mm
Printer:
Ender 3
Infill:
100%
Filament_brand:
Filament_color:
red
Filament_material:
PLA
38 downloads
-
Free
(0 reviews)0 comments
Updated
-
Free
MK1/2/3 Movie1/2 EyeDisc & Tube Set
By Luke S
I used the Plans to make these. It Fits with my Dalek eyestalk set. You may want to use clear filling for the tube. You may want to break it apart if you have a small printer.
159 downloads
(0 reviews)0 comments
Updated
-
Free
Mk1 Gun Rods
By Luke S
So here my version of a mk1 gun rod, kinda like a clear acrylic one. You can print it colored or clear filler. The Rings, Rods, Octagons are separate pieces, so you can put it together easily and with the octagons not with it and giving you a hard time trying to paint it. The Gun Cylinder has pre cut holes for the rods to fit in.
Print Settings
Printer brand:
Creality
Supports:
Yes
Resolution:
0.1mm
Printer:
Ender 3
Infill:
100%
Filament_brand:
Filament_color:
white, Black, gray
Filament_material:
PLA
180 downloads
(0 reviews)0 comments
Updated
-
Free
Classic Dalek Appendages Cutting Torch Kit
By Luke S
A Zip File of the whole items is in the download to save up download room.
The 10mm tube is 350mm long.
I Made the Cutting Torch From the First Dalek Story when they cut the door down. This come with everything besides the 10mm tube and bendy tube. The Tube in the Screen Shots are just to show you what it looks like. Also The Colors in the screenshot are what you could spray paint it, besides the yellow tube, spray that black.
IF You have Downloaded any of my Prints please Pm if I have added or edited it, so i can send you the newest copy.
Unauthorized sales and distribution, in any format, is strictly prohibited.
Print Settings
Printer brand:
Creality
Supports:
Yes
Resolution:
0.1mm
Printer:
Ender 3
Infill:
100%
Filament_brand:
Filament_color:
white, Black
Filament_material:
PLA
63 downloads
(0 reviews)0 comments
Updated
-
Top Downloads
Week
-
Free
-
Free
-

Free
-
Free
-

Free
Month
-
Free
-
Free
-
Free
-
Free
-
Free
Year
-
Free
-
Free
-
Free
-

Free
-
Free
All Time
-
Free
-
Free
-
Free
-

Free
-

Free
-
-
Recent File Reviews
-

Michael56 2
I'm in my late 60's. I live in Australia and have always enjoyed Doctor Who from the very first episode aired here around 1965 when I was 9 years old. Thought how amazing it would be to have a Dalek but had no idea how or where to even begin UNTIL I came across this site. Thanks for giving me the opportunity to at least be able to start on a Dalek build and will detail my progress as it goes along.
-
Mark Sheriff 6
Excellent , looks great and very well designed , well thought out . thank you
-
Marc Harris 54
I'm in my 50s and have since I was a boy watching Dr Who in the 70s always dreamed of making a Dalek for fun, now I have the time and resources, along with your forum's help it's time to live that dream.
I have watched some of the members videos, and I am very impressed with what I have seen.
Long live the Who verse.
I will document my progress and share any innovations I make
-
Chris R 25
Great set of models that printed and fitted together really easily. Can't comment on accuracy as I'm no expert but very happy with the result
-

Dalek Hal 312
Great file, easy to print
-
doctorone 3
Great plan but the pivot does not print as it is not complete like the eye stalk
-


-
Download Statistics
-
Recent File Comments
-

-
By WhosWho · Posted
@RepeatedMemeDid you change something? I haven't touched anything. -
By RepeatedMeme · Posted
@WhosWho @dalekray It's only showing an update because the (written) details were edited. -

-
By life size · Posted
I printed mine in PTEG, 235 nozzle, 60 Bed , no supports and it printed with no mess at all. I ran it at a 40 percent print speed, and the orientation was large cup facing down on my print. -

By John · Posted
See this FAQ topic for more on Downloads availability: -
By ChristmasDalek · Posted
Welcome to the forum! Sorry you have encountered a problem... While waiting for someone who knows more about the downloads section than I do to answer, you may find the explanation in @Johns answer to this thread: Be well, Kathy -
By tardis112 · Posted
Why am I not permitted to download this? -

By Mark Casto · Posted
This is such a useful file for the eye it is perfect for adding a fish tank led inside and looks great thank you. -
By DarthCranium · Posted
ok @Bodule. i apologize if i caused any issue. -

By Bodule · Posted
Hi @DarthCranium Can I suggest that you ask your question in the 3D Printer Discussions section of the forum please? https://www.projectdalek.com/index.php?/forum/209-3d-printer-discussions/ That section itself may be worth a read through, as is @ChristmasDalek's post above yours 👆 here as it may provide additional useful information on how to use the forum. -
By DarthCranium · Posted
What is a good size of 3D printer youd recommend if i wanted to make a dalek of my own? please let me know when able. Thanks -
By Dalek-Nik · Posted
Moflash lenses appear to be slightly difficult these days. the best bet in my opinion is 3D printing them. there are many accurate models here that can be printed on any FDM printer you can find. there is a chance that you can find the lenses online to buy, but those sites can be slightly sketchy. depending on the filament you buy and the printer you have/find, they can be produced fairly accurately. filament can come as cheap as 17 dollars, but do keep in mind that they can some -
By Chris R · Posted
Thanks for uploading these files. Printed really nicely with the odds and sods of filament I had around and very pleased with it, haven't done any tidying up or painting but it looks great as-is.
-
-
Highest Rated Submitters
No ratings this week.
No ratings this month.
-
1
-
2

-
3

-
4
-
5

-
1
-
2

-
3
-
4

-
5
-
-
Current Donation Goals
-
Finance the Forum Hosting 2024Raised £113
-
-
Top Templates
-
Free
-

Free
-

Free
-

Free
-
Free
-