-
Registration
Please register an account to access the Forum topics and features.
An Active Membership subscription gives you access to extra features and exclusive content!
Choosing Active Membership is a great way of supporting the community and showing your appreciation for our resources.
Please note that you need to register BEFORE you can use Facebook, Twitter or Google as a sign in method.
Files For 3D Printing
Files that can be used to for 3D printing physical versions, using your own printer or a service such as Shapeways etc.
Note that files for CNC and laser cutting can be found in their own sub-section, inside.
247 files
-
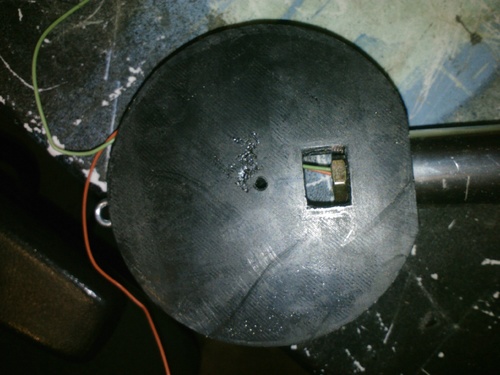
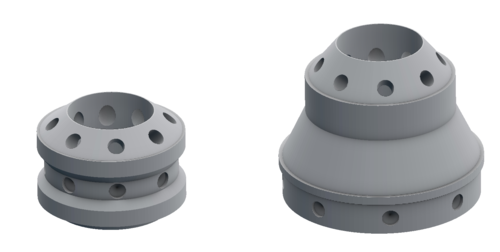
Shawcraft Eyestalk Pivot
By cdngoose
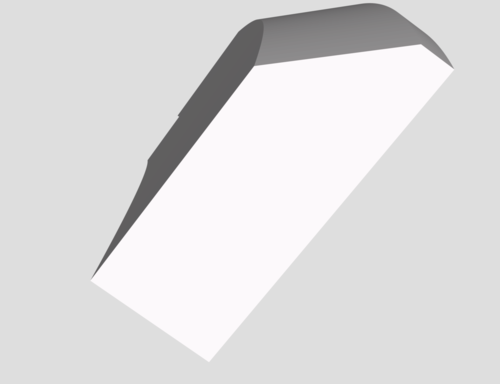
This file is an updated version of Ferrains first version. Phil has kindly donated his time to help out with drawing this part with new features,
Eye pivot
1" hole for eyestalk shaft
Smaller centered 3/8ths hole for threaded bar
Slot for threaded bar nut.
Hole through the backside to the slot for wiring.
3/8ths hole centered for pivot
51 downloads
(0 reviews)0 comments
Updated
-
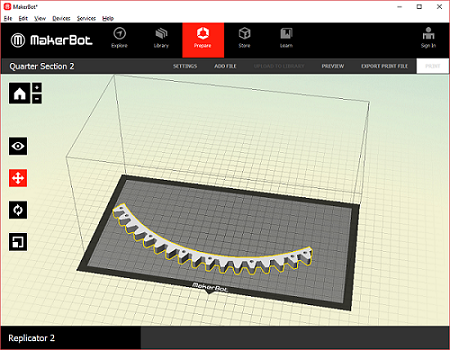
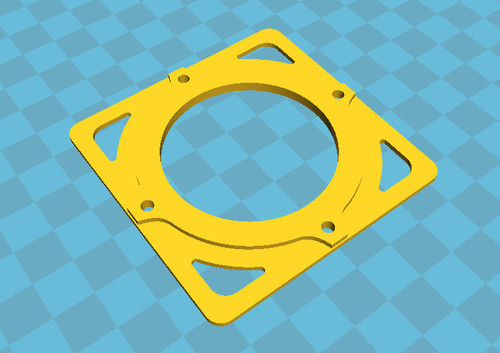
Ferrain - Dome Rotation Involute Spur Gear V5
By Ferrain
Dome Rotation Involute Spur Gear V5
I set up a virtual Windows 7 machine, with a trial copy of Sketchup Pro & downloaded the actual DXF files from the Involute Spur Gear Builder & after some work Saturday morning produced a totally new gear configuration.
Sunday
I completed two 45 degree sections successfully - The 45 degree files are included but were cut into sections with Sketchup without Netfabb.
I completed three 90 degree sections (with only one aborted print) but again were cut into sections with Sketchup without Netfabb
These NEW 90 Degree files are based on the original DXF files\Sketchup model I used, only with holes removed\repositioned locking lugs & sliced via Netfabb.
Addendum
The prints all fitted tightly against my Rockler\Lazy Susan Bearing, but possibly due to mix & matching of 45 & 90 degree sections or not using Netfabb as a slicing tool, I found I had a small gap, please adjust\check the Internal diameter & I have included the Sketchup file with a complete ring, the exploded 45 degree sections & the cog, which you can tailor for your own motor\drive configuration.
Height has been increased to 10mm - Each section typically took 75 minutes to print at a medium resolution settings on a Makerbot Replicator 2 at 8mm height.
136 downloads
(0 reviews)0 comments
Submitted
-
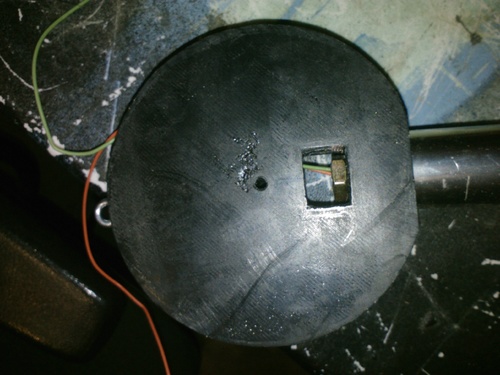
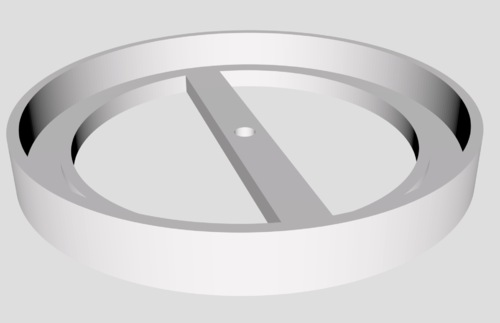
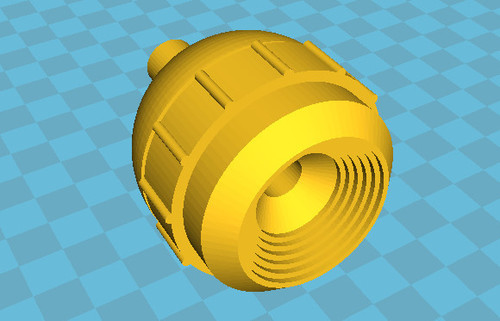
Invasion Earth: 2150 A.D Eyestalk Pivot
By cdngoose
This file is the Eyestalk Pivot without a flat spot as seen on Invasion Earth Dalek . Phil has kindly donated his time to help out with drawing this part with new features,
NOTE* picture presently shows flat spot that has been eliminated.
Eye pivot
1" hole for eyestalk shaft
Smaller centered 3/8ths hole for threaded bar
Slot for threaded bar nut.
Hole through the backside to the slot for wiring.
3/8ths hole centered for pivot
29 downloads
(0 reviews)0 comments
Updated
-
(0 reviews)
0 comments
Submitted
-
(0 reviews)
0 comments
Submitted
-
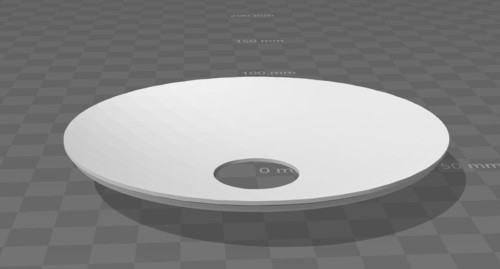
2005 series hemisphere
By Snape757
2005 series hemisphere, add an extrusion to the bottom for the thickness of your material, or ask me and I will.
98 downloads
(0 reviews)0 comments
Submitted
-
(0 reviews)
0 comments
Submitted
-
NSD centered oil seal
By beeweasd
i found one similar to this but it was slightly to big, so i made one with the correct dimensions.
171 downloads
-
NSD neck rings for 3d printing
By beeweasd
these have been split into small sections to fit on a 3d printer.
321 downloads
-
NSD Light Cage Surrounds
By Snape757
Here I have designed the surround to the Moflash lenses, I have to admit its fairly new and I may need to adjust the base to fit the lens, I suppose it depends on the lens?
Have a look, make a comment for improvement etc. Thanks.
230 downloads
(0 reviews)0 comments
Submitted
-
NSD Gun box front detail
By Snape757
Nice easy flat print, select solid print, no supports and best quality, doesn't take too long either.
83 downloads
(0 reviews)0 comments
Submitted
-
Gazing Globe Drill Box
By trickster
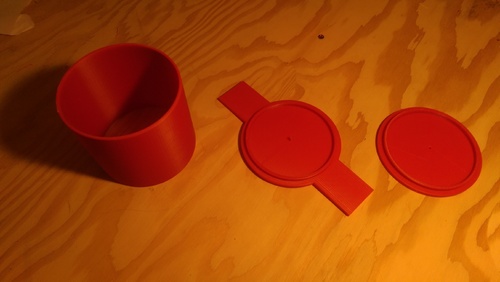
This is a jig I made to drill a pilot hole in a 10cm gazing globe. The globes I used were Rome brand purchased thru Amazon. Each had a single hole already drilled. This jig allowed me to drill a matching hole directly opposite.
The base has leaves which can be clamped to the drill press table. It also has a peg which fits the existing hole in the globe. I clamped down the base, fitted the globe to the pin in the base, pushed the cylinder down over it and then the lid. The lid has a center hole.
There's also test cylinder file which is only 5mm tall. If you want to use this jig I suggest you first print the test cylinder and make sure it is the right size for your globe. It should fit very snugly.
156 downloads
(0 reviews)0 comments
Submitted
-
NSD Iris
By trickster
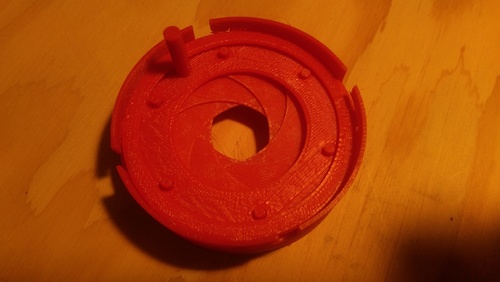
This is a working iris insert. It fits this eyeball by Slythenperior very snugly after both parts are lightly sanded smooth. This is in initial version. I'm going to add parts for attaching an led and stepper motor but I don't have either of those yet and thought the iris alone might be useful.
There are six object files:
Casing - everything fits inside the casing and it fits into the front of the eyeball SlotRing - fits inside the Casing on two keys Leaf - you will need six of these Peg - you will need six of these, one for each leaf HoleRing - this has a handle for attaching a stepper motor LockRing - keeps it all together
Note that the casing has some slots with overhangs. Automatically generated supports did not work so I added some tiny blocks instead. Once it's printed just clean them out. Don't use supports or raft.
One end of each leaf has a pin which is offset from the center. The other end has a hole through it and an indent on the same side as the pin. Press a peg through the hole so that there's a pin on each side of the leaf and the base of the peg fits into the indent. The peg should lock into place. I had to print a few extra leafs because some of them were too loose a fit. You can use glue if the pegs don't fit tight enough. Make six leaf/peg assemblies and lightly sand them smooth.
Insert the slot ring into the casing lining up the notches with the keys:
Lay the leafs in one at a time. The offset pin (the one printed as part of the leaf) goes in one of the slots. Place each leaf on top of the previous ones. The first 4 are easy. The last two, you have to slide them under the first leafs.
Once you have all six leafs seated in the slot ring, place the hole ring on top. Wiggle it around until all six pins are set. Then add the lock ring, pressing it down and turning it.
Here's how it looks when done:
Here is a zip file of all the parts (version 1.1): NSDIris1.1.zip
436 downloads
-
Plans for laser cutting NSD light cages from 1/4" MDF
By cjorgensenmd
If you have access to a laser cutter, you can cut out the attached files and assemble NSD light cages from 1/4" MDF
177 downloads
(0 reviews)0 comments
Updated
-
Imperial Dalek Eyediscs
By Aaron J Climas
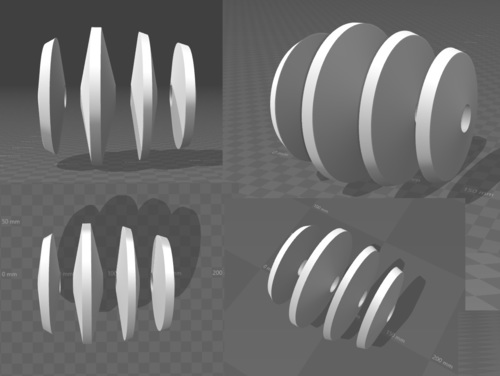
A relatively quick version of the Imperial Dalek eye discs. They are based on (A forum members- someone please help!) measurements from a few years ago. I haven't had a chance to test print these.
Included are all four discs as separate files as well as a combined download of all four. The discs are about 11mm or so apart, and have a 25/26 mm hole partially extruded on both sides of each disc, but not
the whole way through so you have a little choice of construction.
Please give me a shout if you have any issues with them.
239 downloads
-
NSD Dome Detail Kit
By trickster
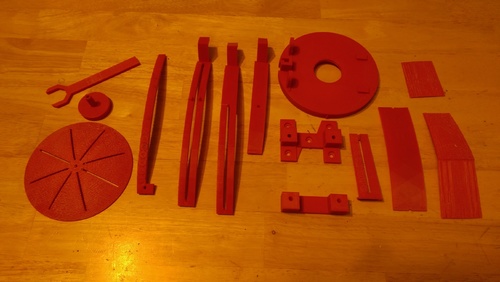
This is a set of tools I made to help with detailing the dome. Some are attachments for a Dremel router base. These are useful for working on wooden domes. Others are more generic and can be used on any dome. All tools are shaped to fit along either the top curved part of the dome or the bottom cone part. Raft and support required where noted. They are numbered on this image and described below. The wrench is not included.:
1 Drill Guide - Guides drill bit perpendicular to dome surface
2 Dome Protractor - Marks out 45 degree angles
3 Dome Ruler * - Measures cm along the surface of the dome and from a center point
4 Long Longitude Arm * - Guide for longitudinal cuts, used with Base Adapter (7) maximum span
5 Short Longitude Arm * - Guide for longitudinal cuts, used with Base Adapter (7) span for lower dome cuts only
6 Latitude Arm * - Guide for latitudinal cut (back half of dome), used with Base Adapter (7)
7 Base Adapter * - Adapter which fits the Dremel router base. Key attaches to Longitude and Latitude Arms (4,5,6) or freehand
8 Angle Guide Bottom - Guides cuts on the cone portion of the dome, used with Angle Guide Top (9)
9 Angle Guide Top - Guides cuts on the cone portion of the dome, used with Angle Guide Bottom (8)
10 Cone Ruler * - Measures and marks the cone portion of the dome
11 Port Template - Marks the eyestalk port
12 Front Indent * - Marks the front indents
13 & 14 Rear indent * - Marks the rear indents, pieces glue together at chamfer angle
* raft and full support required
The Drill Guide, Dome Protractor, Dome and Cone Rulers, Port and Indent templates are pretty obvious how they work
The Base Adapter attaches to a Dremel router base and gives it a solid contact to the dome. It attaches to the router base with two rectangular keys and a pair of bolts/wingnuts. It can be used freehand or with one of the Arms which attach to it with a key block.
The Angle Guide pieces are joined by two 3/16" x 16" metal rods. The bottom mounts to a board and the Dremel router base rides the rods at the proper angle to fit against the cone portion of the dome. Like this:
Here's a build diary entry describing their use
Here's the whole thing: NSD Dome Detail Kit.zip
213 downloads
(0 reviews)0 comments
Updated
-
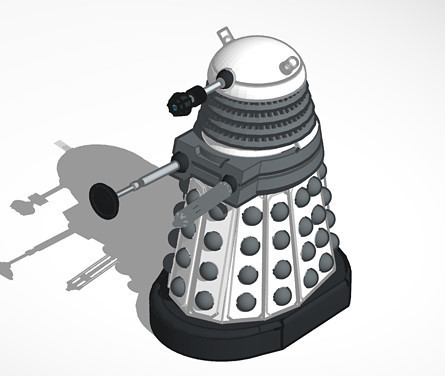
Full True Dalek Paradigm Kit
By erichdalek
To begin: that is a lot of files.
This is in 1/10 scale, so scale up as you want.
This was built on tinkercad.com, the file can be found here.
There is the main file, 'Full Dalek' if you want it in one color, and have support material.
The rest is all the individual parts, broken up so that they can be printed in their different colors, without support material or as groups of the same color.
There are two zipped folders, one "all parts"-- everything individually, and "Everything Sorted By Color" which is the groups of the same color in about a 20x10 cm box.
The last file is one that I am using as a hot glue mold to make the domelights.
If there are any questions or requests or whatever, feel free to contact me.
Disclaimer:
I am not amazing at modeling, nor is Tinkercad the best program ever for this kind of thing (as user KiwiMrDee stated, it is "designed for kids so detail and rendering options are limited") and so this is not exactly perfect (especially my angles in the full dalek, so print the pieces and assemble it yourself!) and I won't take offense at greater creators then me offering criticisms (hot glue mold, really?).
993 downloads
(0 reviews)0 comments
Submitted
-
NSD Hollow Eyestalk Disks
By trickster
These models are best used for making hollow eyestalk disks with translucent filament. You can also use opaque filament but you'll lose the effect. Here is how a solid eyestalk disk looks when printed at 10% fill with translucent filament:
Looks pretty cool as an actual iris but it doesn't let much light thru. So I decided to try making each disk as two separate pieces that fit together with a hollow center. Here's how that looks:
I also did a acetone vapor bath which made them look like this:
If you're doing an acetone vapor bath you must treat the pieces before assembling or acetone will condense in the hollow center and they will end up looking like this:
Here is a build diary entry describing how to do an acetone vapor bath. Here are two finished pairs viewed from each side:
Each piece is oriented with what will become the outer surface facing up. This keeps all the support structure noise on the interior. You need to use full support, btw. And make sure your build plate is evenly heated.
I've included two sets of files. One set has standard 22mm holes in the center. The other set is the one I used for my Dalek. I used a 5/8" center tube so they have 19.5mm holes. Each set has pairs of inner and outer disks for each of the three sizes. There's a ridge on the interior side of the inner disk which fits the lip on the outer disk. Dab of glue (test first!) and you're good to go!
Oh yeah, and I can't swear that they are exactly the same as the original parts. I looked at the part descriptions and thought they were most likely spherical caps. So I did some math and made them spherical caps based on the dimensions of the original parts. If anyone has a genuine article they can compare against I'd appreciate any feedback how close they are and any adjustments that would make them better.
Here's the complete package: NSDHollowEyestalkDisks.zip
465 downloads
(0 reviews)0 comments
Updated
-
NSD Cowl
By trickster
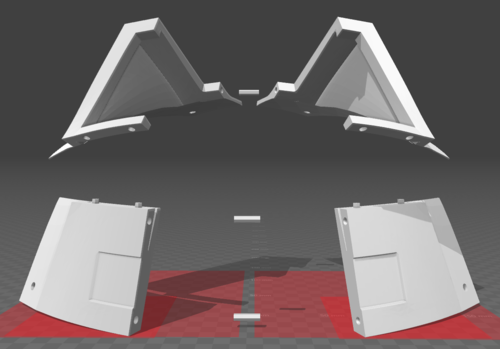
Here is a set of models for creating an NSD cowl. Jbourd was kind enough to gift me with a 3d model of a complete Dalek dome and cruel enough to ask if I could separate out the cowl. It took a while but I managed to remove the dome and leave the cowl intact. Of course it is far to big to fit on my build platform. So I tried cutting it in half vertically. Each piece could only fit my build space in a few orientations. And due to the size and nature of the parts, they all warped beyond use. I wasted nearly a kg of filament on failed attempts. I decided to split it into quarters. This allowed for smaller parts which would fit flat and any warp would be to the thickness. Thought I had it nailed, but the thickness was warped enough so that the towards the back of the cowl the opening was too small to fit the eyestalk pivot. So I added a shim to compensate.
I have been using 3d Builder which is included with Windows 10. It has issues. For whatever reason I was able to separate out and save three out of four quarter pieces but the fourth would not save no matter what I did. So instead I used Replicator to mirror the pieces along the X-axis. That is why only right side parts are included. You have to use your build software to mirror them for the left side parts.
I've included the full cowl model in case you want to slice and dice it on your own. I've included the shim I used and a long peg to use with it. I suggest building out the four main parts and see if you need it.
Also the bottom parts had an issue with one corner pulling loose from the build plate and warping the holes. So I put a throw away block next to that corner to hold it down.
I printed everything at 10% fill .2mm thickness. Use full support and raft for the main pieces but not pegs and shim.
One thing I did not expect but really like is that in producing the curves, the printer leaves a pattern which is similar to wood grain. This is another reason why I included parts for only one side. By mirroring the parts the grain pattern is symmetrical.
Here's some pics. You can see the grain effect.
.
328 downloads
-
NSD Gun Front and Rear
By simon83079
Exactly was it says on the tin. Modelled direct from the plans. Has been printed and looks great.
252 downloads
(0 reviews)0 comments
Submitted
-
Full size NSD Dome solidworks for 3d printing
By cjorgensenmd
I modeled the NSD dome in solidworks with the intention of breaking it up into parts small enough to 3d print and later on make a fibeglass mold from. The cone near the eye cutout will help when an air valve is bolted onto the fiberglass mold. This air valve will enable easy mold release.
233 downloads
(0 reviews)0 comments
Submitted
-
NSD: Front Gun Box Detail
By Ultrastar
NSD: Front Gun Box Detail
By: Ultrastar
Intended for Dalek builders out there with the ability to 3D print models. This is a 3D model of the NSD front gun box detail. This model was created with the purpose of 3D-Printing. However, with this being a 1:1 scale and 100% accurate model it can also be used as a reference for your own builds. Feel free to ask questions about this model as you see fit.
196 downloads
-
NSD: Eye
By Ultrastar
NSD: Eye
By: Ultrastar
Intended for Dalek builders out there with the ability to 3D print models. This is a 3D model of the NSD eye. This model was created with the purpose of 3D-Printing. However, with this being a 1:1 scale and 100% accurate model it can also be used as a reference for your own builds. Feel free to ask questions about this model as you see fit.
533 downloads
(0 reviews)0 comments
Submitted
-
Paradigm: Eye
By Ultrastar
Paradigm: Eye
By: Ultrastar
Intended for Dalek builders out there with the ability to 3D print models. This is a 3D model of the Paradigm Dalek eye. This model was created with the purpose of 3D-Printing. However, with this being a 1:1 scale and 100% accurate model it can also be used as a reference for your own builds. Feel free to ask questions about this model as you see fit.
99 downloads
(0 reviews)0 comments
Submitted
-
Servo Iris Assembly
By trickster
UPDATE: I noticed lots of people are downloading the model files one at a time. It's much easier to download the complete package and avoid the download limits. Here's the zip: ServoIris.zip
UPDATE: There are pictures illustrating the assembly process in my build diary. Note that there are two iris versions in the diary. This is the second one.
This is a complete set of 3d objects to create a micro servo driven iris insert. It is designed to fit into this eye with a little bit of sanding and work with this servo and this LED disk. All parts have the proper clearances based on my printer using .2mm layers. Some of these are pretty close to the wire and you might have to fiddle a bit. I printed everything but the LensPlate using white ABS and painted various surfaces black. The LensPlate is translucent blue ABS with an acetone vapor bath. The leafs and SlotRing were lightly sanded smooth.
Objects included (bottom up):
Casing SlotRing peg (6 required) leaf (6 required, note the stl file is flagged as broken and can't be repaired, but it prints ok. Don't use a raft.) LensPlate (print using translucent filament) [LED disk] LockRing (orients with tabs at the top) DualSlotLEDPlate (LED disk attaches to this) ServoArm (servo horn fits inside) [servo horn] ServoArmCover ServoMountRing ServoStandoff (2 required) ServoMount [servo] ServoMountCap
Check out my build diary for pictures illustrating assembly described below. Note that there are two iris versions in the diary. This is the second one.
Assemble the Bottom Iris Section
Assemble the slot ring into the casing. Spray the front and inner lip flat black.
You will need to print 6 each of the leafs and pegs. Then assemble each peg and leaf so that the peg sticks out the opposite side from the post on the leaf. Give them a light sanding to get them smooth. Now paint them flat black and sand smooth again. Leaf assemblies orient with the offset post (the one printed as part of the leaf) down. You have to get all 6 properly nested.
The LensPlate is printed with blue translucent filament and acetone vapor bath smoothed out. Orienting this piece is the tricky part. You will probably have to spin it a few times to figure out which way works. LockRing goes on top of the LensPlate and fits the slots of the casing. You have to clear out the tiny support thingies on the casing btw. Orient the LockRing with the tabs on top.
The LED disk has 4 holes punched in it. Find the pair that fits the DualSlotLEDPlate and press it on with the wires through the hole. Then add the plate to the stack with the LED facing down. The posts on the LensPlate should be at one end of the slots and should move within the slots to open and close the iris. If this is not the case, try disassembling and rotating the LensPlate one step around the leafs until you find the way that works.
At this point you should be able to operate the iris by hand. This is a good time to sand the outside of the casing and inside of the eye front until they fit together properly.
Assemble the Top Servo Section
I used the micro servo with feedback from Adafruit. Eventually I plan to use the feedback wire to know the servo's current position. I believe the non-feedback micro server is slightly different and probably won't fit this mount. You could use a different servo but would have to adapt the ServoMount and ServoMountCap. Trap the servo between the ServoMount and ServoMountCap so that the servo shaft is in the center of the mount. The pieces should fit together snugly.
The servo comes with several horns. Find the one that matches the hollow in the ServoArm. Trap the horn between the ServoArm and ServoArmCap and snap the pieces together. It only fits one way.
Rotate the servo shaft by hand to determine the limits and set it to the center of its range. Attach the arm assembly to the shaft so it is at a right angle to the servo mount and secure it with the screw.
Assemble the servo assembly, two ServoStandoffs, and the ServoMount Ring. If the standoff pegs are too tight, lightly ream out the holes.
Final Assembly
Operate the iris by hand so it is at the halfway point. Attach the servo assembly to the iris. Everything should be properly oriented and the servo assembly should fit snugly on the casing. Make sure all the tabs are lined up. Try operating the servo arm by hand and verify the iris opens and closes. It will not close 100% and will probably not reach the limit on the slots.
Now you have to connect it all up. I used an RJ45 socket and ethernet cable connected to a Raspberry Pi with Adafruit servo/PWM and PifaceRelayPlus HATs. Here's the software. You will have to experiment with the servo to determine what relay and PWM values to use.
Here's the zipped objects: ServoIris.zip
504 downloads
-
Top Downloads
Week
-
Free
-
Free
-

Free
-
Free
-

Free
Month
-

Free
-

Free
-
Free
-

Free
-

Free
Year
-

Free
-

Free
-

Free
-
Free
-

Free
All Time
-

Free
-

Free
-

Free
-

Free
-

Free
-
-
Recent File Reviews
-

Michael56 2
I'm in my late 60's. I live in Australia and have always enjoyed Doctor Who from the very first episode aired here around 1965 when I was 9 years old. Thought how amazing it would be to have a Dalek but had no idea how or where to even begin UNTIL I came across this site. Thanks for giving me the opportunity to at least be able to start on a Dalek build and will detail my progress as it goes along.
-

Mark Sheriff 6
Excellent , looks great and very well designed , well thought out . thank you
-

Marc Harris 54
I'm in my 50s and have since I was a boy watching Dr Who in the 70s always dreamed of making a Dalek for fun, now I have the time and resources, along with your forum's help it's time to live that dream.
I have watched some of the members videos, and I am very impressed with what I have seen.
Long live the Who verse.
I will document my progress and share any innovations I make
-

Chris R 25
Great set of models that printed and fitted together really easily. Can't comment on accuracy as I'm no expert but very happy with the result
-
Dalek Hal 312
Great file, easy to print
-

doctorone 3
Great plan but the pivot does not print as it is not complete like the eye stalk
-

