-
Registration
Please register an account to access the Forum topics and features.
An Active Membership subscription gives you access to extra features and exclusive content!
Choosing Active Membership is a great way of supporting the community and showing your appreciation for our resources.
Please note that you need to register BEFORE you can use Facebook, Twitter or Google as a sign in method.
Files For 3D Printing
Files that can be used to for 3D printing physical versions, using your own printer or a service such as Shapeways etc.
Note that files for CNC and laser cutting can be found in their own sub-section, inside.
248 files
-
Free
Imperial Dalek Eyeball
By Aaron J Climas
Hey guys.
This is a STL file of the Imperial Dalek eyeball. It's in two halves that need to be printed and glued together.
It is a pair of STL files. They are much larger than normal as I have found issues with low resolution geometry making the prints come out with hard edges. If this is too much geometry I will remodel and upload again.
The front of the eye isn't as deep as the original prop, because it makes adding the front much harder! However I could do that variation if someone was keen.
The front of the eyeball itself is slightly rounded off as per the original, rather than being dead flat.
The rear of the ball has a nice flat section for tube to sit flush against, as well as a pilot hole included for drilling a central hole.
I haven't printed this file yet, but intend to tomorrow!
EDIT. The rear of the eyeball has a hole in he model. I have fixed the model, but not uploaded yet. This will be fixed soon.
EDIT- The previous upload didn't include the front of the eye. I only just saw a message about it then. (4th March 2016.)
95 downloads
-
Free
Classic Eyeball
By Aaron J Climas
This is the front half of a classic style eyeball from the 60's. It's a slightly odd size hemisphere, and the 12 degree angle on the lip can be hard to get even.
So I have made a 3D print file, presented in both STL and OBJ format for people to print if they aren't so keen on making on themselves.
I haven't printed this item yet, but plan to later today. Although checking over the file there should be no major issues. It should fit perfectly flush with a 4" (102mm) hemisphere. It has 360 isoparms coming out across the body, so shouldn't suffer from not having enough resolution on the body.
Edit- I printed the file today, and it came out without a hitch. Although the model was 90 degrees out! Please give me a shout if you print this.
77 downloads
-
Free
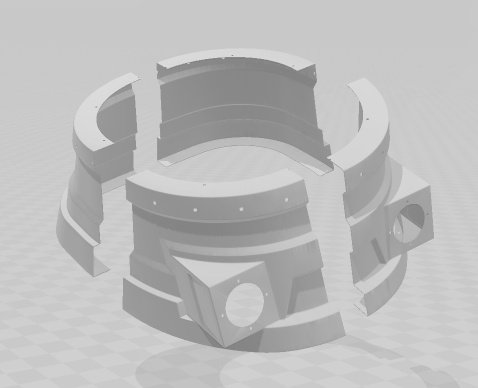
Shawcraft mk1 Kit
By Sparky_Butane
This is a complete 3D printable kit of a mk1. All of the pieces are separated and allowances are included. All of the pieces should assemble with little or no sanding. Some pieces were simplified so that it was actually printable. I haven't printed it yet so contact me with comments, questions, or concerns.
Enjoy!
mk1.zip
713 downloads
-
Free
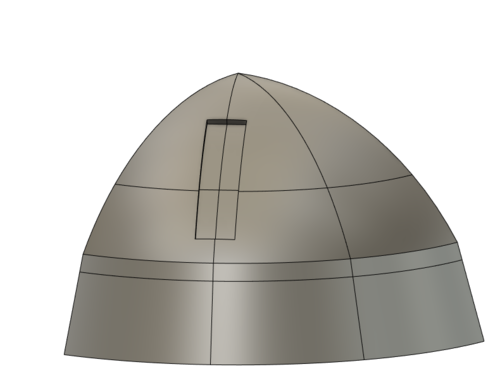
Movie Dalek Dome
By Chris Moliere
Another dome! This is the Movie Dalek dome, using the measurements given in the updated plans. This can be used for a fiberglass mould, or just used as is. As always, enjoy!
97 downloads
(1 review)0 comments
Updated
-
Free
NSD Small Slat
By Ferrain
NSD Small Slat I designed & printed about a year ago. Slightly curved to fit, fill & sand (hopefully easier) to the shoulders.
More details Post 15.
162 downloads
(0 reviews)0 comments
Submitted
-
.thumb.JPG.01120d5af1ebf179de81a06018ed4768.JPG)
Free
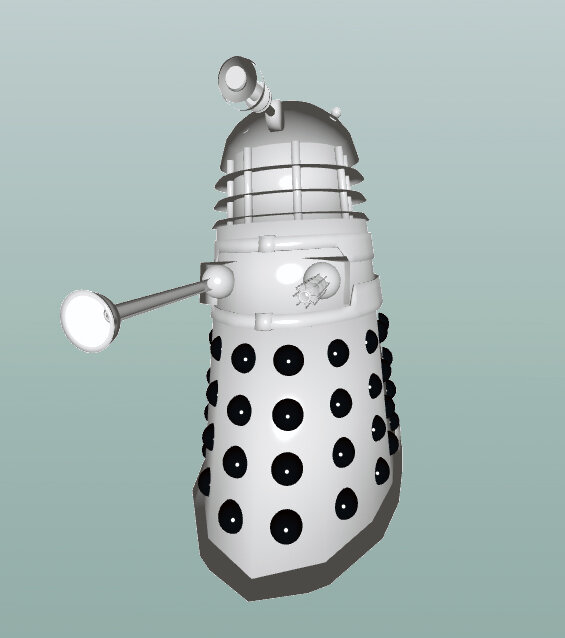
Louis Marx Bump and Go Toy Dalek
By erichdalek
This is a model of the Louis Marx Bump and Go Toy Dalek of the 60's, as used in the production of Evil of the Daleks per information from this gallery entry and this BBC photo.
Provided is:
-.SLDPRT of the whole thing, for your personal improvements or modifications
-.STL of the whole thing
-.STL's of it with the eyestalk and appendages in separate files for you to glue on
Let me know any ways I could better the screen-accuracy or proportions.
307 downloads
-
Free
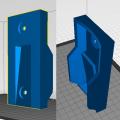
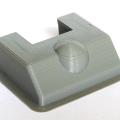
Gun Box Detail
By hallam
NSD Gun Box Detail as STL file.
Back of the piece is hollowed out to minimize use of material. Wall thickness is 1 mm. I paid $25 for printing and after sanding and filling, glued the result to a piece of acrylic to give it a flat base to make moulding easier.
117 downloads
(0 reviews)0 comments
Submitted
-
Free
Mk1 Gun Rods
By Luke S
So here my version of a mk1 gun rod, kinda like a clear acrylic one. You can print it colored or clear filler. The Rings, Rods, Octagons are separate pieces, so you can put it together easily and with the octagons not with it and giving you a hard time trying to paint it. The Gun Cylinder has pre cut holes for the rods to fit in.
Print Settings
Printer brand:
Creality
Supports:
Yes
Resolution:
0.1mm
Printer:
Ender 3
Infill:
100%
Filament_brand:
Filament_color:
white, Black, gray
Filament_material:
PLA
180 downloads
(0 reviews)0 comments
Updated
-
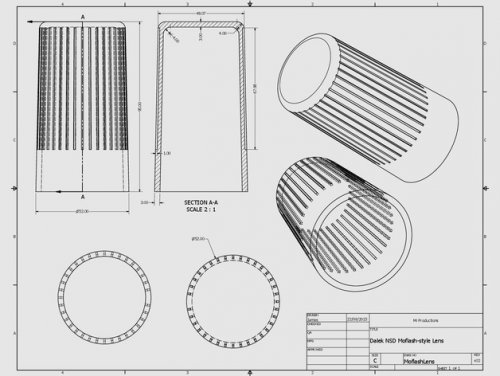
Free
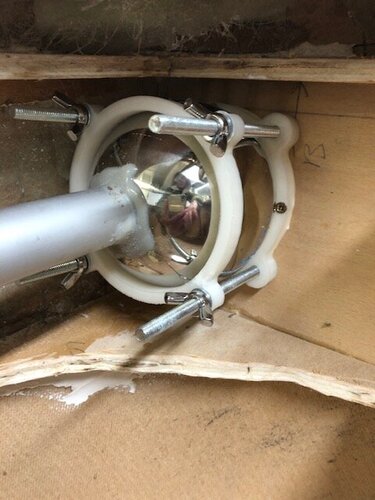
NSD Moflash lens
By cdngoose
I truly believe the 3D printer is a Dalek builders best friend. Since the Moflash Lens is no longer available we can now print one. I used this file from Thingverse and it is quite acceptable. Below is the caveat for its use.
A close approximation of the Moflash lenses used for Dalek NSD dome lights. I do not have a real one, so attempted this for my own NSD.
Dimensioned to fit inside the housings described in the Project Dalek NSD plans.
Print in a transparent or semi-transparent material as desired.
Dalek NSD Moflash-style Dome Light Lens by miproductions is licensed under the Creative Commons - Attribution - Non-Commercial license.
So what's this mean?
Remixing or Changing this Thing is allowed.
Commercial use is not allowed.
Once again I did not create this file but I have used it and it needs to be available to PDF members.
cdngoose
Note: Above are the pictures I took during and after printing, first one is nearing the end of print and the second is print finished. The third one is with the filler removed while the last one is with a flashlight with weak batteries. all in all I prefer this look over the original Moflash unit, I like the silver finish and it glows nicely.. Once the light hits it their is an oddness about the silver glow that makes it far more Dalek worthy!
Enjoy, and with the discontinued production of these lenses take heart that we will have them forever now! Gone are the days of scrounging and pleading in back corners for obscure parts to make our obsession!
cdngoose
319 downloads
(1 review)0 comments
Updated
-
Free
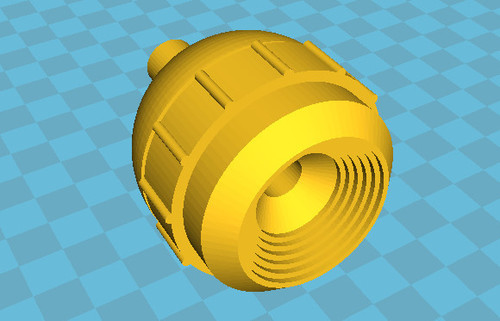
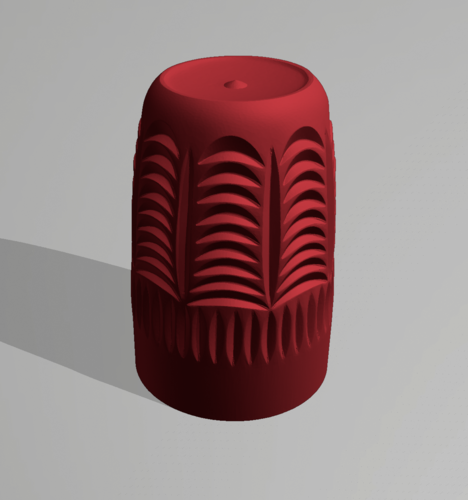
Classic Dalek Appendages Cutting Torch Kit
By Luke S
A Zip File of the whole items is in the download to save up download room.
The 10mm tube is 350mm long.
I Made the Cutting Torch From the First Dalek Story when they cut the door down. This come with everything besides the 10mm tube and bendy tube. The Tube in the Screen Shots are just to show you what it looks like. Also The Colors in the screenshot are what you could spray paint it, besides the yellow tube, spray that black.
IF You have Downloaded any of my Prints please Pm if I have added or edited it, so i can send you the newest copy.
Unauthorized sales and distribution, in any format, is strictly prohibited.
Print Settings
Printer brand:
Creality
Supports:
Yes
Resolution:
0.1mm
Printer:
Ender 3
Infill:
100%
Filament_brand:
Filament_color:
white, Black
Filament_material:
PLA
63 downloads
(0 reviews)0 comments
Updated
-
Free
NSD screw-on Hemi.stl
By DalekDucky
NSD screw-on Hemi
Here is my first dive into creating an STL
Because I want the ability to change my Hemi's at Christmas to have lights inside of them, Dalek camouflaged as a Christmas tree, I created this Screw on Hemi holder.
Two parts,
Internal bracket has three holes for screws, center could be removed but I wanted it to ensure the hemi was centered, it also has a bracket for my LED lights as seen in picture.
Outside bracket is simply a bracket to glue on the Hemi using two parts Christmas ornaments and then simply screw it onto the internal bracket.
Could be handy for quick replacement option of hemi
Hope it helps someone else
Oh! The screw holes are for 3/16.
DalekDucky
125 downloads
-
Free
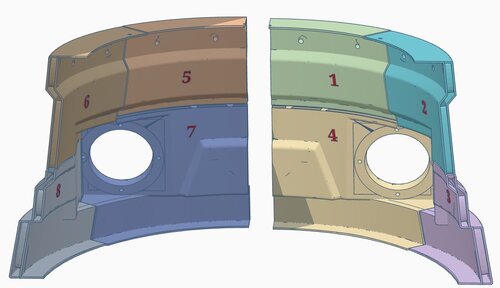
Full Size Movie Dalek Fender (1st or 2nd Films)
By Chris Moliere
FINALLY! This thing took an eternity to split into smaller parts, but it's complete! This can be used for both movies: If you are making a 1st movie Dalek, print all 60 parts, but if you're making a 2nd movie Dalek, print ONLY parts 1-35, and use rubber sheeting for the rest of the fender. This thing will probably take several months or more to print, but it will be worth it! Have fun!
768 downloads
(0 reviews)0 comments
Updated
-
Free
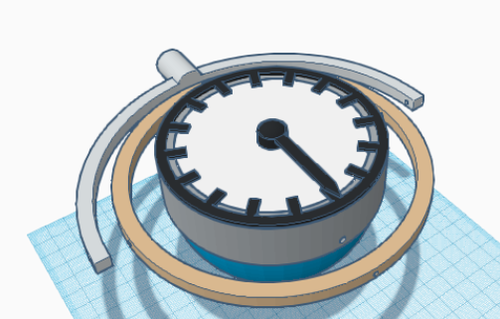
Classic Dalek Appendage Seismic Detector
By Luke S
A Zip File of the whole items is in the download to save up download room.
There are 7 parts, the Bottom Half, numbers, the top, white band, outer gyro ring, inner gyro ring, and Diel. There are already to holes in the print for the dial thingy that spins and the rods that connect to the gyro. The holes for the rods in the print are 4 mm in diameter. US Also You may need to add washers around the pins to stop the rings from sliding off. Thanks to @James O and @Dave'O for there estimated gused blueprints.
IF You have Downloaded any of my Prints please Pm if I have added or edited it, so i can send you the newest copy.
Unauthorized sales and distribution, in any format, is strictly prohibited.
Print Settings
Printer brand:
Creality
Printer:
Ender 3
Infill:
100%
Filament_brand:
Filament_color:
white, Black
Filament_material:
PLA
107 downloads
-
Free
NSD: Eye
By Ultrastar
NSD: Eye
By: Ultrastar
Intended for Dalek builders out there with the ability to 3D print models. This is a 3D model of the NSD eye. This model was created with the purpose of 3D-Printing. However, with this being a 1:1 scale and 100% accurate model it can also be used as a reference for your own builds. Feel free to ask questions about this model as you see fit.
535 downloads
(0 reviews)0 comments
Submitted
-
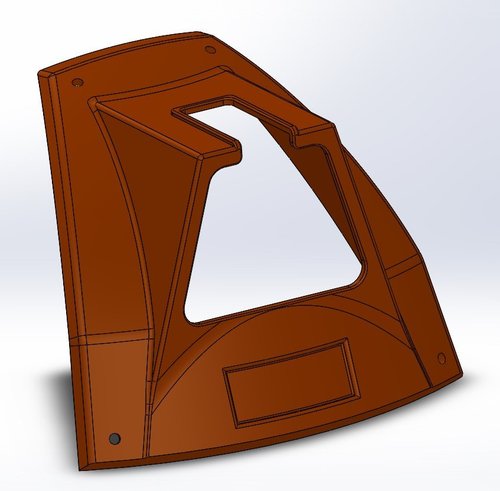
Free
NSD Cowl
By Macropod80
This is the most accurate-looking I could get going by the dimensions in the official plans back in 2017 (which don't seem to me to quite work exactly as specified?) Fits fine on my Dalek Kevin's dome (bumpy as it is). Of course my version of 'exactly according to the plans' may well differ from your version of 'exactly according to the plans', but that's Dalek-building for you...
This has been around for a while so I know at least one other builder in the world has used it successfully.
I printed in PLA for toughness and lack of distortion, at 0.2mm layer height. Just barely squeezes into an UpBox+.
186 downloads
-
Free
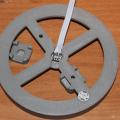
NSD Light Cage with Thread
By DalekDucky
NB: Single zipped folder or 6 individual files - your choice
So I wanted a light cage that did not show screws when assembled and came up with this solution.
It's essentially a remix of @Ultrastar Light cage with the following modifications.
Added thread to the lower part of the cage plus the inner part of the threaded piece to be attached to the Dalek head The hole for the base and top is slightly larger to make screwing around the cage easier no change to his support
In this file I also included the surround part I did for my bulb using a trailer light. The spring from the light lid holds it in place to the lower part so no attachments required.
I used a Ping Pong bulb inside the moflash. so you may want to use some hot glue to secure that part.
The lower part has indentation to allow for my trailer base, if you don't need that, that part is low enough that should not be seen in your cage.
Enjoy
P.S. You will need to rotate a few pieces for print. support needed for some parts depending on your printer calibration.
158 downloads
-
Free
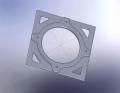
NSD Neck Block (FDM)
By DrJekyll
This NSD Neck Block has been modeled for use with FDM printers, if you have access to SLS type printers you will be better off using Hallam's model.
I used Slic3r 0.9.9 to generate the gcode and printed it in PLA on my home built Mendel I2, with Sanguinololu electronics, Marlin firmware, and a J-Head hot end with the settings below.
; layer_height = 0.2
; perimeters = 2
; top_solid_layers = 5
; bottom_solid_layers = 0
; fill_density = 0.12
; perimeter_speed = 35
; infill_speed = 55
; travel_speed = 130
; nozzle_diameter = 0.35
; filament_diameter = 2.82
; extrusion_multiplier = 1
; perimeters extrusion width = 0.50mm
; infill extrusion width = 0.50mm
; solid infill extrusion width = 0.50mm
; top infill extrusion width = 0.50mm
; first layer extrusion width = 0.50mm
In addition to the Slic3r settings above I also lowered the layer height near the top to reduce the step effect.
Between 14.0mm and 15.3mm layer height was 0.15mm
Between 15.3mm and 16.3mm layer height was 0.10mm
Between 16.3mm and 17.1mm layer height was 0.05mm
I also enabled Brim with a 4mm width to minimize curling/shrinkage, and manually slowed the print speed for the last few mm's to minimize heat buildup. It did not take a lot of work to sand and paint the neck block in the images but I don't think I would want to do it for 24 of them. Casting is a better option for that many.
Steve
90 downloads
-
Free
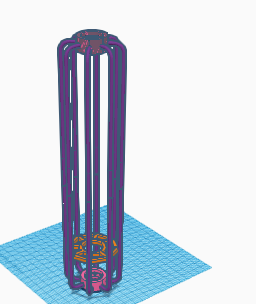
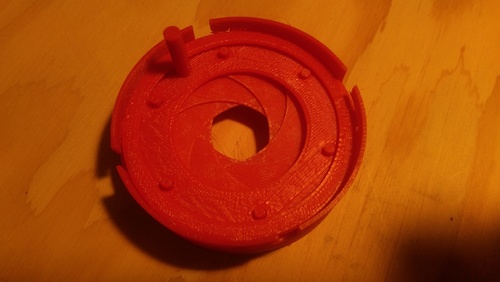
NSD Iris
By trickster
This is a working iris insert. It fits this eyeball by Slythenperior very snugly after both parts are lightly sanded smooth. This is in initial version. I'm going to add parts for attaching an led and stepper motor but I don't have either of those yet and thought the iris alone might be useful.
There are six object files:
Casing - everything fits inside the casing and it fits into the front of the eyeball SlotRing - fits inside the Casing on two keys Leaf - you will need six of these Peg - you will need six of these, one for each leaf HoleRing - this has a handle for attaching a stepper motor LockRing - keeps it all together
Note that the casing has some slots with overhangs. Automatically generated supports did not work so I added some tiny blocks instead. Once it's printed just clean them out. Don't use supports or raft.
One end of each leaf has a pin which is offset from the center. The other end has a hole through it and an indent on the same side as the pin. Press a peg through the hole so that there's a pin on each side of the leaf and the base of the peg fits into the indent. The peg should lock into place. I had to print a few extra leafs because some of them were too loose a fit. You can use glue if the pegs don't fit tight enough. Make six leaf/peg assemblies and lightly sand them smooth.
Insert the slot ring into the casing lining up the notches with the keys:
Lay the leafs in one at a time. The offset pin (the one printed as part of the leaf) goes in one of the slots. Place each leaf on top of the previous ones. The first 4 are easy. The last two, you have to slide them under the first leafs.
Once you have all six leafs seated in the slot ring, place the hole ring on top. Wiggle it around until all six pins are set. Then add the lock ring, pressing it down and turning it.
Here's how it looks when done:
Here is a zip file of all the parts (version 1.1): NSDIris1.1.zip
448 downloads
-
Free
NSD Eye STL Files
By henryjolly
Eye2 is hollow without a stem and Eye4 is hollow with a stem. Perfect for printing then adding an LED.
350 downloads
-
Free
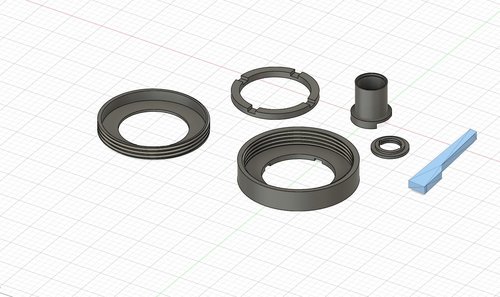
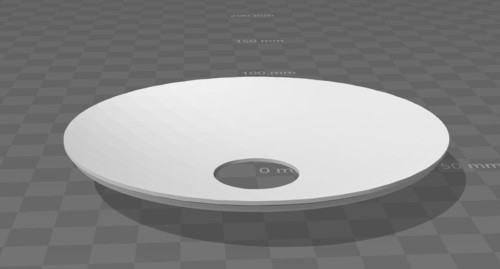
Printable Oil Seal Surrounds and Hemispheres (Glowing?)
By Kresty
My take on oil seal surrounds and hemispheres... I'm not sure these are practical as it takes an hour to print a surround and a couple for a hemisphere, but here they are...
The reason I did this was because brialath has talked about a Disco Dalek and I wanted to see if WS2812B LEDs would be able to light a 100mm hemisphere. Since I made the hemisphere, I decided a mount for the aforementioned LEDs built into the surround might be good, and the traditional center bolt doesn't really work because the LED needs to be there.
Since I could I also made a solid hemisphere that might print better, and a surround with a centered bolt hole for an M4 bolt, and a little block to keep the bolt head from turning. I considered glynharper's surrounds, however I wanted an exact fit for the hemisphere I'd made, and I wanted a enough room for a 12-14mm washer to distribute the load. So that meant I needed a block to hold the M4 bolt head, the recessed version wouldn't work. Also, of course I needed a version with a spot for the LED in the middle.
The surrounds are intended to fit exactly in the middle of the hemisphere. They probably need some sort of adhesive, but for my printer it was a really close fit.
Since normal humans could reuse these for xmas ornaments or something, I put them on Thingiverse, with more info... http://www.thingiverse.com/thing:726897 (including the openscad & sketchup files for them).
138 downloads
-
Free
NSD Shoudlers STL
By daviddz
This is just the Shoulder section of the Solid works NSD 1.0.0 by cjorgensenmd
I took the fiberglass NSD shoulder.SLDPRT file, and used Grab CAD to convert it to an STL file since I don't have Solidworks.
I then used Mesh Mixer to cut it in to quarters that would fit on my CR-10 Max printer.
NOTE: I have not tried printing this (Yet), though all files are water tight, and Should print OK.
309 downloads
(1 review)0 comments
Updated
-
Free
DalekStorm-Parts2.zip
By Djsloanau
Attached is the zip of all STL parts to date as well as a couple of the Lightwave 2015 object files for Djsloanau's 1/6 Scale 3D Printed Dalek Storm. It has been 3 years since I started the project and I don't know if or when I'll get back to it. If you can use this to complete a Storm I'd love to see your photos.
93 downloads
-
Free
Movie Dalek Domelight Beaker 3D Scan
By audrey2
This is a 3D scan I took off an original beaker from the 60s. The file was then cleaned up, and an interior shape was cut to reasonably match the original.
Can be used to 3D print or carve.
174 downloads
(2 reviews)0 comments
Updated
-
Free
NSD Hollow Eyestalk Disks
By trickster
These models are best used for making hollow eyestalk disks with translucent filament. You can also use opaque filament but you'll lose the effect. Here is how a solid eyestalk disk looks when printed at 10% fill with translucent filament:
Looks pretty cool as an actual iris but it doesn't let much light thru. So I decided to try making each disk as two separate pieces that fit together with a hollow center. Here's how that looks:
I also did a acetone vapor bath which made them look like this:
If you're doing an acetone vapor bath you must treat the pieces before assembling or acetone will condense in the hollow center and they will end up looking like this:
Here is a build diary entry describing how to do an acetone vapor bath. Here are two finished pairs viewed from each side:
Each piece is oriented with what will become the outer surface facing up. This keeps all the support structure noise on the interior. You need to use full support, btw. And make sure your build plate is evenly heated.
I've included two sets of files. One set has standard 22mm holes in the center. The other set is the one I used for my Dalek. I used a 5/8" center tube so they have 19.5mm holes. Each set has pairs of inner and outer disks for each of the three sizes. There's a ridge on the interior side of the inner disk which fits the lip on the outer disk. Dab of glue (test first!) and you're good to go!
Oh yeah, and I can't swear that they are exactly the same as the original parts. I looked at the part descriptions and thought they were most likely spherical caps. So I did some math and made them spherical caps based on the dimensions of the original parts. If anyone has a genuine article they can compare against I'd appreciate any feedback how close they are and any adjustments that would make them better.
Here's the complete package: NSDHollowEyestalkDisks.zip
476 downloads
(0 reviews)0 comments
Updated
-
Free
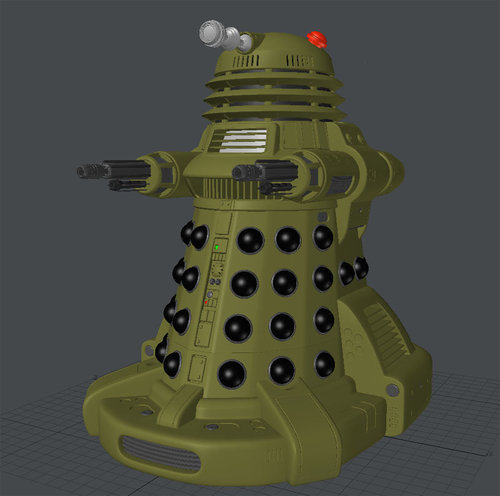
Full True Dalek Paradigm Kit
By erichdalek
To begin: that is a lot of files.
This is in 1/10 scale, so scale up as you want.
This was built on tinkercad.com, the file can be found here.
There is the main file, 'Full Dalek' if you want it in one color, and have support material.
The rest is all the individual parts, broken up so that they can be printed in their different colors, without support material or as groups of the same color.
There are two zipped folders, one "all parts"-- everything individually, and "Everything Sorted By Color" which is the groups of the same color in about a 20x10 cm box.
The last file is one that I am using as a hot glue mold to make the domelights.
If there are any questions or requests or whatever, feel free to contact me.
Disclaimer:
I am not amazing at modeling, nor is Tinkercad the best program ever for this kind of thing (as user KiwiMrDee stated, it is "designed for kids so detail and rendering options are limited") and so this is not exactly perfect (especially my angles in the full dalek, so print the pieces and assemble it yourself!) and I won't take offense at greater creators then me offering criticisms (hot glue mold, really?).
998 downloads
(0 reviews)0 comments
Submitted
-
Top Downloads
Week
-
Free
-

Free
-
Free
-

Free
-
Free
Month
-
Free
-
Free
-
Free
-
Free
-

Free
Year
-
Free
-
Free
-
Free
-
Free
-
Free
All Time
-
Free
-
Free
-
Free
-
Free
-
Free
-
-
Recent File Reviews
-

Michael56 4
I'm in my late 60's. I live in Australia and have always enjoyed Doctor Who from the very first episode aired here around 1965 when I was 9 years old. Thought how amazing it would be to have a Dalek but had no idea how or where to even begin UNTIL I came across this site. Thanks for giving me the opportunity to at least be able to start on a Dalek build and will detail my progress as it goes along.
-
Mark Sheriff 6
Excellent , looks great and very well designed , well thought out . thank you
-
Marc Harris 73
I'm in my 50s and have since I was a boy watching Dr Who in the 70s always dreamed of making a Dalek for fun, now I have the time and resources, along with your forum's help it's time to live that dream.
I have watched some of the members videos, and I am very impressed with what I have seen.
Long live the Who verse.
I will document my progress and share any innovations I make
-
Chris R 25
Great set of models that printed and fitted together really easily. Can't comment on accuracy as I'm no expert but very happy with the result
-

Dalek Hal 312
Great file, easy to print
-
doctorone 3
Great plan but the pivot does not print as it is not complete like the eye stalk
-


-
Download Statistics
-
Recent File Comments
-

-
By WhosWho · Posted
@RepeatedMemeDid you change something? I haven't touched anything. -
By RepeatedMeme · Posted
@WhosWho @dalekray It's only showing an update because the (written) details were edited. -

-
By life size · Posted
I printed mine in PTEG, 235 nozzle, 60 Bed , no supports and it printed with no mess at all. I ran it at a 40 percent print speed, and the orientation was large cup facing down on my print. -

By John · Posted
See this FAQ topic for more on Downloads availability: -
By ChristmasDalek · Posted
Welcome to the forum! Sorry you have encountered a problem... While waiting for someone who knows more about the downloads section than I do to answer, you may find the explanation in @Johns answer to this thread: Be well, Kathy -
By tardis112 · Posted
Why am I not permitted to download this? -

By Mark Casto · Posted
This is such a useful file for the eye it is perfect for adding a fish tank led inside and looks great thank you. -
By DarthCranium · Posted
ok @Bodule. i apologize if i caused any issue. -

By Bodule · Posted
Hi @DarthCranium Can I suggest that you ask your question in the 3D Printer Discussions section of the forum please? https://www.projectdalek.com/index.php?/forum/209-3d-printer-discussions/ That section itself may be worth a read through, as is @ChristmasDalek's post above yours 👆 here as it may provide additional useful information on how to use the forum. -
By DarthCranium · Posted
What is a good size of 3D printer youd recommend if i wanted to make a dalek of my own? please let me know when able. Thanks -
By Dalek-Nik · Posted
Moflash lenses appear to be slightly difficult these days. the best bet in my opinion is 3D printing them. there are many accurate models here that can be printed on any FDM printer you can find. there is a chance that you can find the lenses online to buy, but those sites can be slightly sketchy. depending on the filament you buy and the printer you have/find, they can be produced fairly accurately. filament can come as cheap as 17 dollars, but do keep in mind that they can some
-
-
Highest Rated Submitters
No ratings this week.
No ratings this month.
-
1
-
2

-
3
-
4
-
5

-
1
-
2

-
3
-
4

-
5
-
-
Current Donation Goals
-
Finance the Forum Hosting 2024Raised £113
-
-
Top Templates
-
Free
-

Free
-
Free
-

Free
-
Free
-