-
Registration
Please register an account to access the Forum topics and features.
An Active Membership subscription gives you access to extra features and exclusive content!
Choosing Active Membership is a great way of supporting the community and showing your appreciation for our resources.
Please note that you need to register BEFORE you can use Facebook, Twitter or Google as a sign in method.
Files For 3D Printing
Files that can be used to for 3D printing physical versions, using your own printer or a service such as Shapeways etc.
Note that files for CNC and laser cutting can be found in their own sub-section, inside.
247 files
-
Free
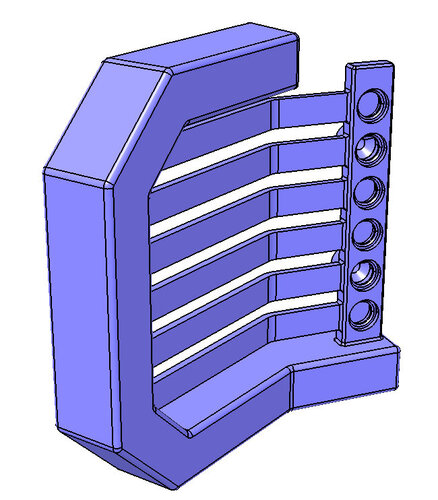
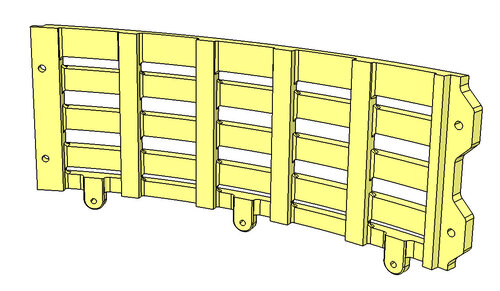
SKV-DVC-B106 DAVROS-BACKREST RIB LWR OTR RH.stl
By jaguwa68
Lower RH outer rib segment (see drawing SKV-DVA-B001 for assembly sequence)
1 download
(0 reviews)0 comments
Submitted
-
Free
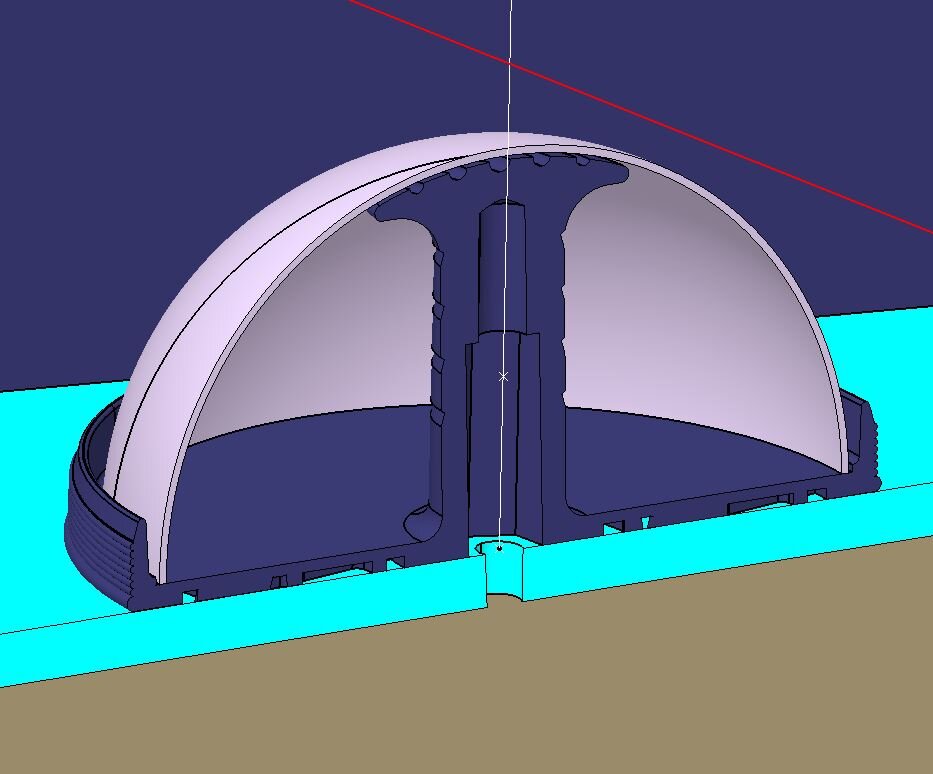
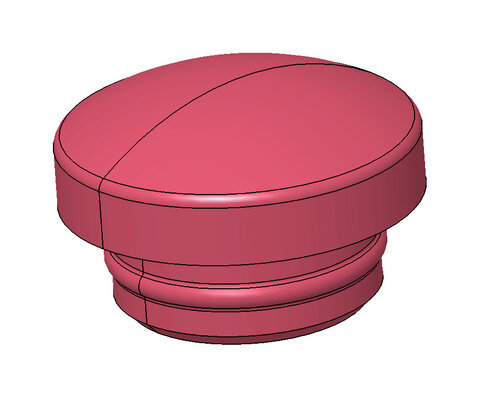
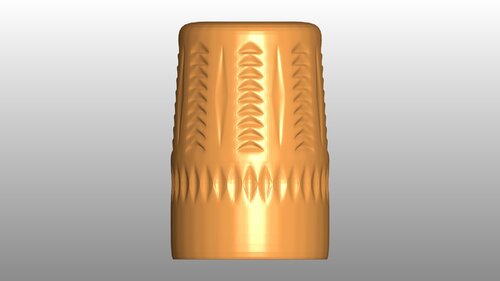
NSD Hemi and Base
By tim hards
To give something back to this group, I have designed this hemi to fit the Complete NSD Scale Model by @audrey2.
I hope it helps anyone making this scale model.
Note : it will need a quick sand around the plug on the bottom to fit nicely into the skirt.
6 downloads
(0 reviews)0 comments
Submitted
-
Free
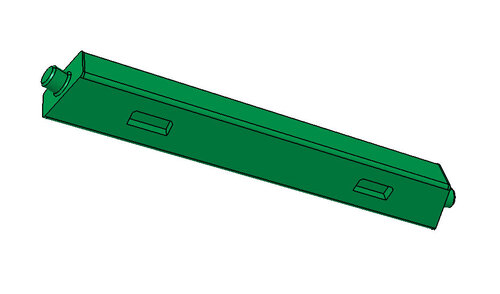
SKV-DVC-B115 DAVROS-BOLSTER LH.stl
By jaguwa68
The left-hand headrest bolster (item 2 in drawing headrest assembly drawing SKV-DVA-B004). Best printed vertically to ensure clean visible surfaces.
1 download
(0 reviews)0 comments
Submitted
-
Free
SKV-DVC-B116 DAVROS-BOLSTER RH.stl
By jaguwa68
The right-hand headrest bolster (item 1 in drawing headrest assembly drawing SKV-DVA-B004). Best printed vertically to ensure clean visible surfaces.
1 download
(0 reviews)0 comments
Submitted
-
Free
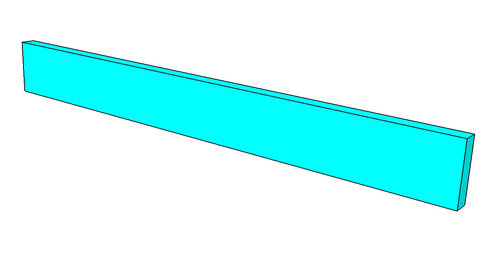
SKV-DVC-B117 DAVROS-HEADREST TOP BAR.stl
By jaguwa68
The headrest top joining bar (item 3 in drawing headrest assembly drawing SKV-DVA-B004). Best printed horizontally to ensure clean visible surfaces.
1 download
(0 reviews)0 comments
Submitted
-
Free
SKV-DVC-B118 DAVROS-HEADREST STRUT.stl
By jaguwa68
The joining struts (item 4 in drawing headrest assembly drawing SKV-DVA-B004). 6 off required.
2 downloads
(0 reviews)0 comments
Submitted
-
Free
SKV-DVC-B119 DAVROS-HEADREST BUTTON COVER.stl
By jaguwa68
The button covers (item 5 in drawing headrest assembly drawing SKV-DVA-B004). 12 off required. 4 used to cover the screw heads.
1 download
(0 reviews)0 comments
Submitted
-
Free
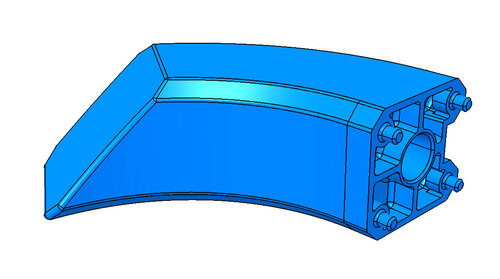
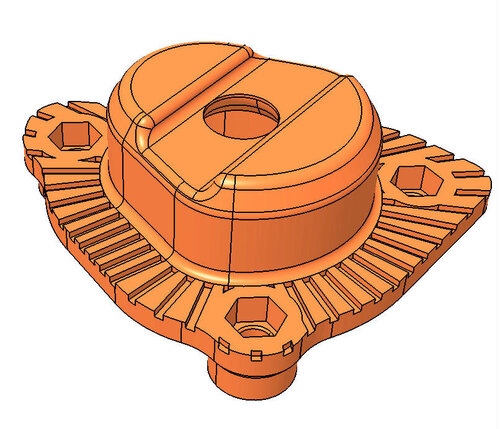
SKV-DKC-SK138 Dalek-Receptacle, Quarter turn, Frt LH.stl
By jaguwa68
Design intended for quick release fixing of the fender to the skirt. To be used in conjunction with Pitking 44mm base 11mm grip quarter turn fasteners and spring retainers fitted to SKV-DKC-SK135 within the skirt lower panel. Please see SKV-DKA-F001 in link below for assembly details.
2 downloads
(0 reviews)0 comments
Submitted
-
Free
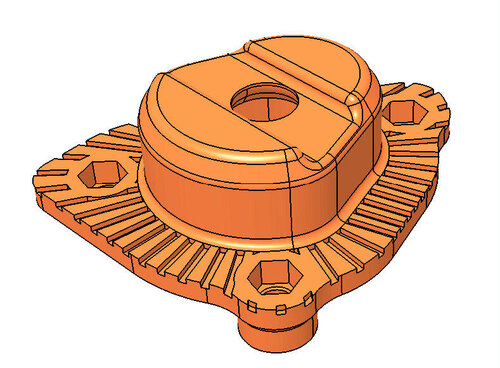
SKV-DKC-SK139 Dalek-Receptacle, Quarter turn, Frt RH.stl
By jaguwa68
Design intended for quick release fixing of the fender to the skirt. To be used in conjunction with Pitking 44mm base 11mm grip quarter turn fasteners and spring retainers fitted to SKV-DKC-SK136 within the skirt lower panel. Please see SKV-DKA-F001 in link below for assembly details.
2 downloads
(0 reviews)0 comments
Submitted
-
Free
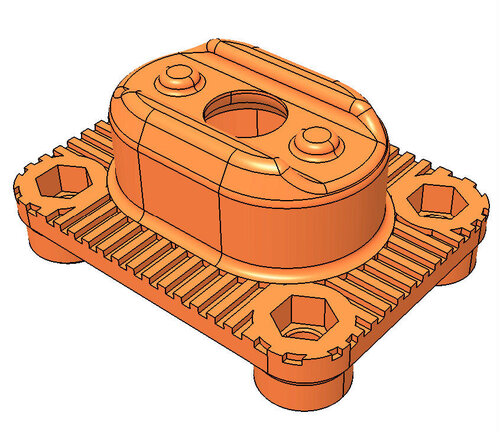
SKV-DKC-SK140 Dalek-Receptacle, Quarter turn, RR.stl
By jaguwa68
Design intended for quick release fixing of the fender to the skirt. To be used in conjunction with Pitking 44mm base 11mm grip quarter turn fasteners and spring retainers fitted to SKV-DKC-SK137 within the skirt lower panel. Please see SKV-DKA-F001 in link below for assembly details. 2 off required.
2 downloads
(0 reviews)0 comments
Submitted
-
Free
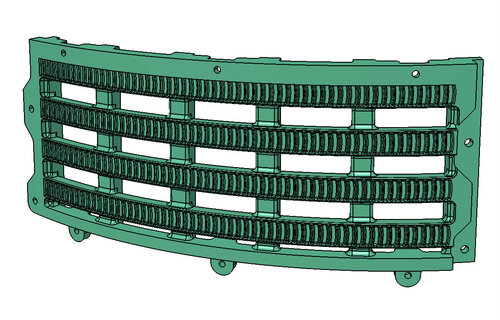
NSD Heronrib Neck Mesh Segment-Upper
By jaguwa68
Upper neck mesh segment (to be used in conjunction with SKV-DKC-N105 Mesh Lower and SKV-DKC-N106 Mesh Mid). Print time approx 10-12 hours. x8 required to complete each ring.
16 downloads
-
Free
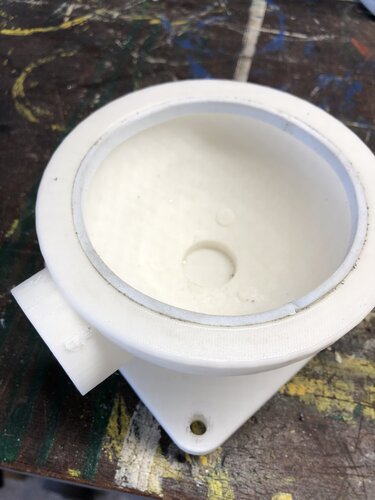
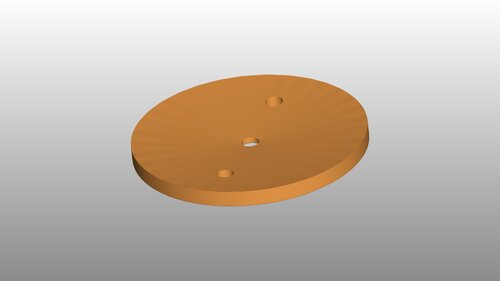
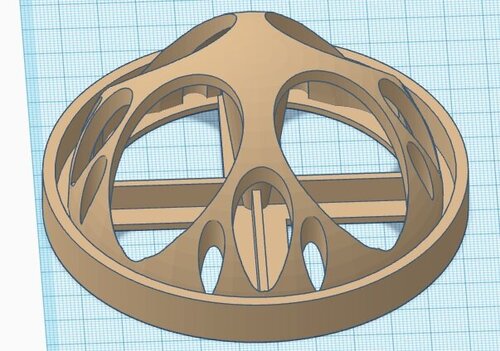
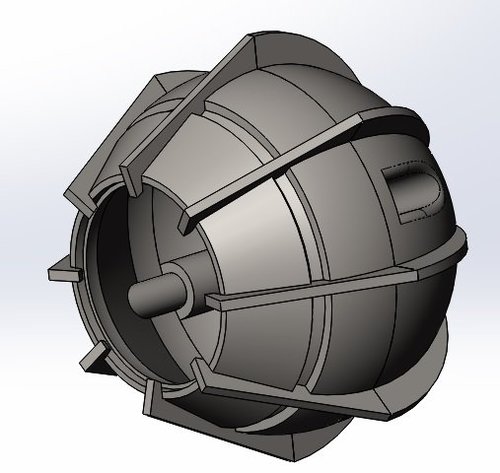
Vacuum chuck
By Simchet
Vacuum chuck for holding 100mm stainless steel spheres for drilling 25mm diameter holes to make weapon ball joints. Note - chuck is specific for bed on Bosch PBD40 pillar drill. There’s a boss in the bottom that locates in the 20mm diameter hole in the centre of the bed. This ensures the apex of the sphere is under the centre of the drill bit. The bolt holes also align with the T nut slots on the Bosh drill. That’s the only thing that makes it drill specific.
You need to add a strip of compliant material (rubber/draught excluder strip etc) to top inner surface of chuck to provide an air tight seal. Plug in a vacuum cleaner into the side port and it pulls the sphere into the chuck holding it securely. A strip of tape round the equator of the sphere helps increase friction to resist torque from the hole saw. Chuck must be fixed securely to base of pillar drill.
Chuck is specific for 25mm diameter hole saws as to drill the second hole you insert a short length of 25mm tube in the first hole that locates in a counter bore (25mm diameter) in the bottom of the Chuck. This ensures the two holes are aligned. You need to seal the bottom as the vacuum will be lost when the hole saw breaks through on the 2nd hole. Ring of hot melt glue between the stub of tube and the sphere works. Another ring of draught excluder seal in the bottom of the chuck would also work. If you do this keep the diameter of it as small as possible as you’re reducing the area that air pressure has to work on.
If you don’t understand all of above and how vacuum chucks work, you shouldn’t be using the chuck. Take usual precautions when operating powered tools, I.e guards and PPE. Also note that stainless steel spheres are work hardened, use a hole saw with high speed steel teeth and run at a low speed and low feed rate. If work piece starts rotating, vibrating or spinning, stop immediately.
STL file and original CAD geometry files. CAD is in RS Design Spark Mechanical format (free). I suspect if you change the extension to .sdoc it will open in Ansys Spaceclaim as it’s basically the same software. Sorry, can’t export in parasolid/STEP with the free version of DesignSpark Mechanical.
4 downloads
(1 review)0 comments
Submitted
-
Free
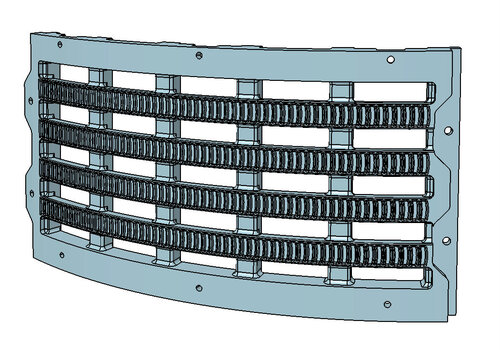
NSD Heronrib Neck Mesh Segment-Mid
By jaguwa68
Mid neck mesh segment (to be used in conjunction with SKV-DKC-N105 Mesh Lower and SKV-DKC-N107 Mesh upper). Print time approx 10-12 hours. x8 required to complete each ring.
14 downloads
(0 reviews)0 comments
Submitted
-
Free
NSD Heronrib Neck Mesh Segment-Lower
By jaguwa68
Lower neck mesh segment (to be used in conjunction with SKV-DKC-N106 Mesh Mid and SKV-DKC-N107 Mesh upper). Print time approx 10-12 hours. x8 required to complete each ring.
21 downloads
(0 reviews)0 comments
Submitted
-
Free
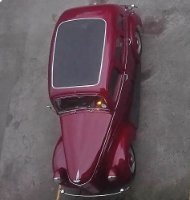
Movie_Dalek_Light_Lens.stl
By AlanB01
Movie_Dalek_Light_Lens.stl. Just been modeling the 60's movie dalek from the plans on here, great plans guys, so I thought I'd model the lights first so here is my take on the light lens, use as you will just give me a mention. Enjoy.
8 downloads
(0 reviews)0 comments
Submitted
-
Free
Movie_Dalek_Light_Lens_Base.stl
By AlanB01
Movie_Dalek_Light_Lens_Base.stl. This is the base for the light lens it's been dished to fit the Dome
4 downloads
(0 reviews)0 comments
Submitted
-
Free
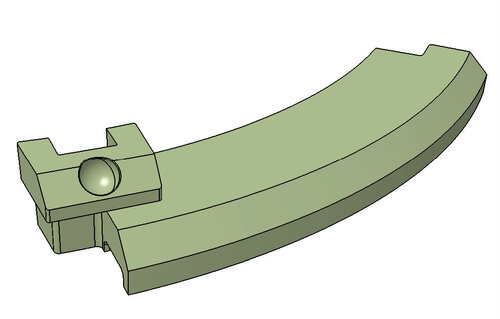
NSD Upper Neck Ring Segment (For 200mm bed)
By jaguwa68
Upper neck ring segment that incorporate the strut knuckle. x8 required to complete the ring. I glued each segment together one after the other using superglue and clamps, then filled on both the underside and the joints using U-pol Fantastic two part body filler.
27 downloads
(0 reviews)0 comments
Submitted
-
Free
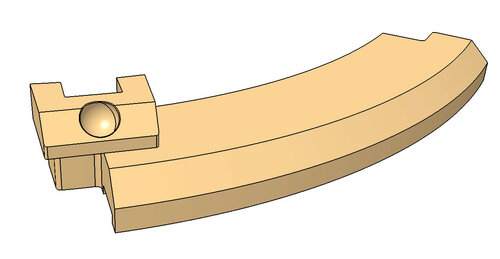
NSD Mid Neck Ring Segment (For 200mm bed)
By jaguwa68
Mid neck ring segment that incorporates the strut knuckle. x8 required to complete the ring. I glued each segment together one after the other using superglue and clamps, then filled on both the underside and the joints using U-pol Fantastic two part body filler.
20 downloads
(0 reviews)0 comments
Submitted
-
Free
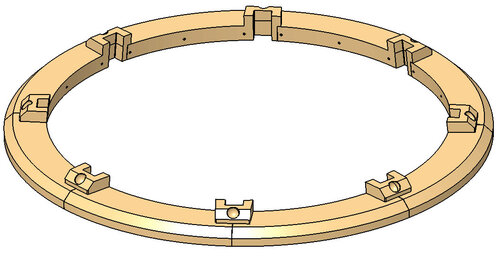
NSD Lower Neck Ring Segments (For 200mm bed)
By jaguwa68
Lower ring segments that incorporate the strut knuckle. x4 of N101 and x4 N102 required to complete the ring. The N102 includes a feature to fix in an M6 x 50 nut and bolt to locate the neck assembly to the shoulders at a later date. I glued each segment together one after the other using superglue and clamps, then filled on both the underside and the joints using U-pol Fantastic two part body filler. An alternative to wooden routed rings if, like me, your router (and routing skills!) are a bit dodgy.
42 downloads
(0 reviews)0 comments
Submitted
-
Free
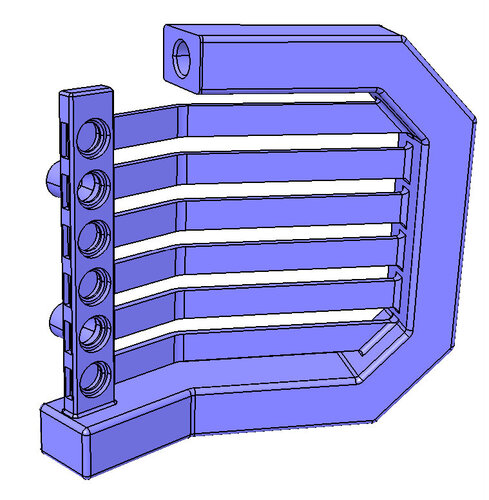
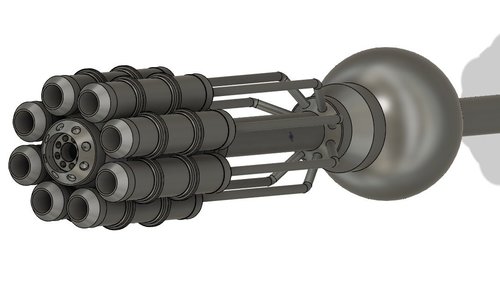
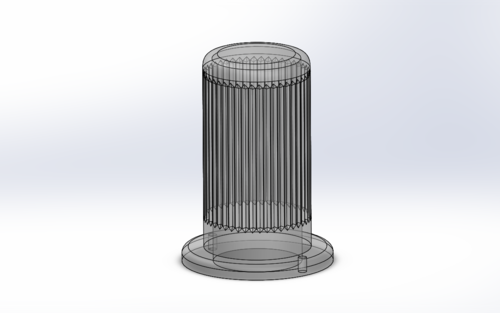
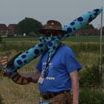
"Eve of the Daleks" Gatling Gun for NSD. Full Size, Rotating
By threegringos
This is the NSD "Gatling Gun" weapon as seen on the trailers for the 2022 New Year's episode "Eve of the Daleks".
This 3D model was made before the episode aired, so the scren shots were very limited. It looks accurate to my eye, however more details may become apparent once we get to see the entire episode.
I used Fusion360 to create this model. It's split into multiple parts for ease of printing.
You will need to provide a 25.4mm (1 inch) diameter pipe for the arm, and also mount a suitable 102mm (4 inch) ball-joint. I always use magic 8-ball toys for my ball joint.
The eight small pipes coming out of the rear of the gun part are 6mm diameter. You can either print them from my files, or optionally use stainless steel drinking straws, cut to length.
I did include an internal gear in the main body of the gun, and an additional pinion gear in case somebody wants to motorize the rotation of the weapon. I haven't had time to figure that out yet.
127 downloads
-
Free
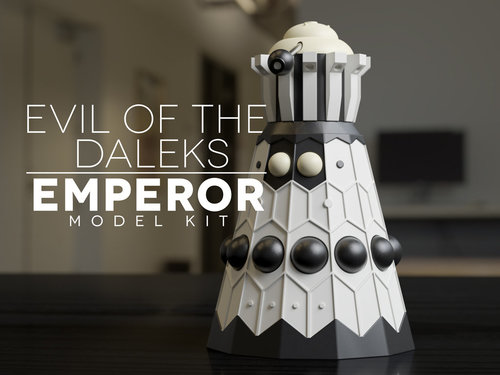
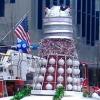
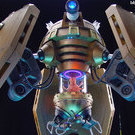
Evil of the Daleks - Emperor Dalek 5 Inch Model Kit
By audrey2
This is a model kit of the Emperor of the Daleks from Evil of the Daleks.
It should print in scale with the Character Options dalek figures. It should print with no supports required if you have a well-tuned printer printing at a high enough resolution.
Print 12 of the hemi_large, and 2 of the hemi_small, and you'll have everything needed for a Dalek civil war.
175 downloads
-
Free
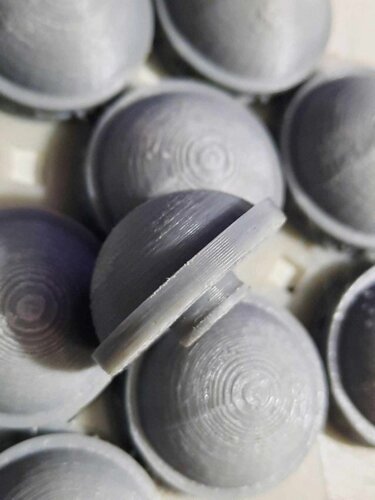
NSD Hemisphere mounting
By Prefect1938
Hello,
Hope you are all doing well. Please find attached my mounting for the hemispheres, like others I went for the 100mm bobbles which are nice but not very robust. To overcome this a bit and also help mount them I designed this mounting which incorporates a backing for the bobble so that it can be glued to it and therefor strengthening it considerably. It's so strong in fact that I can stand on it with my full Dad weight without it crushing, and yet it only weighs 41g! I have incorporated a hole though it so that a 5mm bolt or threaded rod can be simply screwed in to mount it to the skirt. It requires no supports, no brim and only 5% infill. I can print 4 at a time in 24hrs, increasing the printer speed to 120%. If you print it in black there is no further finishing required other than to fit your painted half bobble. I suggest printing one as a test to check it is a good match for your bobbles and if not a slight % change should be enough. A good test is to put a little blue-tack on the frame and to check that it is well squished when fitting the bobble. Please note the following Cura Standard setting over rides -
Wall line count - 2
Top layers - 4
Bottom layers - 8
Infill density - 5%
Infill pattern - Triangles
Support - None
Build adhesion - None
Any questions or comments very welcome.
Thanks, Scott.
11 downloads
(1 review)0 comments
Updated
-
Free
Eye design
By MechDesign
This is a design I did for Nigel and his new dalek that will be named Avo.
130 downloads
-
Free
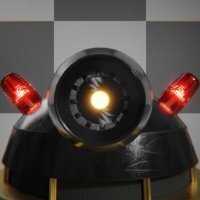
Moflash Lens STL (NSD dome lights)
By ddoherty958
This is my Moflash lens for the NSD dome lights. It's just the lens, no cage. It's as accurate as I can make it, of course feedback is welcome.
If you want to try printing it in clear filament here's the file! I found it extremely hard, having problems with bed adhesion in particular.
175 downloads
-
Free
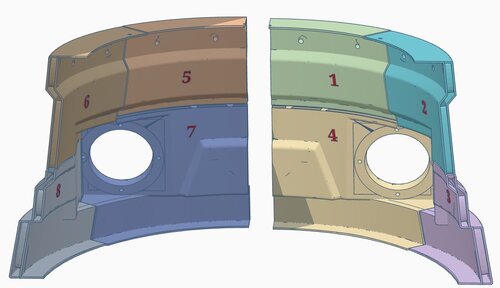
NSD double walled shoulders in 16 easy parts for 300 x 300 x 400 printers
By Prefect1938
Hello,
Please find the STL files for my 2005 Dalek’s shoulders. I took the original model shell from daviddz and put it into Tinkercad. There I added a further double skin with connecting internal blocks so that it would be rigid without any need to skin inside with GRP or further reinforcement etc. Once assembled the structure is very strong with no flex at all and is still quite light. This is great way to avoid building the complex curves in wood and will last a very long time. As the original sections were very large, I also split them up so that they would easily fit on my CR10’s 300 x 300 x 400mm bed. Some further simple cuts on some of the taller sections would get them to fit on smaller machines such as an Ender.
All the 16 sections have been pre-orientated for printing and only two sections need any form of support, which saves a huge amount of material and build time. The two parts that do need support, only need a small amount of tree support on one side which just snaps off with no difficulty. Even if this is your first print you will find this a very easy project, although you will need to be patient as it’s a lot of printing. If you are confident in your printer, then some parts can be grouped on the same build plate, but it doesn't really save a huge amount of time to do so and risks losing two parts if something goes wrong. You will need about 8kgs of filament, and it is best buying this in 5kg spools which I hang of the wall. I just google for the cheapest stuff I can find.
I have printed all the parts which have come out perfectly. To join the sections together I welded them with a 30 watt soldering iron rather than glue as it is much stronger. I have carefully split the sections so that joints would be easy to sand, I never bothered sanding the inside as it just looks like metal welding. For bed adhesion I have only been using thinned down white glue, about 5- 10% with water, this works great and have never had a failure. When working through so many parts I would recommend, just going from 1 – 16 printing one at a time. I have numbered the inside surface of the sections to avoid mix ups and added some matching assembly screenshots. I added two wooden rings to the inside of the top and bottom lips which were added before the front and back sections were welded together. I used Tiger seal adhesive between the plastic and wood which is extremely strong. Although the printing of these is really easy, it is a large undertaking so I would suggest you thoroughly study the files and confirm they will all fit on your machine, parts 14 & 12 being the tallest.
Enjoy!
I used the standard setting on Cura with the following overrides –
All parts except 4 & 7
Wall count = 4
Infill = 20%
Support type = none
Adhesion type = Brim
Brim with = 20mm
Parts 4 & 7
Wall count = 4
Infill = 20%
Support type = none
Adhesion type = Brim
Brim with = 20mm
Support type = tree
Support = touching build plate
Support angle = 70degs
I've tried to be as careful as possible but if I have goofed up somewhere let me know asap!
351 downloads
(1 review)0 comments
Updated
-
Top Downloads
Week
-

Free
-
Free
-
Free
-
Free
-

Free
Month
-
Free
-
Free
-
Free
-
Free
-
Free
Year
-
Free
-
Free
-
Free
-

Free
-
Free
All Time
-
Free
-
Free
-
Free
-

Free
-
Free
-
-
Recent File Reviews
-

Michael56 2
I'm in my late 60's. I live in Australia and have always enjoyed Doctor Who from the very first episode aired here around 1965 when I was 9 years old. Thought how amazing it would be to have a Dalek but had no idea how or where to even begin UNTIL I came across this site. Thanks for giving me the opportunity to at least be able to start on a Dalek build and will detail my progress as it goes along.
-
Mark Sheriff 6
Excellent , looks great and very well designed , well thought out . thank you
-
Marc Harris 54
I'm in my 50s and have since I was a boy watching Dr Who in the 70s always dreamed of making a Dalek for fun, now I have the time and resources, along with your forum's help it's time to live that dream.
I have watched some of the members videos, and I am very impressed with what I have seen.
Long live the Who verse.
I will document my progress and share any innovations I make
-
Chris R 25
Great set of models that printed and fitted together really easily. Can't comment on accuracy as I'm no expert but very happy with the result
-

Dalek Hal 312
Great file, easy to print
-
doctorone 3
Great plan but the pivot does not print as it is not complete like the eye stalk
-


-
Download Statistics
-
Recent File Comments
-

-
By WhosWho · Posted
@RepeatedMemeDid you change something? I haven't touched anything. -
By RepeatedMeme · Posted
@WhosWho @dalekray It's only showing an update because the (written) details were edited. -

-
By life size · Posted
I printed mine in PTEG, 235 nozzle, 60 Bed , no supports and it printed with no mess at all. I ran it at a 40 percent print speed, and the orientation was large cup facing down on my print. -

By John · Posted
See this FAQ topic for more on Downloads availability: -
By ChristmasDalek · Posted
Welcome to the forum! Sorry you have encountered a problem... While waiting for someone who knows more about the downloads section than I do to answer, you may find the explanation in @Johns answer to this thread: Be well, Kathy -
By tardis112 · Posted
Why am I not permitted to download this? -

By Mark Casto · Posted
This is such a useful file for the eye it is perfect for adding a fish tank led inside and looks great thank you. -
By DarthCranium · Posted
ok @Bodule. i apologize if i caused any issue. -
By Bodule · Posted
Hi @DarthCranium Can I suggest that you ask your question in the 3D Printer Discussions section of the forum please? https://www.projectdalek.com/index.php?/forum/209-3d-printer-discussions/ That section itself may be worth a read through, as is @ChristmasDalek's post above yours 👆 here as it may provide additional useful information on how to use the forum. -
By DarthCranium · Posted
What is a good size of 3D printer youd recommend if i wanted to make a dalek of my own? please let me know when able. Thanks -
By Dalek-Nik · Posted
Moflash lenses appear to be slightly difficult these days. the best bet in my opinion is 3D printing them. there are many accurate models here that can be printed on any FDM printer you can find. there is a chance that you can find the lenses online to buy, but those sites can be slightly sketchy. depending on the filament you buy and the printer you have/find, they can be produced fairly accurately. filament can come as cheap as 17 dollars, but do keep in mind that they can some -
By Chris R · Posted
Thanks for uploading these files. Printed really nicely with the odds and sods of filament I had around and very pleased with it, haven't done any tidying up or painting but it looks great as-is.
-
-
Highest Rated Submitters
No ratings this week.
No ratings this month.
-
1
-
2

-
3

-
4
-
5

-
1
-
2

-
3
-
4

-
5
-
-
Current Donation Goals
-
Finance the Forum Hosting 2024Raised £113
-
-
Top Templates
-
Free
-
Free
-
Free
-

Free
-
Free
-